
Desserts
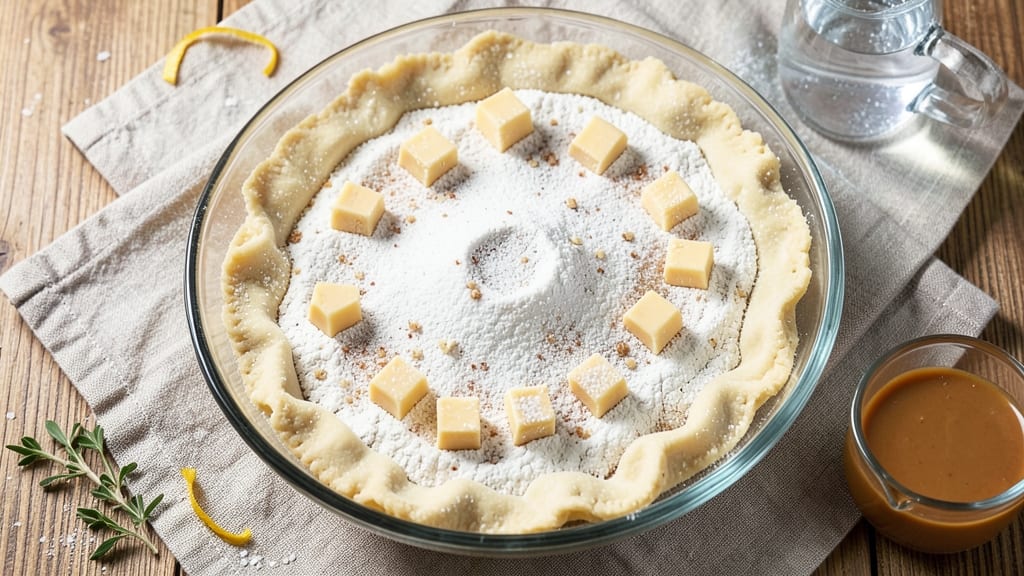
This all-purpose pie crust recipe delivers foolproof flaky layers that work for everything from fruit pies to savory quiches. The secret lies in cold butter and minimal handling—no rolling required if you use the right technique.
I developed this version after years of testing, and it never fails to impress, even with beginners.
What makes this crust truly versatile is its 15-minute prep time and adaptability to both sweet and savory fillings. The dough comes together with just five ingredients, and the high-fat content ensures that signature shatteringly crisp, melt-in-your-mouth texture.
The key is keeping everything cold, which prevents the butter from melting prematurely and guarantees those perfect layers.
Once baked, this crust holds its shape perfectly, whether you're blind-baking for a custard tart or using it as the base for a classic apple pie. The flaky, golden-brown edges create an irresistible contrast to any filling, making it the ultimate foundation for dessert creations.
Store the dough for up to 48 hours or freeze it for future baking.
Ready to master the art of pie crust? This recipe transforms a basic dough into a restaurant-quality base with minimal effort. The instructions walk you through every step, from mixing to baking, so you'll achieve professional results every time.
Ingredients for all purpose pie crust
Five ingredients, zero rolling—just cold butter and patience for restaurant-quality flaky layers.
| Ingredient | Amount | Notes |
|---|---|---|
| All-Purpose Flour 🌾 | 2 ½ cups | Sifted, for perfect texture |
| Unsalted Butter 🧈 | 1 cup | Cold, cubed, high-fat preferred |
| Ice Water 💧 | ⅓ cup | Chilled, for precise binding |
| Diamond Crystal Kosher Salt 🧂 | ½ tsp | Fine grain for even distribution |
| Granulated Sugar 🍚 | 1 tbsp | Balances richness in crust |
The butter makes or breaks this crust—European-style (82% fat) from Plugrá is ideal, but any high-fat butter works. Grab it from the coldest section of your fridge and cut it into 1/2-inch cubes (no melting!). Flour matters too: King Arthur or Gold Medal brands have consistent protein levels for reliable results. The ice water is non-negotiable—room temp water will steam the butter and ruin those flaky layers. Pro move: freeze your mixing bowl and dough scraper for 10 minutes before starting.
No high-fat butter? European-style butter from Trader Joe's is a solid backup. Short on ice water? Freeze 1/4 cup water in ice cube trays for instant cubes. The sugar can be swapped for powdered sugar at half the amount if you prefer a slightly sweeter crust. For a savory version, reduce sugar to 1 tsp and add 1 tsp dried thyme. The salt? Diamond Crystal is less salty than Morton, so use it if you're sensitive to sodium—just don't switch halfway through.
This dough keeps for 48 hours wrapped in plastic in the fridge, or 3 months frozen between parchment paper. For best results, let it sit at room temp for 15 minutes before rolling (if you're using the traditional method). Blind-baked crusts? Poke holes with a fork and weigh down with pie weights or dried beans. The secret to reheating: 5 minutes at 375°F with a pie shield to crisp edges without burning.
Why You'll Love This Recipe
- Foolproof First Try: I’ve made pie crusts fail spectacularly—this one never does. The cold butter cuts into the flour like butter (literally), and the ice water keeps things from getting gummy. No food processor? No problem. A fork and your hands work just fine.
- Butter-Sugar Secret: That tiny pinch of sugar? It’s not just for sweet pies. It caramelizes slightly when baked, giving savory crusts (like quiche or pot pie) a subtle depth that makes them taste finished. Honestly, I add a little extra to my chicken pot pie crust now—game changer.
- Pie, Pot, Hand Pies: Need a quick lunch? Roll it out, cut into squares, and fill with leftover roasted veggies. Hosting a dinner party? Double the batch and use one for dessert, one for savory galettes. Between us, I’ve even used scraps to make mini tart shells for appetizers.
- Pantry Staples Only: Five ingredients, zero specialty items. The butter stays cold thanks to the ice water trick (I keep a bowl of ice cubes on standby), and the kosher salt? It dissolves evenly, so every bite has that perfect balance. My grocery bill stays sane, and my freezer’s always stocked with crusts ready to go.
Step-by-step instructions for flaky pie crust
Here's the method that guarantees perfect flakiness every time—no shortcuts, just science-backed technique.
Cut in the Cold Butter
Place the 2.5 cups all-purpose flour in a large mixing bowl and add the 0.5 tsp Diamond Crystal kosher salt and 1 tbsp granulated sugar. Whisk together briefly to distribute evenly. Cut the 1 cup unsalted butter into ¼-inch cubes and chill them for 10 minutes in the freezer—this prevents melting during handling.
Using a pastry cutter or two forks, work the cold butter cubes into the flour mixture until the pieces are roughly the size of small peas. Press down firmly with your fingers—you should feel resistance, not a smooth dough. The goal is to create a mixture where butter pieces remain distinct, which will create those signature flaky layers when baked. If the mixture starts to look like wet sand, add 1-2 ice cubes from your 0.33 cup ice water reserve.
Gradually Add Ice Water
Sprinkle the 0.33 cup ice water over the flour-butter mixture, 1 tablespoon at a time, gently tossing with a fork after each addition. The dough should begin to come together but still feel slightly crumbly—this is crucial. Overworking the dough develops gluten, which destroys flakiness. Stop adding water when the mixture forms a loose ball that holds together when pressed.
Here's the thing—pie crust dough should look shaggy, not smooth. If it feels too dry, add 1 more tablespoon ice water. If it's too wet, sprinkle in 1 tablespoon flour. The dough should gather when pressed but still show some dry spots. This texture ensures proper layering during baking.
Form and Chill the Dough
Turn the dough out onto a lightly floured surface and gently shape it into a 1-inch thick disc. Wrap it tightly in plastic wrap and refrigerate for at least 1 hour (or up to 2 days). This resting period is non-negotiable—it allows the gluten to relax and the fat to firm up, preventing shrinking and ensuring maximum flakiness.
Don't skip this step, even if you're eager to bake. I've learned the hard way that rushed dough shrinks dramatically in the oven. The cold also helps prevent the butter from melting too quickly during baking, which is what creates those beautiful, crisp layers. For best results, let the dough chill overnight—it develops even better texture.
Roll Out and Transfer to Pan
On a lightly floured surface, roll the chilled dough into a 12-inch circle, about ⅛-inch thick. The key here is to keep the dough cold—if it starts to soften, return it to the fridge for 10 minutes. Roll from the center outward, rotating the dough as you go to maintain even thickness. If the edges get too thin, fold them under occasionally.
Carefully transfer the rolled dough to your 9-inch pie pan (or whatever size you're using). Gently press it into the bottom and up the sides, letting the dough overhang the edge by about ½ inch. Trim the excess with a sharp knife, leaving about ½ inch overhang. Fold the overhang under itself to create a neat edge. The crust should be taut but not stretched—this prevents shrinking during baking.
Blind Bake for Perfect Texture
Preheat your oven to 375°F. Line the crust with parchment paper and fill it completely with dried beans, pie weights, or rice—this prevents the bottom from puffing up. Bake for 15 minutes, then remove the weights and bake for another 10-15 minutes until the edges are golden brown and the crust is firm to the touch.
Here's where attention to detail pays off: The crust should be fully baked but not dark brown—this indicates burning, not proper browning. For extra crispiness, brush the baked crust with a thin layer of egg wash (1 egg yolk + 1 tablespoon water) before adding your filling. This creates a beautiful golden finish and adds a subtle sheen to the final pie.
Pro Tips For Making All Purpose Pie Crust
- CHILL THE BUTTER FIRST: Take that cold butter straight from the fridge—no thawing, no room-temperature nonsense. Cold butter creates flaky layers, and if you skip this, you’ll end up with a tough, dense mess. I learned this the hard way when I rushed and got a crust that tasted like a cracker.
- WEIGH YOUR FLOUR: Scooping flour from the bag is a recipe for disaster—you’ll either pack it too tight or get clumps. Use a kitchen scale for precision, or at least spoon it into a measuring cup and level it off. A crust with the right ratio of flour to butter is the difference between flaky and frustrating.
- WORK FAST WITH ICE WATER: Add ice water one tablespoon at a time, mixing just until the dough holds together. If you dump it all in at once, you’ll overwork the gluten and end up with a chewy, bread-like crust. Keep a bowl of ice water nearby so you can add it quickly—this isn’t a marathon.
- SALT THE DOUGH, NOT THE FILLING: Skip adding salt to the filling if your crust already has it—this recipe calls for kosher salt in the dough, and double-salting makes everything taste flat. Taste the dough before rolling; if it’s bland, add a pinch more salt, but resist the urge to overdo it. Balance is everything.
Flavor customization for this dish
Sweet vs. Savory
This crust shines in both sweet and savory applications. For fruit pies like apple or peach, keep the 1 tbsp granulated sugar to enhance caramelization.
For savory dishes (think quiche or pot pie), reduce sugar to 1 tsp and add 1 tsp dried thyme or ½ tsp smoked paprika—the earthy notes complement rich fillings beautifully. 🍐
Herb Infusions
Add fresh herbs directly to the dough for vibrant flavor. I love 2 tbsp finely chopped rosemary for a savory twist or 1 tbsp lemon zest for a citrusy crust.
For a Mediterranean touch, mix in 1 tsp dried oregano with the flour before cutting in the butter. The herbs distribute evenly during rolling, ensuring every bite carries their essence.
Spiced Variations
Warm spices elevate this crust for fall and winter baking. Add ½ tsp cinnamon and ¼ tsp nutmeg for pumpkin pie, or ½ tsp cardamom for a Middle Eastern-inspired twist.
For a smoky profile, swap ½ tsp of the sugar for ½ tsp chipotle powder—the heat balances perfectly with sweet fillings. Always toast spices lightly before adding to deepen their flavor.
Nutty Enhancements
For texture and depth, fold ¼ cup chopped walnuts or pecans into the dough before rolling. The nuts add crunch that contrasts beautifully with creamy fillings. Toast the nuts first for enhanced flavor—just 3-4 minutes in a dry pan—then cool before mixing.
This works especially well with pecan pie or spiced fruit compotes where nutty undertones complement the sweetness.
Cheesy Twist
Transform this crust into a cheesy base by replacing ¼ cup flour with ¼ cup grated sharp cheddar or Gruyère. The cheese melts during baking, creating a rich, golden crust that pairs perfectly with spinach quiche or savory fruit fillings.
For extra decadence, add ½ tsp mustard powder** to the flour mixture—it cuts through the richness and adds complexity. 🧀
Nutrition facts
Frequently asked questions
Can I use this crust for both sweet and savory pies?
This versatile crust works perfectly for both fruit pies and savory dishes. For sweet applications like apple or berry pies, keep the full 1 tbsp sugar to enhance caramelization. For savory pies (quiche, pot pie), reduce sugar to 1 tsp and add 1 tsp dried thyme or ½ tsp smoked paprika for depth. The same dough handles both beautifully!
Why does my crust turn out tough instead of flaky? The most common causes are overworking the dough or using warm butter. Keep everything cold—even your mixing bowl—and handle the dough minimally. The butter should remain in pea-sized pieces, not fully incorporated. Also,
How do I prevent the crust from shrinking in the oven?
Shrinking happens when the dough isn't properly chilled before baking. Always refrigerate the dough for at least 1 hour (overnight is even better). When transferring to the pan, leave a ½-inch overhang and fold it under to create a neat edge. This technique helps maintain the shape during baking. Also, avoid rolling the dough too thin—⅛-inch thickness is ideal.
What's the best way to store leftover dough?
Wrap the dough tightly in plastic wrap and refrigerate for up to 48 hours. For longer storage, freeze the dough disc (still wrapped) between parchment paper for up to 3 months. When ready to use, thaw in the fridge overnight. Never thaw at room temperature—this causes the butter to melt and ruins the flaky texture. Let it sit at room temp for 15 minutes before rolling.
Can I make this crust without a food processor?
Yes! While a food processor makes cutting in the butter easier, you can do it perfectly by hand. Use two forks or your fingers to work the cold butter cubes into the flour until they're pea-sized. The key is to keep everything cold—press down firmly with your fingers to feel resistance, not a smooth dough. This manual method actually gives you more control over the butter distribution for that perfect flaky texture.