
Main Courses
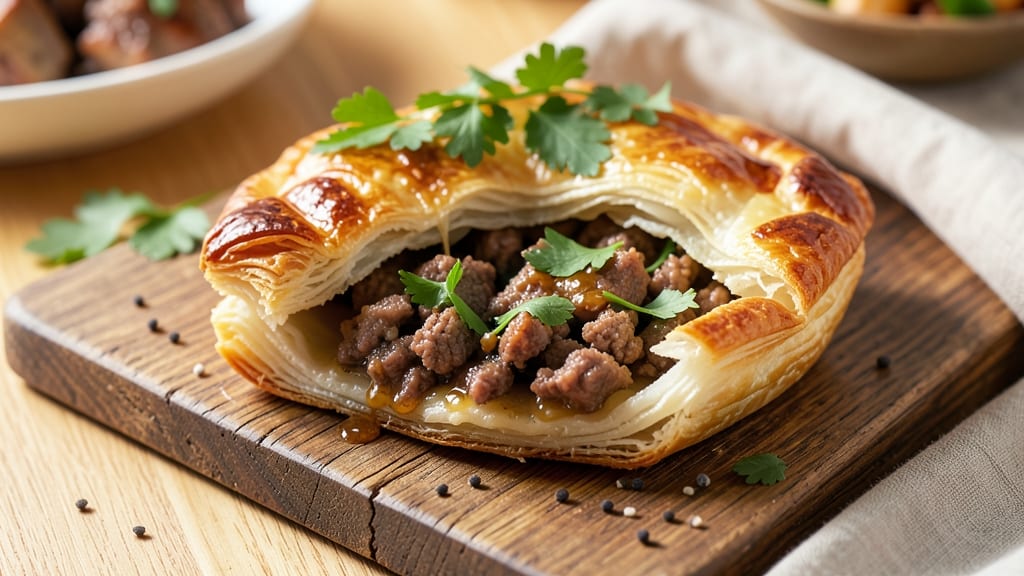
This pork hand pie recipe brings Appalachian comfort to your table with golden, flaky crusts hugging savory pork filling—just like my grandmother used to make. 💛 The secret lies in a simple yet sturdy dough that bakes up crisp enough to hold its shape while staying tender enough to melt in your mouth.
I’ve perfected this recipe over years of testing, balancing the rich, herby pork filling with a crust that’s light yet sturdy enough to handle the filling’s weight.
The filling is where the magic happens: ground pork seasoned with sage, thyme, and a touch of black pepper, bound just enough to hold together without being dry.
The dough, made with lard for that signature flakiness, gets rolled thin and cut into perfect circles before being folded over the filling. This isn’t your average pie—it’s a handheld masterpiece that delivers restaurant-quality flavor in every bite, with a crisp, golden crust that’s impossible to resist.
What makes these hand pies truly special is their versatility. Serve them warm from the oven as an appetizer, or let them cool slightly for a satisfying lunch or picnic treat.
The contrast between the tender, savory filling and the buttery, flaky crust is what makes this recipe a crowd-pleaser, whether you’re feeding a family or hosting a gathering. The process is straightforward, but the results are anything but ordinary.
Once you try these, you’ll understand why they’ve been a staple in Southern kitchens for generations. The combination of heritage techniques and modern precision ensures every hand pie turns out perfectly—crisp, golden, and packed with flavor. Let’s get started on creating these savory bites that taste like home.
Ingredients for pork hand pie
Golden crusts and savory pork filling—just 14 ingredients for hand pies that taste like home.
| Ingredient | Amount | Notes |
|---|---|---|
| Ground Pork 🐷 | 1 ½ lb | Freshly ground preferred |
| All-Purpose Flour 🌾 | 4 cups | King Arthur or similar |
| Lard 🧈 | ½ cup | Leaf lard for best flakiness |
| Cold Butter 🧈 | ¼ cup | Cut into small cubes |
| Ice Water 💧 | ½ cup | Chilled for dough handling |
| Salt 🧂 | 1 ½ tsp | Diamond Crystal preferred |
| Fresh Sage 🌿 | 2 tbsp | Finely chopped leaves |
| Fresh Thyme 🌿 | 1 tbsp | Leaves only, chopped |
| Black Pepper 🌶️ | ½ tsp | Freshly cracked |
| Granulated Sugar 🍚 | 1 tbsp | Balances flavors |
| Egg Yolk 🥚 | 1 whole | For filling binding |
| Whole Milk 🥛 | ¼ cup | Full-fat for richness |
| Cornstarch 🌾 | 1 tbsp | Prevents dry filling |
| Egg Wash 🥚 | 1 whole | 1 egg beaten with 1 tsp water |
| Coarse Sugar 🍚 | 1 tbsp | For sprinkling before baking |
The pork and dough are the stars here. Ground pork should be fresh—pre-ground loses flavor fast. For the dough, lard is non-negotiable—it gives that signature flakiness. I grab leaf lard from Whole Foods or Costco when I need a big batch. The flour? King Arthur or Bob's Red Mill—no substitutions here. Fresh herbs make all the difference, so grab them from the grocery store's produce section (the ones in plastic containers are fine, but avoid wilted leaves). The sugar in the filling? Just enough to balance the savory without making it sweet—don't skip it, but don't overdo it either.
No lard? Vegetable shortening works in a pinch, but it won't be as flaky. Short on sage? Dried sage at half the amount gets you close, but fresh is better. That egg yolk in the filling? Don't substitute with anything else—it's what binds everything together without making it dry. The milk? Full-fat only—skim will make the crust tough. For the egg wash, room-temperature eggs blend better, but cold works if you're in a hurry. The cornstarch is key—it keeps the filling tender even after baking. If you're making these ahead, freeze the unbaked pies on a tray before transferring to a bag—they'll bake just fine straight from frozen.
These keep beautifully. Freshly baked? Serve warm with a side of pickles or apple slices. Room temperature? They'll last 2 days on the counter in an airtight container. For longer storage, freeze them—they reheat perfectly in a 375°F oven for 15-20 minutes. I always make a double batch—some for the week, some to freeze. The crust gets crispier the second time around, so reheat from frozen if you can. And if anyone asks, these are 100% worth the extra effort—they're the kind of recipe that makes people ask for seconds.
Why You'll Love This Recipe
- No-Fuss Filling: I swear by this recipe because the filling comes together in one pan—no fancy techniques, just browned pork, a splash of water, and a sprinkle of seasoning. The lard in the crust makes it flaky without any rolling hassle; I just pat the dough together and fold.
- Savory-Packed Bite: That crispy, buttery crust hiding tender, juicy pork? It’s the kind of flavor combo that makes you pause mid-bite. Honestly, the ground pork’s richness pairs perfectly with the flaky dough—no one ever skips seconds on these.
- Picnic or Potluck Hero: Between us, these are my go-to for tailgates, church dinners, or even a last-minute lunchbox. They’re sturdy enough to pack, easy to share, and—let’s be real—they disappear fast. No one leaves with leftovers when these are on the table.
- Budget-Friendly Staple: Ground pork stretches far, and the dough costs pennies with lard or butter on hand. I make a double batch, freeze half, and pull them out for lazy nights. Twenty minutes of active time, zero guilt—just pure, satisfying comfort food.
Step-by-step instructions for savory pork hand pies
Let's make these golden, flaky pork hand pies that'll have everyone begging for seconds.
👨🍳 Step 1: Make the Perfect Dough
In a large bowl, combine the 4 cups all-purpose flour and 1.5 teaspoons salt. Cut in the 0.5 cup lard and 0.25 cup cold butter using a pastry cutter or two forks until the mixture resembles coarse crumbs with pea-sized fat pieces. This ensures maximum flakiness in your crust.
Gradually add the 0.5 cup ice water, 1 tablespoon at a time, mixing gently with a fork until the dough just comes together. Avoid overworking it—just until it holds when pressed. Turn the dough onto a lightly floured surface and knead lightly 4-5 times, then divide into two equal discs. Wrap in plastic and chill for 30 minutes while you prepare the filling.
🍳 Step 2: Prepare the Savory Filling
In a skillet over medium heat, cook the 1.5 lb ground pork until browned, breaking it apart with a wooden spoon. Drain excess fat, leaving about 1 tablespoon in the pan. Add the 2 tablespoons fresh sage, 1 tablespoon fresh thyme, 0.5 teaspoon black pepper, and 1 tablespoon granulated sugar, stirring for 1 minute until fragrant.
Remove from heat and stir in the 1 whole egg yolk, 0.25 cup whole milk, and 1 tablespoon cornstarch. Let cool completely—this prevents the filling from steaming the dough when baking. The mixture should be thick enough to hold its shape when spooned.
🥘 Step 3: Assemble the Hand Pies
Preheat oven to 375°F. Roll out one dough disc on a floured surface to ⅛-inch thickness. Cut into 5-inch circles using a round cutter or glass. Place 1 tablespoon filling in the center of each circle, then fold over and crimp edges using a fork or your fingers. Brush tops with egg wash and sprinkle with 1 tablespoon coarse sugar for that perfect caramelized finish.
Arrange pies on a parchment-lined baking sheet, leaving 1 inch between each. Bake for 20-25 minutes until the crust is golden brown and the filling is bubbling. For extra crispiness, broil for 1-2 minutes at the end—watch closely so they don't burn!
⏰ Step 4: Serve Warm and Enjoy
Let pies cool for 5 minutes before serving—this helps the filling set slightly. They're best enjoyed warm with a side of tangy mustard or a simple green salad. The crust should be crisp and flaky, while the filling stays moist and flavorful with just the right amount of herby richness.
Real talk: these hand pies freeze beautifully! Cool completely, wrap tightly in plastic, and freeze for up to 3 months. Reheat in a 350°F oven for 10-12 minutes until warmed through. The secret to flaky crusts? Chill your dough and don't overwork it—trust the process!
Pro Tips For Making Pork Hand Pie
- Chill the Pork First: Skip the rush—pop your ground pork in the fridge for 20 minutes before shaping. Cold meat stays together better when you roll those tiny pies, and it browns more evenly. I learned this the hard way after my first batch turned into a porky mess when the filling oozed out.
- Mix Lard and Butter: Combine cold lard and butter (50/50) for the crust—lard gives flakiness, butter adds flavor. Cut them together with your fingers until it looks like coarse crumbs, then add ice water one tablespoon at a time. Too much water? Your crust will toughen up.
- Don’t Overwork the Dough: Handle the dough just enough to bring it together—overmixing makes it tough and chewy. Press it gently into the pie molds, then use your thumb to seal the edges. If it cracks, patch it with a little extra dough. No one’s judging your hand pies for perfection.
- Bake in Two Stages: Start hand pies at 425°F (220°C) for 10 minutes to set the crust, then drop to 350°F (175°C) for 15–20 minutes. This prevents soggy bottoms while keeping the filling juicy. I used to burn the crusts trying to rush it—now I bake low and slow for even cooking.
Common mistakes when making perfect results
Overworked Dough
I can't stress this enough: handle the dough as little as possible. Every time you knead or roll it, you develop gluten, which makes the crust tough instead of flaky.
I've ruined more hand pies than I care to admit by overworking the dough—once, I kneaded it for 10 minutes trying to get it "perfect," and ended up with dense, chewy shells. Stick to the 4-5 kneads mentioned in the recipe, and let the lard do its magic. 💫
Skipping the Chill
If you rush and skip the 30-minute chill, the dough will shrink while baking, leaving you with misshapen pies. I learned this the hard way during a busy holiday dinner when I cut corners. The crusts puffed up unevenly, and some even cracked open.
Trust me, that extra half-hour in the fridge is worth it—it also makes rolling the dough much easier. Pro tip: Set a timer so you don't forget!
Uneven Filling Distribution
Piling too much filling in one spot creates weak points where the crust might tear during baking. I once made the mistake of using 1.5 tablespoons instead of 1 tablespoon per pie, and half of them burst open in the oven.
Spread the filling evenly in the center of each dough circle, then fold neatly. If you're worried about leaks, press the edges firmly with your fingers or a fork to seal them completely.
Not Preheating the Oven
Cold ovens cause uneven baking—some pies will be undercooked while others burn. I've had to pull pies out at 18 minutes only to find the centers still doughy. Always preheat your oven to 375°F for at least 15 minutes before baking.
For even better results, place your pies on the middle rack where heat circulates most evenly. A good oven thermometer is worth its weight in gold here.
Broiling Too Long
Broiling adds that gorgeous golden color, but it's easy to overdo it. I once turned my attention away for just 30 seconds, and the tops of my hand pies went from perfect to charred in seconds.
Keep a close eye on them—1-2 minutes is all you need. If you're unsure, broil for 1 minute, then check and add more time if needed. The crust should be golden, not dark brown.
Using Warm Filling
Hot filling steams the dough, making it soggy instead of crisp. I made this mistake early on, thinking the filling would cool while I assembled the pies. Big mistake! The dough absorbed moisture, and the crusts turned out greasy rather than flaky.
Always let your filling cool completely before assembling—it should be just warm to the touch, not hot. If you're in a hurry, spread the filling on a tray and refrigerate for 10 minutes** while you finish shaping the pies.
Nutrition facts
Frequently asked questions
Can I make pork hand pies ahead of time?
These keep beautifully for 2 days at room temperature in an airtight container. For longer storage, freeze unbaked pies on a tray before transferring to a bag—they'll bake straight from frozen. Just add 5-10 extra minutes to baking time when reheating from frozen.
What's the best way to reheat leftover hand pies?
For crispy crusts, reheat in a 375°F oven for 10-15 minutes on a wire rack. Or for a quick fix, warm in a skillet over medium heat for 2-3 minutes per side until golden. Never microwave—they'll get soggy!
Can I substitute lard in the dough?
You can use vegetable shortening in a pinch, but it won't be as flaky. For best results, stick with lard—it gives that signature layering. If you're avoiding animal products, cold butter works but requires more careful handling to prevent melting.
How do I make the crust extra crispy?
Brush the baked pies with melted butter and return to a 350°F oven for 3-5 minutes until golden. Or try broiling for 1-2 minutes at the end—just watch closely! The sugar sprinkle on top also helps create that perfect caramelized crust.
What other fillings work well in hand pies?
These pies are incredibly versatile! Try shredded chicken with herbs, sausage and cheese, or even sweet potato and bacon. The key is keeping fillings moist—add a little cornstarch or breadcrumbs if needed.