
Desserts
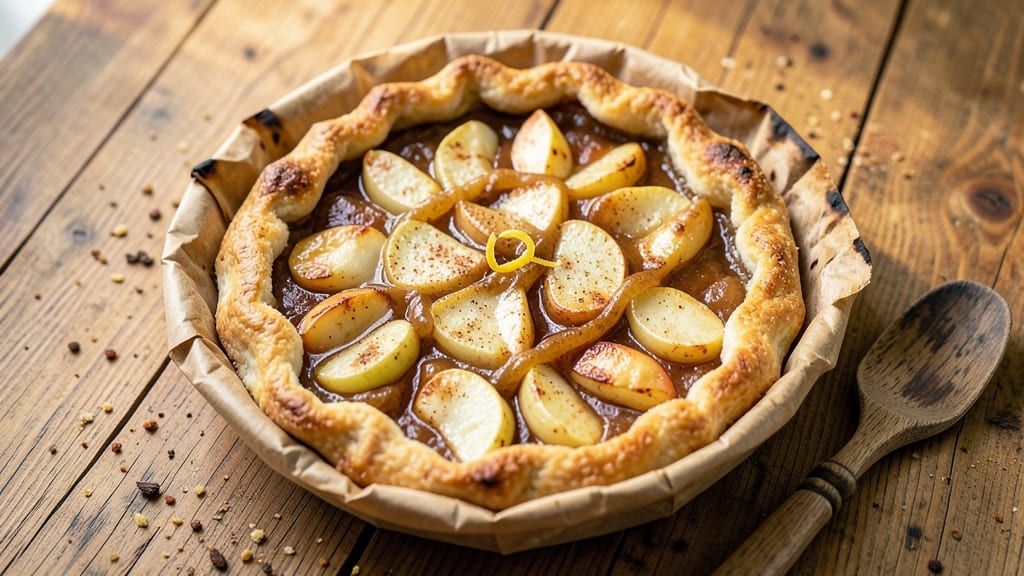
This apple pie baked in a bag recipe delivers all the comfort of classic pie—flaky crust, spiced apples, and that signature caramelized top—without the stress of a burnt or soggy bottom.
The secret lies in baking the filling in a foil pouch, creating a foolproof method that guarantees perfect results every time. I developed this technique after years of pie disasters, and it’s now my go-to for effortless dessert nights.
The beauty of this method is its simplicity: no pie dish required, no risk of a messy spill, and a crust that stays crispy without overbrowning. You’ll still get that warm, spiced apple aroma filling your kitchen, but with none of the traditional pie-making headaches.
The foil pouch creates a sealed environment, locking in moisture and flavors while the apples tenderize just enough to release their natural sweetness.
What you’ll end up with is a pie that looks and tastes like it came from a bakery—golden, bubbling, and with that perfect balance of cinnamon, nutmeg, and buttery crust. The filling stays moist and flavorful, while the crust remains crisp at the edges and tender in the center.
This recipe is especially great for beginners or anyone tired of pie disasters, but even experienced bakers will appreciate the foolproof technique.
The best part? You can customize the crust—use store-bought for convenience or whip up a homemade version if you’re feeling ambitious. Serve it warm with vanilla ice cream or whipped cream for the ultimate cozy dessert. Let’s get baking!
Ingredients for apple pie baked in a bag
Foolproof foil pouch method with pantry staples—no pie dish, no burnt crust, just perfect spiced apples.
| Ingredient | Amount | Notes |
|---|---|---|
| Granny Smith Apples 🍎 | 4 medium | Peeled, cored, sliced thin |
| All-Purpose Flour 🌾 | 1 ½ cups | For homemade crust |
| Unsalted Butter 🧈 | ¾ cup | Cold, cubed for crust |
| Granulated Sugar 🍚 | ¾ cup | For filling sweetness |
| Light Brown Sugar 🍚 | ¼ cup | Packed, for caramel depth |
| Ground Cinnamon 🌿 | 2 tbsp | Freshly ground preferred |
| Ground Nutmeg 🌿 | ½ tsp | Freshly grated for warmth |
| Lemon Juice 🍋 | 1 tbsp | Freshly squeezed |
| Heavy Cream 🥛 | ¼ cup | For filling richness |
| Aluminum Foil 📄 | 1 sheet | Heavy-duty, 18"x12" |
| Salt 🧂 | ½ tsp | Diamond Crystal preferred |
| Ice Water 💧 | ¼ cup | For dough handling |
The apples are non-negotiable—Granny Smiths hold their shape and add tartness, but Honeycrisp or Fuji work too. Walmart or Trader Joe's usually have pre-washed bags for convenience, but organic is worth it if you're feeling fancy. Slice them paper-thin (a mandoline makes this easy) and toss immediately with lemon juice to prevent browning. The foil is your secret weapon—Reynolds heavy-duty is my go-to, but any sturdy brand works. Pro tip: use a 18x12 sheet for perfect proportions.
No heavy cream? Evaporated milk or coconut cream keeps the filling rich without curdling. Short on brown sugar? White sugar plus 1 tsp molasses mimics the caramel notes. The crust can be store-bought (just skip the butter in the ingredients), but homemade gives that buttery, flaky magic. For extra flair, add 1 tsp vanilla extract to the filling. And if you're making this ahead? Pre-slice the apples and store in lemon water—they'll stay fresh for days.
This pie keeps beautifully—3 days at room temp in its foil pouch (yes, really) or 5 days refrigerated. For serving, punch holes in the foil and warm for 10 minutes. The crust stays crispy thanks to the sealed environment, but if it softens, reheat uncovered. Freeze the whole pouch for up to 3 months. Just thaw overnight before serving. Pair with vanilla ice cream or whipped cream for maximum coziness.
Why You'll Love This Recipe
- No-Roll Crust Magic: The dough comes together in three minutes—just flour, butter, and a pinch of salt. No rolling, no fuss, and no waiting for the oven to preheat just to handle a temperamental pie crust. That buttery, flaky texture? It’s all in the bag, baked right alongside the apples.
- Tart-Sweet Perfection: Granny Smiths keep their bite, while the brown sugar caramelizes into a sticky, golden glaze. Honestly, the first bite makes me pause—I swear it’s the kind of dessert that tastes like autumn in a bag, no fuss.
- Weeknight Crowd Pleaser: I’ve served this at book club, potlucks, and even my mom’s Thanksgiving—no one bats an eye. It’s sturdy enough for a picnic, but simple enough to throw together when my kids’ friends show up hungry. (Yes, even on a Tuesday night.)
- Zero-Waste Leftovers: The whole thing bakes in one bag, so I can slice it up and freeze portions for later. No crust to go soggy, no filling to dry out—just reheat and enjoy. Between us, this is my go-to for when I bake once but eat twice.
Step-by-step instructions for apple pie baked in a bag
This foolproof method delivers crispy edges and tender filling without a single burnt crust—just foil, oven, and 45 minutes.
Make the Crust with Cold Butter and Ice Water
Cut the 0.75 cup unsalted butter into ¼-inch cubes and place in the freezer for 10 minutes to firm up. In a large bowl, whisk together the 1.5 cups all-purpose flour, 0.5 tsp salt, and 2 tbsp ground cinnamon. Add the chilled butter cubes and use a pastry cutter or your fingers to work them into the flour until the mixture resembles coarse crumbs with pea-sized butter pieces.
Drizzle in the 0.25 cup ice water 1 tablespoon at a time, mixing gently with a fork until the dough just comes together. Avoid overmixing—just until the dough holds when pressed. Shape into a disk, wrap in plastic, and chill for 30 minutes. The cold butter is key: it creates flaky layers when baked, and the ice water keeps the dough firm enough to hold its shape in the foil bag.
Prepare the Filling with Tart Apples
Peel, core, and slice the 4 medium Granny Smith apples into ¼-inch thick slices. Toss them in a bowl with 0.75 cup granulated sugar, 0.25 cup packed light brown sugar, and 0.5 tsp ground nutmeg. Sprinkle in the 1 tbsp lemon juice and toss again. The acidity brightens the apples and prevents them from turning mushy during baking.
In a separate small bowl, whisk together the 0.25 cup heavy cream and remaining 0.5 tsp ground cinnamon. Pour this over the apple mixture and stir gently to combine. Let the filling sit for 10 minutes—this allows the juices to release slightly, ensuring a moist pie filling that doesn’t dry out in the oven.
Assemble the Pie in Foil with Precision
Preheat your oven to 375°F. Lay out the 1 sheet heavy-duty aluminum foil on a flat surface and fold it into a 12-inch square. Spread half of the chilled dough over the foil, pressing it into an 8-inch circle with your fingers. The dough should be about ¼-inch thick—don’t worry if it’s not perfect, as the foil will help shape it.
Add the apple filling to the center of the dough circle, mounding it slightly. Fold the foil edges up over the filling, then top with the remaining dough. Press the edges together firmly to seal, creating a 1-inch wide border around the filling. Crimp the edges with your fingers or a fork to create a neat finish. The foil acts as both a seal and a mold, ensuring the pie holds its shape without a traditional crust.
Bake Until Golden and Bubbling
Place the foil-wrapped pie on a baking sheet and bake for 40-45 minutes until the crust is deep golden brown and the filling is bubbling at the edges. The foil will trap steam, creating a tender filling while the crust crisps beautifully. If the edges brown too quickly, loosely cover the pie with an additional sheet of foil for the last 10 minutes of baking.
Remove the pie from the oven and let it cool for 15 minutes before carefully unfolding the foil. The crust should be crispy on the outside and flaky on the inside, with a filling that’s just tender enough to slice cleanly. Serve warm with a scoop of vanilla ice cream—this is where the magic happens, with every bite delivering that perfect balance of tart and sweet.
Pro Tips For Making Apple Pie Baked In A Bag
- PEEL THE APPLES HALFWAY: Granny Smiths stay firm but get mealy if overcooked. Cut them into ¼-inch slices, then peel just the outer skin—leave the crisp white pith. This keeps texture intact while letting the filling caramelize properly.
- SEAL THE BAG TIGHT: Fold the bag’s top edge twice before twisting it shut—like a burrito. Air pockets make the crust soggy. Press firmly along the seal with your palm to guarantee a tight barrier. (Yes, it looks like you’re wrapping a present.)
- USE COLD BUTTER: Cut the butter into small cubes and toss it in with the flour before adding liquid. Cold butter creates flaky layers instead of greasy dough. Skip the warm butter—this isn’t a cookie.
- BAKE UNTIL GOLDEN: The bag will puff up fast, but don’t pull it out when it’s just brown. Wait for deep golden spots—about 10–15 minutes past when the edges look set. Underbaked crust stays gummy.
Wine and beer pairings for this recipe
Crisp White Wine
For this apple pie, I reach for a dry Riesling—its bright acidity cuts through the richness of the spiced filling beautifully. Look for a German or Alsace Riesling with notes of green apple and citrus, like Dr. Loosen Blue Slate or Trimbach Riesling.
The crisp, mineral finish refreshes your palate between each buttery, cinnamon-kissed bite. 🍷
Sweet Red Options
A Pinot Noir from Oregon or Burgundy is a fantastic choice—its red fruit notes complement the apples while the earthiness balances the sweetness. I love Domaine Drouhin Oregon Pinot Noir for its silky texture and cherry undertones.
For something sweeter, try a Lambrusco from Italy, which adds a fizzy contrast to the pie’s warmth.
Creamy Dessert Wines
If you prefer something sweeter, a Moscato d'Asti from Piedmont offers light bubbles and peach flavors that mirror the pie’s caramelized apples. For a richer pairing, Ice Wine like Inniskillin Vidal Ice Wine adds a luxurious touch with its honeyed sweetness. Serve slightly chilled for the best experience.
Beer Pairings
A honey brown ale like Samuel Smith’s Nut Brown Ale brings malty sweetness that enhances the pie’s spices. For something lighter, try a Belgian witbier such as Hoegaarden—its citrusy notes brighten the dish. Avoid heavy stouts or IPAs, as their bitterness can overpower the delicate apple flavors.
Non-Alcoholic Options
For a refreshing non-alcoholic match, serve with sparkling apple cider—like Martinelli’s Sparkling Cider—which echoes the pie’s tartness. A vanilla chai latte with cinnamon also complements the warm spices perfectly. Both options keep the cozy dessert experience intact without alcohol. 🍏
Nutrition facts
Frequently asked questions
Why does baking apple pie in foil work better than a traditional pie dish?
The foil pouch creates a sealed environment that locks in moisture and steam, preventing the crust from overbrowning while keeping the filling perfectly tender. This method also eliminates the risk of a soggy bottom or burnt edges, making it ideal for beginners or busy bakers.
Can I use this recipe with store-bought pie crust?
Simply omit the butter and flour from the crust ingredients and use 1 pre-made pie crust (homemade or store-bought). Roll it out to fit your foil square and proceed with the assembly. The foil method works just as well with pre-made dough.
How do I prevent the foil from sticking to the crust?
Lightly grease the inside of the foil pouch with butter or cooking spray before adding the dough. This creates a barrier that prevents sticking while still allowing the crust to crisp beautifully. For extra insurance, use parchment paper between the foil and dough.
What if my apples turn mushy during baking?
Mushy apples usually mean they were too thinly sliced or overcooked. Stick to ¼-inch thick slices and bake for exactly 40-45 minutes. For extra tartness (which prevents mushiness), add 1 extra tbsp lemon juice to the filling. Granny Smiths hold up best!
Can I make this pie ahead of time?
Yes! Assemble the pie in its foil pouch and refrigerate for up to 24 hours before baking. For longer storage, freeze the assembled pouch (unbaked) for up to 3 months. Thaw overnight in the fridge before baking as directed.