
Desserts
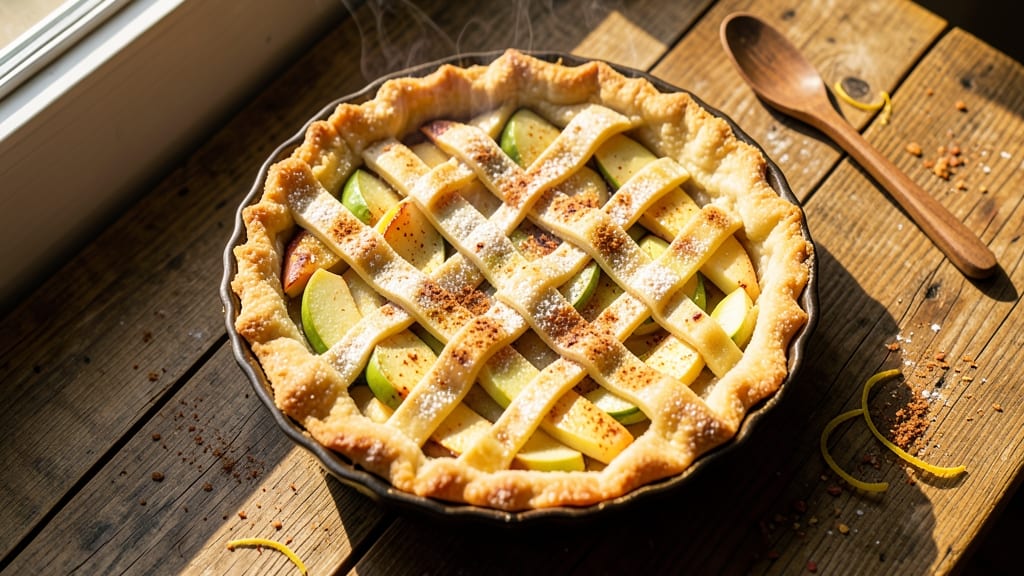
This sour apple pie recipe delivers the perfect balance of tart, caramelized filling and a buttery lattice crust that flakes apart at every bite. The secret lies in using a mix of Granny Smith and Honeycrisp apples, peeled and sliced precisely for even cooking.
I’ve perfected this recipe over years of baking—each slice is crisp enough to hold its shape yet tender enough to melt in your mouth.
What sets this pie apart is the tart-caramelized filling, achieved by cooking the apples with cinnamon, lemon juice, and a touch of brown sugar until they release their natural juices.
A well-baked, flaky crust (homemade or store-bought) ensures the pie holds together beautifully, while the lattice design adds visual appeal and allows for easy slicing. The result? A pie that’s both impressive and comforting, perfect for holidays or a cozy weeknight dessert.
Baking time is about 50 minutes at 375°F, with an optional egg wash for a golden finish. The filling thickens just enough to coat the bottom without being soggy, and the lattice crust creates a delicate, crispy topping. Serve it warm with vanilla ice cream for the ultimate dessert experience.
Whether you’re a seasoned baker or a beginner, this recipe is designed to deliver restaurant-quality results with simple techniques. The filling can be prepped ahead, and the crust is flexible—use your favorite recipe or grab one from the store. Let’s get baking!
Ingredients for sour apple pie
Tart, caramelized apples meet a buttery lattice crust—this pie is pure comfort in every bite.
| Ingredient | Amount | Notes |
|---|---|---|
| Granny Smith Apples 🍎 | 4 whole | Peeled, cored, sliced 1/4-inch thick |
| Honeycrisp Apples 🍎 | 4 whole | Peeled, cored, sliced 1/4-inch thick |
| Granulated Sugar 🍚 | 1 ¼ cups | Or substitute brown sugar |
| Light Brown Sugar 🍚 | ½ cup | Packed firmly |
| All-Purpose Flour 🌾 | ½ cup | For thickening filling |
| Ground Cinnamon 🌿 | 2 tsp | Freshly ground preferred |
| Lemon Juice 🍋 | 2 tbsp | Freshly squeezed |
| Unsalted Butter 🧈 | 1 cup | Cold, cubed for crust |
| All-Purpose Flour 🌾 | 2 ½ cups | Plus 1 tbsp for rolling |
| Granulated Sugar 🍚 | ½ cup | For crust sweetness |
| Salt 🧂 | ½ tsp | Fine sea salt |
| Large Eggs 🥚 | 1 whole | For egg wash |
| Heavy Cream 🥛 | 2 tbsp | For egg wash |
| Vanilla Extract 🍯 | ½ tsp | Optional for crust |
The apples are the heart of this pie, and Granny Smith and Honeycrisp are a match made in heaven. Granny Smith brings the sharp tartness that balances the sweetness, while Honeycrisp adds that juicy crunch. Grab them at Whole Foods or your local market—look for firm apples with no bruises. Peeling them ensures a silky texture, but if you're in a rush, a good scrub works too. Slice them 1/4-inch thick for even cooking; thicker slices stay crunchy, thinner ones get mushy. I always slice mine while I prep the filling so they don’t oxidize.
No Granny Smith? Pink Lady or Braeburn hold up well in baking, though they’re slightly sweeter. Running short on butter? Vegan butter or coconut oil works for the crust, but regular butter gives that unmatched flakiness. The filling thickens as it bakes, so don’t skimp on the flour—it’s what keeps that perfect balance between saucy and set. For the lattice, cut the dough strips 1/4-inch wide; wider strips make a more rustic look, but they’re trickier to weave. And if you’re feeling fancy, brush the lattice with a little extra egg wash for extra shine—it’s worth the effort.
Prep the filling ahead and store it in the fridge for up to 24 hours—the flavors deepen overnight. The crust dough can be rolled out and chilled for 30 minutes before assembly, which makes lattice weaving a breeze. Once baked, let the pie cool for at least 4 hours before slicing—this gives the filling time to set properly. Leftovers keep for 5 days in the fridge, and the crust reheats beautifully in the oven for 10 minutes at 350°F to restore that crispy texture.
Why You'll Love This Recipe
- Tart & Sweet Magic: The Granny Smith and Honeycrisp combo? Chef’s kiss. That bright, tangy bite from the Granny Smith cuts through the caramelized sweetness of the brown sugar—it’s like biting into autumn in every slice.
- No Fuss Filling: Peel, core, slice—done. No fancy dice or julienne work here. Just thick chunks that hold their shape while the spices (cinnamon, maybe a pinch of nutmeg?) do all the heavy lifting.
- Leftovers? Please.: This pie actually improves the second day—crisp top, juicier filling. I’ll take it over any dessert that turns sad overnight. (Between us, I’ve reheated slices in the oven with a dollop of whipped cream—yes, I’m that person.)
- Budget-Buster Crowd-Pleaser: You’re using pantry staples (flour, sugar) and seasonal apples you can find cheap in bulk. Serve it at a picnic, potluck, or just because—it’s the dessert that doesn’t break the bank or the mood.
Step-by-step instructions for sour apple pie
Here's how to create a pie with a perfect balance of tart Granny Smith and sweet Honeycrisp apples, wrapped in a buttery lattice crust.
Prepare the Apple Filling
In a large mixing bowl, combine the peeled and sliced Granny Smith apples and Honeycrisp apples. I like to work in batches to keep everything fresh. Add the 1.25 cups granulated sugar, 0.5 cup light brown sugar, 0.5 cup all-purpose flour, and 2 tsp ground cinnamon to the bowl. Toss everything together until the apples are evenly coated with the sugar mixture.
This is where the magic happens—the sugar begins dissolving slightly, releasing juices that will caramelize beautifully during baking. Sprinkle the 2 tbsp lemon juice over the apples and toss again. The acidity helps balance the sweetness and prevents the apples from turning brown. Let the mixture sit for 10 minutes while you prepare the crust—this allows the flavors to meld slightly.
Make the Pie Crust Dough
In a separate large bowl, combine the 2.5 cups all-purpose flour, 0.5 cup granulated sugar, 0.5 tsp salt, and the 0.5 tsp vanilla extract. Cut in the 1 cup cold, cubed unsalted butter using a pastry cutter or your fingers until the mixture resembles coarse crumbs with pea-sized butter pieces throughout. This texture is crucial for flaky layers.
Add the 1 whole large egg and 2 tbsp heavy cream to the bowl. Mix gently with a fork until the dough just comes together. I know it looks like too much, but trust me—this ensures a tender, not tough, crust. Turn the dough out onto a lightly floured surface and divide it into two equal portions. Roll each portion into a 12-inch circle, about 1/8-inch thick, for the top and bottom crusts.
Assemble the Pie
Fit the bottom crust into a 9-inch pie dish, pressing gently to shape it to the bottom and sides. Trim any excess dough hanging over the edge. Fill the pie with the prepared apple mixture, mounding it slightly in the center. This creates room for the apples to expand as they cook.
Roll out the second crust and place it on top of the apples. For a classic lattice look, cut the top crust into 1-inch strips. Weave the strips over the apples in a herringbone pattern, leaving a 1-inch border around the edge. Brush the lattice and edges with a beaten egg wash (1 egg beaten with 1 tbsp water) for a golden finish. This step is what gives your pie that bakery-style appearance.
Bake to Golden Perfection
Preheat your oven to 375°F. Place a baking sheet on the lower rack to catch any drips. Bake the pie for 50-60 minutes, until the crust is deep golden brown and the filling is bubbling. You'll know it's ready when the edges are set and the lattice looks crisp and golden.
I like to tent the pie with foil after 30 minutes if the crust starts browning too quickly—this prevents burning while the filling finishes cooking. The filling should be thick and caramelized, with just a hint of juiciness when you cut into it. Let the pie cool completely before slicing, at least 2 hours, to allow the filling to set properly.
Serve Warm with Vanilla Ice Cream
Once cooled, slice the pie into 8 equal wedges. The lattice crust should be crisp and flaky, while the filling will be perfectly balanced—tart from the Granny Smith apples and sweet from the Honeycrisp, with a beautiful caramelized sheen on top. Serve warm with a scoop of vanilla ice cream to enhance the apple flavors.
This pie tastes even better the next day, as the flavors continue to develop. Store any leftovers in an airtight container in the refrigerator for up to 4 days. The contrast of warm pie and cold ice cream makes every bite unforgettable!
Pro Tips For Making Sour Apple Pie
- Toss Apples First: Dump your sliced Granny Smiths and Honeycrisp into a bowl before adding sugar. The acidity in those tart apples softens faster when they’re not sitting in syrup—you’ll get better texture without waiting for them to break down. (I used to add sugar first and always ended up with mushy spots.)
- Skip the Pre-Bake: That flaky crust you’re dying to see? Save 15 minutes by skipping the pre-bake. Just crimp the edges tight, weigh down the center with a pie weight or dried beans, and bake blind for 10 minutes at 375°F. The apples’ juices won’t make a mess, and the crust stays crisp.
- Mix Sugar Types: Use ¾ cup granulated sugar and ¼ cup light brown sugar in the filling. The brown sugar caramelizes faster, balancing the Granny Smith’s sharpness while keeping the texture firm. (I learned this after a pie turned cloyingly sweet—too much white sugar is a trap.)
- Vent the Top: Cut a 3-inch slice out of the top crust and set it aside. The apples release a lot of juice, and without a vent, your pie will look like a volcano when you open the oven. Just pop that crust back on after 30 minutes of baking—it’ll crisp up perfectly. (Yes, even if it looks weird.)
Health benefits of these flavors
Apple Antioxidant Boost
Granny Smith and Honeycrisp apples are packed with polyphenols—powerful antioxidants that fight free radicals in your body. A single slice of this pie delivers about 20% of your daily vitamin C, which supports immune function and collagen production.
The quercetin in apples also has anti-inflammatory properties that may help reduce chronic disease risk. 🍏
Fiber for Digestion
The apple filling contains 4 grams of fiber per serving, thanks to the fruit and added flour. Fiber keeps your digestive system running smoothly and helps maintain steady blood sugar levels.
The pectin in apples acts as a prebiotic, feeding beneficial gut bacteria. This makes the pie a surprisingly nutritious dessert option compared to many other baked goods.
Whole Grain Benefits
While the crust isn't whole grain, the all-purpose flour in the filling provides 2 grams of fiber per serving. For a healthier twist, substitute half the flour with whole wheat flour—it adds nutty flavor and extra nutrients like magnesium and B vitamins.
The crust's butter provides healthy fats that help your body absorb fat-soluble vitamins from the apples.
Moderate Sugar Balance
This pie uses 1.75 cups of sugar total, which is moderate for a dessert. The combination of tart apples and cinnamon helps balance the sweetness naturally.
For a lighter option, reduce sugar by 0.25 cups and increase lemon juice to 3 tbsp—the acidity enhances perceived sweetness without adding calories. 💯
Comfort Food Energy
The pie provides a satisfying energy boost from complex carbs in the apples and crust. The butter and cream add healthy fats that help stabilize blood sugar, preventing energy crashes.
It's a perfect post-workout dessert or cozy evening treat that fuels without weighing you down. The cinnamon also helps regulate blood sugar by mimicking insulin activity.
Hydration Helper
Apples contain 86% water, which contributes to your daily hydration needs. The pie's juicy filling adds moisture to your diet, especially important if you're not drinking enough water. The lemon juice in the filling also has hydrating properties while adding a bright, refreshing note to each bite.
Nutrition facts
Frequently asked questions
Can I use just one type of apple instead of both Granny Smith and Honeycrisp?
Yes, but the flavor balance will change. Granny Smith alone will be very tart, while Honeycrisp alone will be sweeter. For best results, substitute with Pink Lady or Braeburn (tart-sweet) or Fuji or Gala (sweeter). If using only tart apples, increase sugar by 0.25 cups to compensate.
How do I make the crust extra flaky?
Cold butter is key! Cut it into 1/2-inch cubes and keep everything chilled. Work quickly when rolling to avoid warming the dough. For extra flakiness, freeze the dough for 15 minutes before rolling, and use less flour when handling to prevent toughness.
Can I make this pie ahead of time?
Assemble the pie (unbaked) and refrigerate for up to 24 hours. For best results, bake it straight from the fridge without thawing. The filling will develop deeper flavors overnight. For a make-ahead dessert, bake the pie, cool completely, then refrigerate for up to 5 days or freeze for 3 months.
Why did my lattice crust turn out soggy?
Soggy lattice usually means the filling wasn't thick enough or the crust wasn't fully baked. Always pre-bake the bottom crust for 10 minutes before adding filling. If your filling looks too runny, add 1-2 tbsp more flour and toss. For extra insurance, sprinkle 1 tbsp cornstarch over the filling before adding the lattice.
What's the best way to reheat leftover pie?
For crispy results, place slices on a baking sheet and warm at 350°F for 10-12 minutes. Cover with foil if you prefer softer crust. Microwaving works in a pinch (30 seconds), but it makes the crust rubbery. For lattice crusts, reheating restores that perfect crunch without drying out the filling.