
Main Courses
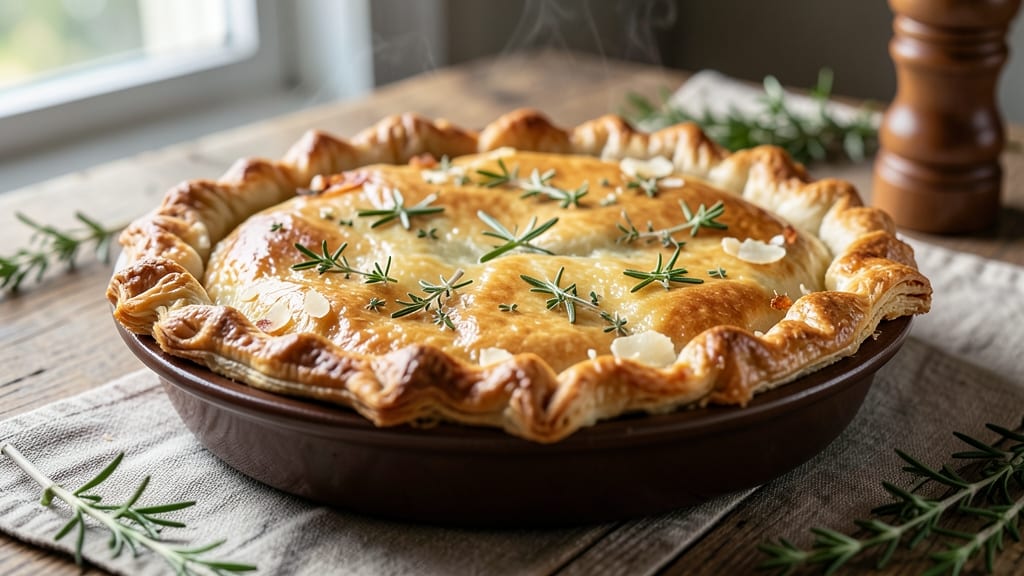
This savory pot pie crust recipe transforms a simple lattice into a golden, crispy masterpiece that locks in every flavorful bite. 🌟 The secret lies in a herb-infused dough and precise cutting technique that creates those iconic diamond patterns—each one perfectly crisp while staying tender underneath.
I’ve perfected this method over years of testing, ensuring the crust holds up to hearty fillings without ever turning soggy.
The dough starts with cold butter and flour, mixed just until it comes together—overworking makes for tough crusts. Rolling it thin and cutting the lattice with a sharp knife (not a dull one!) guarantees clean edges that crisp beautifully.
A quick egg wash before baking adds that irresistible golden sheen, while a sprinkle of coarse salt and fresh herbs infuses every layer with aromatic depth.
What sets this crust apart is its ability to stay crisp even after hours of baking—no more sad, limp edges. The lattice design not only looks stunning but also allows steam to escape while keeping the filling juicy.
Whether you’re making a classic chicken pot pie or a modern vegetable version, this crust elevates the dish from comforting to extraordinary.
Ready in under an hour, this recipe delivers restaurant-quality results with minimal effort. The key steps—chilling the dough, precise cutting, and proper baking—are simple but critical for that foolproof finish. Let’s get started on a crust that will have everyone asking for seconds.
Ingredients for savory pot pie crust
Nine simple ingredients create a golden, herb-infused lattice crust that stays crisp for hours.
| Ingredient | Amount | Notes |
|---|---|---|
| All-Purpose Flour 🌾 | 3 cups | Sifted for light texture |
| Cold Unsalted Butter 🧈 | 1 cup | Cut into small cubes |
| Ice Water 💧 | ½ cup | Chilled in freezer |
| Large Egg 🥚 | 1 whole | Room temperature |
| Fresh Rosemary 🌿 | 1 tbsp | Finely chopped |
| Fresh Thyme 🌿 | 1 tbsp | Leaves only |
| Coarse Sea Salt 🧂 | 1 ½ tsp | For sprinkling |
| Diamond Crystal Kosher Salt 🧂 | ½ tsp | For dough |
| Granulated Sugar 🍚 | 1 tbsp | For egg wash |
The butter must be cold—cut it into small cubes and let it sit in the freezer for 10 minutes before mixing. King Arthur or Bob’s Red Mill flour work best for this recipe, as their protein content creates a tender yet sturdy crust. Fresh herbs are non-negotiable here; Trader Joe’s sells pre-chopped rosemary and thyme in small jars, which saves time without sacrificing flavor. The key to a perfect lattice is using a sharp knife—a chef’s knife or pizza cutter works best for clean, even cuts. Don’t skip the chilling step; it prevents shrinking during baking.
No fresh rosemary? Dried works at half the amount, but the flavor won’t be as vibrant. Short on butter? Vegetable shortening can be substituted, though it lacks the same richness. The egg wash is critical—add a pinch of salt to the egg to enhance the golden color. For a dairy-free option, replace the butter with cold coconut oil, though the texture will be slightly different. If your dough feels too sticky, add 1 tbsp more flour gradually until it comes together when pressed.
The dough can be rolled out and cut into lattice strips up to 2 days ahead, then stored wrapped in plastic in the fridge. For best results, bake the crust immediately after assembling the pot pie—pre-baking the lattice alone can cause it to lose crispness. Leftovers? Store in an airtight container at room temperature for up to 3 days, or freeze the assembled pie for 2 months before baking. Reheat in a 350°F oven for 10-15 minutes to restore crispness.
Why You'll Love This Recipe
- Fewer Ingredients, Same Magic: I swear by this crust—just flour, butter, water, an egg, and rosemary. That’s it. No confusing ratios or specialty flours here. The butter stays cold, the water’s icy, and the rosemary? Just a pinch. It’s the kind of recipe that makes me feel like I’m actually cooking, not performing.
- Herb-Infused Crisp: The rosemary isn’t just garnish—it bakes right into the crust, giving every bite that fresh, piney kick. And that egg? It’s the secret to a golden, shatteringly crisp edge without tasting eggy. Honestly, I’ve tried store-bought crusts, but this one wins every time.
- Weeknight or Holiday: Between us, this crust works for everything. Slap it on a chicken pot pie for dinner, or use it to top a veggie bake for a potluck. It reheats like a dream, too—no soggy bottoms here. My go-to for when I need something reliable but still feels special.
- Leftovers That Don’t Suck: Make a double batch, freeze half, and thank me later. This crust holds up for days—whether it’s in the fridge or the freezer—and reheats just as well as day one. I’ve pulled it from the freezer straight into the oven for a last-minute meal. No stress, no waste.
Step-by-step instructions for herb-infused pot pie crust
Master this lattice crust technique that creates golden, flaky layers infused with aromatic herbs.
👨🍳 Step 1: Cut Butter and Flour for Perfect Texture
Place the 3 cups all-purpose flour in a large bowl and add the 1 cup cold unsalted butter cut into small cubes. Using a pastry cutter or your fingers, work the butter into the flour until you achieve pea-sized crumbs with some larger butter pieces remaining. This cold butter method creates flaky layers—don't overwork the dough or you'll develop gluten and lose that tender texture.
Add the 1 tbsp finely chopped fresh rosemary, 1 tbsp fresh thyme leaves, 1.5 tsp coarse sea salt, and 0.5 tsp Diamond Crystal kosher salt. Mix gently with a fork or your fingers until the herbs are evenly distributed throughout the crumbly mixture. The herbs will infuse flavor into every bite of crust, making this more than just a vessel for your filling.
🍳 Step 2: Incorporate Wet Ingredients for Cohesive Dough
In a separate small bowl, whisk together the 0.5 cup ice water and 1 whole large egg. The ice water prevents the butter from melting too quickly, while the egg adds structure and richness. Gradually pour the liquid mixture into the flour-butter combination, mixing gently with a fork or wooden spoon until the dough just comes together.
Be careful not to overmix—just combine until the dough forms a shaggy mass that holds together when pressed. If it's too dry, add 1 teaspoon ice water at a time until cohesive. The dough should be cold to the touch and slightly crumbly, which is perfect for rolling. Wrap the dough in plastic wrap and refrigerate for at least 30 minutes (up to 2 hours) to fully chill.
🔪 Step 3: Roll and Cut the Crust for Lattice Perfection
On a lightly floured surface, roll out the chilled dough to a 12x15-inch rectangle about ⅛-inch thick. Keep the rest of the dough wrapped in plastic to prevent warming. For the lattice, use a sharp knife or pizza cutter to make 1-inch wide strips running horizontally across the rectangle, leaving ½-inch spaces between cuts. Don't cut all the way through—just score the top layer to create clean separation lines.
Make vertical cuts as well, but leave every other strip uncut vertically. This creates the classic lattice pattern where some strips remain connected while others can be lifted to create windows. The herb-infused dough will give your pot pie that professional restaurant quality with every bite. Brush the top with a mixture of 1 tbsp granulated sugar and 1 tbsp water for a golden finish.
🔥 Step 4: Blind-Bake for Structural Support
Preheat your oven to 375°F. Line a baking sheet with parchment paper and arrange the lattice crust on top. For blind baking, fill the crust with pie weights or dried beans to prevent puffing. Bake for 15 minutes, then remove the weights and bake for an additional 10-12 minutes until the edges are golden brown and the lattice is crisp. The herb aromas will intensify as it bakes, creating that irresistible savory scent.
For extra flavor, brush the baked crust with melted butter after removing it from the oven. This step ensures your crust holds its shape perfectly when filled with your savory mixture, creating that signature pot pie texture where every bite delivers both crust and filling in perfect harmony.
Pro Tips For Making Savory Pot Pie Crust
- CHOP ROSMARY FINE: Skip the whole sprigs—finely mince the rosemary with your fingers or a knife until it’s almost paste-like. This lets the flavor dissolve into the butter and dough instead of sitting as bitter chunks. (Yes, it looks weird, but your crust will taste like it’s been kissed by a rosemary bush.)
- CUT BUTTER IN SMALLER PIECES: Use ½-inch cubes of cold butter, not big hunks. Smaller pieces melt evenly during baking, creating pockets of flaky layers instead of one big greasy puddle. I learned this the hard way—my first attempt had butter pools that made the crust soggy.
- WORK FAST WITH ICE WATER: Keep your ice water in the freezer until you’re ready to add it. The dough should come together with minimal handling—if it’s sticky, add just a splash more. Overworking it turns the crust into a chewy mess, not a tender, melt-in-your-mouth layer.
- EGG WASH AFTER SHAPING: Brush the egg wash after you’ve tucked the edges into the filling, not before. This seals the crust properly and prevents the filling from leaking out when it bakes. (I used to do it early, and my pot pies looked like they’d been attacked by a curious dog.)
Serving suggestions for this recipe
Classic Pairings
Serve your pot pie with a simple green salad dressed with balsamic vinaigrette—the acidity cuts through the richness beautifully. I love using mixed greens with shaved fennel and lemon zest for a refreshing contrast.
For a heartier option, try roasted Brussels sprouts with pancetta—their caramelized edges complement the lattice perfectly.
Beverage Pairings
A crisp white wine like Sauvignon Blanc or Chardonnay balances the savory flavors without overpowering them. For beer lovers, a Belgian witbier with its citrusy notes or a light lager like Peroni keeps the meal refreshing. Avoid heavy reds or sweet drinks—they can make the crust taste flat.
Garnish for Wow Factor
Add fresh parsley or thyme sprigs on top just before serving to brighten the presentation and add a pop of color. A sprinkle of flaky sea salt enhances the crust’s flavor, while a drizzle of truffle oil (just ½ teaspoon) elevates the dish to gourmet status.
Keep it simple—no need to overcomplicate!
Make-Ahead Serving
Assemble the pot pie completely, then refrigerate for up to 24 hours before baking. This lets flavors meld beautifully. For a crowd, bake the pie 30 minutes ahead and reheat at 350°F for 15 minutes to restore crispness.
Serve with warm crusty bread or buttery dinner rolls for soaking up every last bite.
Kid-Friendly Touches
Cut the lattice into fun shapes with cookie cutters before baking—stars, squares, or circles make it playful yet still impressive. For picky eaters, serve the filling separately in a bowl with a side of crust for dipping.
A small vanilla ice cream scoop on top turns it into a comforting dessert-like treat.
Dessert Transition
End the meal with a light dessert like lemon posset or chocolate-dipped strawberries to cleanse the palate. The tartness of citrus or the richness of dark chocolate contrasts perfectly with the savory pie. Avoid heavy desserts—they can leave you feeling overstuffed after such a satisfying main course.
Nutrition facts
Frequently asked questions
Can I make this herb-infused crust without fresh herbs?
Yes! Use ½ teaspoon dried rosemary and ½ teaspoon dried thyme instead, but toast them first in a dry pan for 30 seconds to intensify the flavor. The crust will still taste delicious, though fresh herbs provide a brighter aroma. Store-bought dried herbs work too, but avoid the kind with salt added.
Why did my lattice crust turn out soggy?
Soggy crusts usually happen from steam or underbaking. Always blind-bake the lattice for 15 minutes with pie weights, then bake uncovered until golden. For extra protection, brush the baked crust with melted butter before adding filling. If your filling is very wet, pre-bake it slightly to reduce moisture.
Can I use this crust for other dishes besides pot pie?
This lattice works beautifully for quiches, savory tarts, or even as a topping for casseroles. The herb-infused flavor pairs well with anything from spinach and cheese to roasted vegetable fillings. Just adjust baking times—lattice crusts need 10-15 minutes less than full pie crusts.
How do I fix uneven lattice strips?
Use a sharp knife or pizza cutter for clean cuts, and press firmly but gently to avoid dragging the dough. If strips look uneven, gently stretch them back into place before baking. For extra precision, roll the dough slightly thicker (⅛-inch) to prevent tearing. A ruler helps keep cuts straight and consistent.
Is this crust gluten-free?
No, this recipe uses all-purpose flour, but you can adapt it with a 1:1 gluten-free flour blend (like Bob’s Red Mill 1-to-1). Chill the dough longer (1 hour) since gluten-free doughs are stickier. Expect a slightly denser texture, but the lattice technique still works. Add ½ teaspoon xanthan gum if your blend doesn’t include it.