
Main Courses
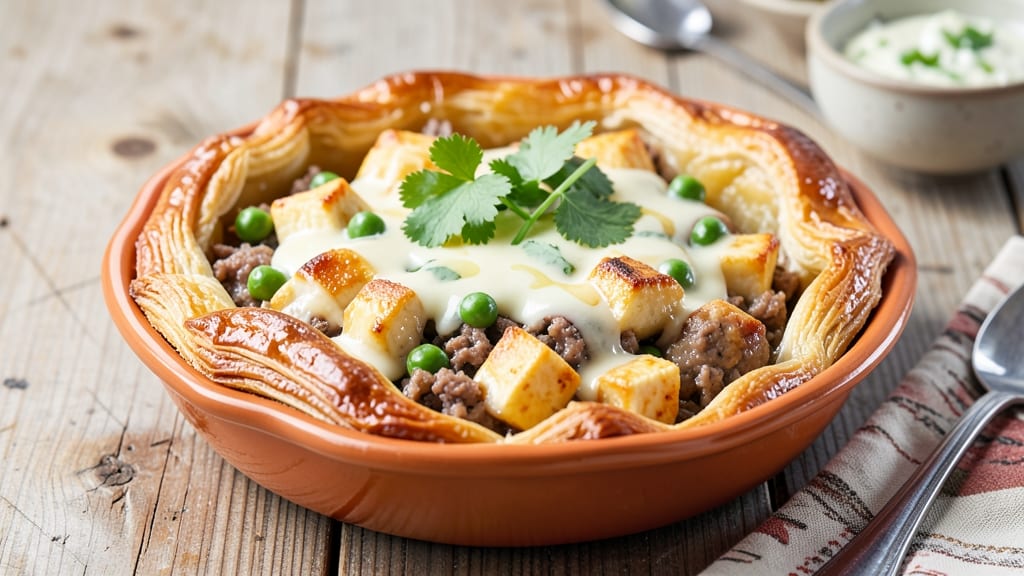
This samosa pot pie recipe transforms a beloved Indian street food into an elegant, one-dish wonder—flaky pastry cups cradling spiced potato-pea-paneer filling and crowned with a golden, buttery crust. The secret lies in balancing traditional samosa flavors with a modern twist: a creamy yogurt drizzle that ties everything together.
I developed this recipe after years of perfecting the art of blind-baking pastry while keeping the filling rich, aromatic, and perfectly seasoned.
The beauty of this dish is its versatility—you can use store-bought puff pastry for a shortcut or make homemade dough for that extra-crispy finish. The filling gets its depth from cumin, coriander, and garam masala, while the peas and paneer add texture and protein.
What makes it special is the way the spices caramelize during baking, infusing the crust with warm, earthy notes that turn every bite into a flavor explosion.
By the time it emerges from the oven, you’ll have a golden, bubbling masterpiece with layers of crispy pastry, tender filling, and a creamy yogurt drizzle that balances the richness. The aroma alone—spiced potatoes, toasted cumin, and buttery pastry—will have everyone at the table asking for seconds.
This is comfort food elevated: hearty enough for a weeknight dinner but impressive enough for guests.
Serve with a side of cool cucumber raita or garlic naan to complete the meal. The best part? Leftovers reheat beautifully, making it perfect for meal prep. Let’s get started on this fusion favorite that brings the flavors of samosas to your dinner table in a whole new way.
Ingredients for samosa pot pie
Puff pastry, spiced potatoes, and creamy yogurt drizzle—this fusion dish brings samosa flavors to your dinner table.
| Ingredient | Amount | Notes |
|---|---|---|
| Puff Pastry Sheets 🥧 | 2 sheets | Store-bought or homemade, thawed |
| Russet Potatoes 🥔 | 3 lb | Medium size, peeled and cubed |
| Green Peas 🌱 | 1 ½ cups | Fresh or frozen, thawed |
| Paneer Cheese 🧀 | 12 oz | Cubed, firm variety |
| Plain Yogurt 🥛 | 1 cup | Full-fat for creaminess |
| Unsalted Butter 🧈 | ¾ cup | Cold, cubed for pastry |
| Heavy Cream 🥛 | ½ cup | For yogurt drizzle |
| Garam Masala 🌶️ | 1 ½ tsp | Ground, for spiced filling |
| Ground Cumin 🌿 | 1 tsp | Toasted for depth |
| Ground Coriander 🌿 | 1 tsp | Freshly ground preferred |
| Turmeric Powder 🌶️ | ½ tsp | For vibrant color |
| Salt 🧂 | 1 ½ tsp | Kosher or sea salt |
| Black Pepper 🌶️ | ½ tsp | Freshly ground |
| Garlic Cloves 🧄 | 4 cloves | Minced for filling |
| Onion 🧅 | 1 whole | Yellow, finely diced |
The puff pastry is non-negotiable for that crispy, flaky magic. Store-bought sheets like Pillsbury or Whole Foods brand save time, but homemade dough gives that extra-crispy finish. Look for sheets with good marbling—thin layers mean better flakiness. For the filling, fresh paneer from the Indian market section is ideal, but the block cheese in the dairy aisle works too. Just press out excess moisture. The potatoes should be waxy for texture, but russets work if you boil them first to soften. I always double-check the peas—fresh are great, but frozen (thawed) are fine if you're in a pinch.
No puff pastry? Phyllo dough is a good swap, but it won’t be as flaky. Short on paneer? Extra-firm tofu pressed and cubed works, though it won’t melt like paneer. The garam masala is the soul of this dish—MDH or Everest brand from the Indian grocery store is best, but any ground blend will do. Fresh spices make a difference, but pre-ground works if it’s labeled ‘freshly ground.’ Want more richness? Add 2 tbsp cream cheese to the filling. The yogurt drizzle can be made ahead—just whisk it with cream and a pinch of salt before serving.
Make the filling a day ahead—it tastes even better after the flavors meld. Store the yogurt drizzle separately in the fridge, then whisk before serving. The assembled pie keeps for 2 days in the fridge, but reheat gently to avoid soggy pastry. Freeze unbaked pies for 2 months—just bake straight from frozen, adding 10 minutes. The aroma alone will have everyone rushing to the table, so don’t wait to serve this showstopper.
Why You'll Love This Recipe
- Here’s what sold me: that crispy, flaky pastry shell with a soft, creamy filling inside. The yogurt keeps it rich but light, while the paneer adds a satisfying bite. Honestly, it’s the kind of dish where every bite feels like a little victory—especially when my kids fight over the last piece.
- I’ll be real: puff pastry isn’t cheap, but it stretches far when you’re feeding a crowd. A single sheet covers a whole dish, and the rest of the ingredients—potatoes, peas, paneer—are all pantry staples. It’s the kind of recipe that makes me feel fancy without breaking the bank, and leftovers? They’re just as good reheated as they are fresh.
Step-by-step instructions for samosa pot pie
Here's how to transform flaky puff pastry into golden samosa-shaped pies packed with spiced potato and paneer filling.
Prepare the Spiced Potato and Paneer Filling
In a large pot, boil the 3 lb Russet Potatoes in salted water until fork-tender, about 15-20 minutes. Drain well and let cool slightly before peeling and roughly mashing them with a fork—you want some texture, not a puree.
In a separate pan, melt 0.5 cup Unsalted Butter over medium heat. Add the 1 whole Onion (finely diced) and sauté until translucent, about 5 minutes. Add the 4 cloves Garlic Cloves (minced) and cook for another 1 minute until fragrant. Stir in 1.5 tsp Garam Masala, 1 tsp Ground Cumin, 1 tsp Ground Coriander, 0.5 tsp Turmeric Powder, 1.5 tsp Salt, and 0.5 tsp Black Pepper, toasting the spices for 30 seconds to release their aromas.
Add the mashed potatoes, 1.5 cups Green Peas, and 12 oz Paneer Cheese (cubed) to the spiced butter. Cook for 5-7 minutes, stirring occasionally, until the peas are heated through and the mixture reaches 160°F internally. Remove from heat and let cool completely before filling the pastry cups.
Assemble the Samosa Pot Pie Cups
Preheat your oven to 375°F. Roll out one of the 2 sheets Puff Pastry Sheets on a lightly floured surface. Using a 3-inch round cutter, cut out circles for the pie bases. Gently press each circle into a greased mini muffin tin or small ramekin, creating a shallow cup shape. Chill in the freezer for 10 minutes to firm up.
Fill each pastry cup with about 2 tablespoons of the spiced potato and paneer mixture, pressing down gently to compact the filling. Be careful not to overfill—you want room for the top to seal properly. In a small bowl, mix 1 cup Plain Yogurt with 0.5 cup Heavy Cream and set aside.
Seal and Bake the Pot Pies
Roll out the second sheet of puff pastry and cut additional 3-inch circles for the tops. Brush the edges of the filled pastry cups with a little water, then place a pastry top on each, pressing firmly around the edges to seal. Use a fork to crimp the edges decoratively, creating a classic samosa shape. Cut a small slit in the top of each pie to allow steam to escape.
Brush the tops with the yogurt-cream mixture for a golden finish. Bake for 25-30 minutes until the pastry is deep golden brown and puffed. The filling should be bubbling hot when you check with a toothpick. Let cool for 5 minutes before serving—this prevents the filling from spilling out when you remove them from the tin.
Serve Warm with Yogurt Drizzle
Carefully remove the pot pies from the tin and transfer to a serving platter. Drizzle any remaining yogurt-cream mixture over the top for extra richness. Serve warm with a side of mint chutney or a sprinkle of fresh cilantro for a burst of freshness. Each bite delivers a perfect balance of flaky, crispy pastry and spiced, creamy filling—just like a samosa, but in pie form!
Pro Tips For Making Samosa Pot Pie
- PARE POTATOES UNEVENLY: Cut them in lumpy chunks—no need for perfect cubes. The uneven edges caramelize faster in the yogurt sauce, giving that deep, golden flavor you’d expect from a restaurant version. (Yes, I’ve tried the cube method. It works, but this is faster and tastes better.)
- SALT THE YOGURT SAUCE: Don’t hold back—add 1.5 teaspoons of salt per cup of yogurt. The paneer and peas soak up the flavor, and the sauce will taste bland if you skimp. I learned this the hard way after making a batch where the yogurt tasted like it was missing something.
- VENT THE PASTRY: Before baking, pierce the puff pastry with a fork in a crisscross pattern. It prevents a messy puff-up and lets steam escape, so the filling stays juicy instead of turning into a soggy mess. (Trust me, your future self will curse you if you skip this.)
- COOK PEAS AL DENTE: Boil the peas for 2 minutes less than the package says—you’ll finish them in the oven. Overcooked peas turn mushy and water down the filling. A quick test: Taste one raw—if it’s still crisp, you’re good. (I’ve ruined more pies than I’ll admit by ignoring this.)
Pro cooking tips for perfect results
Perfect Pastry Handling
Keep your puff pastry cold at all times—I mean it! Work on a chilled surface and use parchment paper between layers if stacking. When rolling out, use a light dusting of rice flour instead of all-purpose flour to prevent sticking.
For extra crispiness, brush the pastry cups with melted butter before baking. 🥧
If your pastry shrinks during baking, it’s likely too warm. Pop the assembled pies in the freezer for 10 minutes before baking to firm up the edges.
For a restaurant-quality finish, use a pastry brush with egg wash (1 egg yolk + 1 tbsp water) on the tops before the final 5 minutes of baking.
Filling Texture Secrets
Your filling should be chunky, not mushy—think of it like a thick, spiced mash with visible potato pieces. If it’s too wet after cooking, spread it on a baking sheet and chill for 15 minutes to firm up.
For extra richness, stir in 2 tbsp Greek yogurt into the filling before assembling. 🧀
Don’t skip toasting the spices! Bloom them in the butter for 30 seconds to wake up their flavors. If your peas are frozen, thaw and drain them thoroughly—excess moisture makes the filling soggy. For a smoky depth, add ½ tsp smoked paprika to the spice mix.
Baking Like a Pro
Use mini muffin tins or small ramekins for even baking. If using tins, grease them well with butter or oil to prevent sticking. For a crispier bottom, bake on the middle rack of your oven.
The pies are done when the pastry is golden brown and the filling is bubbling hot—165°F internally. 🔥
Let the pies rest for 5 minutes after baking before removing from the tin. This prevents the filling from spilling out when you transfer them. For extra shine, broil for 1-2 minutes at the very end—just watch them like a hawk to avoid burning!
Make-Ahead Magic
Assemble the pies unbaked and refrigerate for up to 24 hours before baking. For freezing, assemble and bake as directed, then cool completely. Store in an airtight container for up to 3 days or freeze for 2 months.
To reheat, warm in a 350°F oven for 10 minutes—this keeps the pastry crispy.
The filling can be prepped 2 days ahead and stored in the fridge. Reheat gently in a saucepan with a splash of water to prevent drying out. The yogurt drizzle keeps for 3 days in the fridge—just whisk before serving for the creamiest finish. ✨
Nutrition facts
Frequently asked questions
Can I make this recipe with store-bought puff pastry? Store-bought puff pastry works perfectly and saves time. Look for high-quality brands with good marbling for maximum flakiness. Just
How do I prevent the filling from leaking out?
Press the filling down firmly but don't overfill the pastry cups—leave room for the top to seal. Chill the assembled pies in the freezer for 10 minutes before baking to firm up the edges. Also, cut a small slit in the top to allow steam to escape without causing leaks.
What can I substitute for paneer?
For a vegetarian option, use extra-firm tofu pressed and cubed. For a non-vegetarian version, try shredded cooked chicken or diced ham. If you prefer dairy, feta cheese works well but will melt differently. Adjust the filling consistency by adding a bit more yogurt if needed.
Can I make these ahead of time?
Yes! Assemble the pies unbaked and refrigerate for up to 24 hours before baking. For freezing, assemble and bake as directed, then cool completely. Store in an airtight container for up to 3 days or freeze for 2 months. Reheat in a 350°F oven for 10 minutes to keep the pastry crispy.
What's the secret to extra-crispy pastry?
Keep everything cold while working with the pastry. Use rice flour instead of all-purpose flour when rolling out to prevent sticking. Brush the pastry cups with melted butter before baking, and bake on the middle rack for even heat distribution. For a restaurant finish, use an egg wash on the tops before the final 5 minutes of baking.