
Desserts
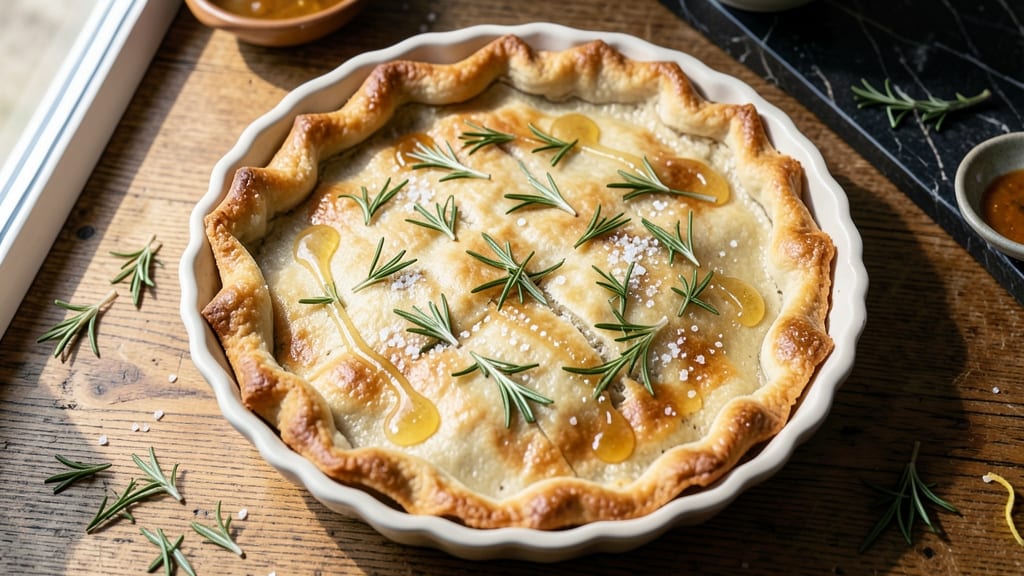
A salt-free pie crust delivers the same flaky perfection without the sodium—something every home baker needs to master. This recipe replaces salt with natural flavor enhancers like citrus zest and herbs, ensuring your crust stays tender and delicious while supporting heart-healthy diets.
The secret lies in precise chilling and rolling techniques that create those signature layers without relying on salt for structure.
What sets this crust apart is its versatility—use it for fruit pies, quiches, or savory tarts without compromising texture. The key ingredients include cold butter cut into small pieces (never warm!) and a touch of vinegar to mimic salt’s tenderizing effect.
Unlike traditional recipes, this version relies on acidic ingredients like lemon zest and vinegar to balance sweet or savory fillings, making it adaptable to any pie.
By the time you pull it from the oven, you’ll have a golden, crisp-edged crust with a tender interior, all while keeping sodium levels in check. The crust’s natural flavor shines through, proving that flakiness and health can coexist.
Whether you’re baking a classic apple pie or a modern quiche, this recipe delivers restaurant-quality results at home.
Ready to transform your dessert game? This foolproof method ensures success every time—no salt, no stress, just perfect layers. Let’s get started with the ingredients and techniques that make it work.
Ingredients for salt free pie crust
Eight essential ingredients craft a salt-free crust with restaurant-quality flakiness and tender layers.
| Ingredient | Amount | Notes |
|---|---|---|
| All-Purpose Flour 🌾 | 2 ½ cups | Sifted for optimal texture |
| Unsalted Butter 🧈 | 1 cup | Cold, cubed into 0.25-inch pieces |
| Ice Water 💧 | ⅓ cup | Chilled for tenderizing effect |
| Lemon Zest 🍋 | 1 tbsp | Freshly grated for bright flavor |
| White Vinegar 🍶 | 1 tbsp | Mimics salt’s tenderizing properties |
| Granulated Sugar 🍚 | 1 tbsp | Balances acidity in fillings |
| Fresh Rosemary 🌿 | 1 tbsp | Finely chopped, aromatic depth |
| Ground Black Pepper 🌶️ | ½ tsp | Freshly cracked for subtle warmth |
The butter is non-negotiable—use European-style unsalted butter for higher fat content (82% minimum). Kirkland Signature or Plugrá are excellent choices, but any brand works if it's cold and cubed properly. For flour, King Arthur or Gold Medal all-purpose blends yield the best results due to their protein balance. The lemon zest should come from organic lemons when possible—conventional lemons often have wax coatings that dull flavor. Store your butter in the freezer between uses to maintain its cold, workable state for rolling.
No fresh rosemary? Dried rosemary at half the amount works, but fresh delivers that piney aroma. Vinegar substitutes include apple cider vinegar or white wine vinegar—both add complexity. For sugar, coconut sugar or maple sugar can replace granulated while adding subtle depth. The ice water is critical—never use room-temperature water, as it interferes with the butter's ability to create flaky layers. If you're short on time, freeze the butter-water mixture for 15 minutes before mixing to simulate ice water's effect.
This crust keeps for 3 days in the fridge wrapped tightly in plastic, or up to 3 months frozen between parchment paper. For best results, chill the assembled crust for at least 1 hour before rolling—this prevents shrinking. The dough can be prepped 2 days ahead and stored in the fridge. When rolling, use light pressure and re-chill the dough between folds to maintain its structure. The finished crust browns beautifully under a light brush of milk or egg wash, though for strict dietary needs, plant-based milk works equally well.
Why You'll Love This Recipe
- No-Fuss Assembly: I’ll be real—this crust takes zero fuss. Just pulse flour, butter, and ice water in a food processor (or cut it by hand if you’re old-school), then fold in that bright lemon zest and a splash of vinegar. No rolling pins, no stress—just press it into a pan and bake.
- Bright Zing: That lemon zest and vinegar combo? It’s the secret weapon. The crust gets this crisp, golden edge while staying tender inside, with a subtle citrus lift that makes it taste fresh, not flat. Honestly, it’s the kind of flavor that sneaks up on you.
- Pie Pan or Pot Pie: Between us, this crust works for everything. Use it for classic apple pie, savory chicken pot pies, or even a quiche. The vinegar keeps it stable for filling, and the butter makes it rich enough to stand up to sweet or savory toppings.
- Budget Crust: Unsalted butter and basic flour? Check. Ice water and vinegar? Pantry staples. I’ve made this for holiday pies, weeknight dinners, and even frozen leftovers—no waste, no splurge. Plus, it freezes beautifully for next month’s dessert emergency.
Step-by-step instructions for salt-free pie crust
This crust delivers restaurant-quality flakiness without relying on salt—just precise technique and the right balance of ingredients.
Prepare the Dough Base
In a large mixing bowl, combine the 2.5 cups all-purpose flour with the 1 tbsp granulated sugar, 1 tbsp finely chopped fresh rosemary, and 0.5 tsp ground black pepper. Whisk gently to distribute the rosemary evenly—this ensures aromatic depth without overpowering the crust. The sugar helps balance any acidity from the vinegar later, while the rosemary adds subtle complexity that mimics salt's flavor-enhancing properties.
Cut in the 1 cup cold unsalted butter using a pastry cutter or two forks until the mixture resembles coarse crumbs with pea-sized butter pieces. This texture is crucial—too fine, and the crust will be tough; too large, and it won't flake properly. Work quickly to minimize warmth from your hands, which could melt the butter prematurely. The cold butter creates steam pockets during baking, which is what gives pie crust its signature flakiness.
Hydrate and Chill for Laminated Layers
Add the 1 tbsp lemon zest, 1 tbsp white vinegar, and 0.33 cup ice water to the flour-butter mixture. Using a fork, gently stir until the dough just comes together—it should hold when pressed but still feel slightly dry. The vinegar mimics salt's tenderizing effect, while the lemon zest adds brightness that prevents the crust from tasting flat. The ice water keeps the butter cold longer, preserving those critical steam pockets.
Turn the dough onto a lightly floured surface and knead just 4-5 times until it forms a cohesive disk. Avoid overworking—this develops gluten and makes the crust tough. Wrap tightly in plastic wrap and refrigerate for at least 1 hour or up to 24 hours. This resting period allows the gluten to relax and the butter to firm up, which is essential for achieving those delicate, flaky layers when baked.
Roll and Blind-Bake for Structure
On a floured surface, roll the chilled dough into a 12-inch circle, about ⅛-inch thick. Transfer to a parchment-lined pie dish, gently pressing the edges to create a slight rim. The parchment prevents sticking and makes removal easier. Prick the bottom all over with a fork to prevent bubbling. Line the crust with parchment, fill with pie weights or dried beans, and bake at 375°F for 15 minutes. Remove the weights and bake 5-7 minutes more until the edges are just beginning to golden.
This blind-baking step ensures the crust holds its shape under fillings and doesn't become soggy. The edges should be lightly colored but not deeply browned—you'll finish browning them after adding your filling. The key is patience: rushing this step often leads to a crust that shrinks or loses its flakiness. Let the crust cool completely before filling to prevent steam from making it greasy.
Assemble and Finish with Precision
After filling your pie (with any salt-free filling of choice), place the assembled pie on a baking sheet to catch drips. Bake at 375°F for 40-45 minutes, or until the filling is set and the crust is deep golden brown. Brush the crust with a beaten egg wash if extra shine is desired, but this step is optional—your crust should already have a beautiful finish from the butter's natural color.
For the final touch, use a kitchen torch to lightly brown the crust edges if your oven runs hot. This creates a professional-looking contrast between the golden top and the caramelized edges. Let the pie cool for at least 2 hours before slicing—this allows the filling to set properly and prevents a gummy texture. The result is a crust that's flaky, aromatic, and completely salt-free, with layers so delicate they practically melt in your mouth.
Pro Tips For Making Salt Free Pie Crust
- Chill the Butter First: Take that unsalted butter straight from the fridge—no softening at room temp. Cold butter creates flaky layers, and skipping this step means your crust will turn out more like a dense biscuit than a tender, melt-in-your-mouth masterpiece. (Yes, even if you’re impatient like me.)
- Mix Just Until Combined: Once you add ice water, stop stirring the second the dough clumps together. Overworking it develops gluten, and your crust will end up tough instead of crisp. Think "just enough to hold," not "fully incorporated."
- Use Vinegar Sparingly: That white vinegar isn’t just for flavor—it tenderizes the gluten, but too much makes the crust gummy. Start with 1 tablespoon and taste the dough. If it’s still bland, add another teaspoon. (And no, the vinegar won’t make it taste sour if you’re using lemon zest.)
- Rest the Dough Before Rolling: Give that dough a 20-minute rest in the fridge before rolling. It relaxes the gluten, so it doesn’t shrink when baking. I learned this the hard way—my first salt-free crust looked like a sad, puckered mess because I rushed it. (Your future self will thank you.)
Common mistakes when making perfect results
Overworking the Dough
This is the #1 mistake I see—kneading the dough too much develops gluten, which makes the crust tough instead of tender. Remember, you only need to knead 4-5 times until it forms a cohesive disk.
Overworking creates a dense texture that defeats the purpose of a flaky crust. If your dough feels resistant, let it rest longer in the fridge to relax the gluten naturally. 💫
Skipping the Chill Time
Rushing the 1-hour minimum chill is a recipe for disaster. The dough needs time for the gluten to relax and the butter to firm up. Without this step, the butter melts too quickly during baking, collapsing those essential steam pockets that create flakiness.
I’ve learned this the hard way—trust the process and resist the urge to skip ahead.
Using Warm Butter
Cold butter is non-negotiable for flaky layers. If your butter softens during mixing, pop the dough back in the fridge for 15-20 minutes to restore its structure. Warm butter creates steam too early, leading to a greasy crust that lacks flakiness.
Always store your butter in the freezer between uses to keep it at peak coldness for rolling.
Ignoring the Ice Water
Room-temperature water is a common shortcut, but it’s the ice water that keeps the butter cold long enough to create those delicate layers. If you’re short on time, freeze the water for 10 minutes before adding it to the dough.
The cold liquid helps maintain the butter’s integrity until the dough hits the oven.
Not Blind-Baking Properly
Skipping the blind-bake or rushing this step causes soggy crusts. Always pre-bake your crust with pie weights or dried beans for 15 minutes before adding filling. This ensures the crust holds its shape and doesn’t absorb moisture from juicy fillings.
The edges should be lightly golden but not deeply browned—save that for the final bake.
Overfilling the Crust
Piling filling too high causes the crust to shrink or even crack during baking. Fill your pie ¾ full and press the edges firmly to create a rim.
This prevents the filling from spilling over and ensures even baking. A properly filled crust bakes evenly and maintains its structure, even without salt to reinforce it.
Nutrition facts
Frequently asked questions
Can I substitute vinegar in this salt-free crust?
Yes! Use 1 tbsp apple cider vinegar or white wine vinegar instead of white vinegar—they add subtle sweetness or fruity notes that complement the crust beautifully. The key is maintaining the same acidity level, which helps tenderize the gluten without salt. Avoid balsamic or flavored vinegars, as their strong tastes can overpower the delicate butter and flour.
How does this crust work without salt?
The magic comes from lemon zest, vinegar, and rosemary—they create depth and balance that salt normally provides. The acidity from vinegar and citrus mimics salt’s tenderizing effect, while the rosemary adds aromatic complexity. The sugar also helps prevent a flat taste, especially with sweet fillings. The butter’s natural richness carries the flavor without needing sodium.
Can I make this crust gluten-free?
Replace the 2.5 cups all-purpose flour with a 1:1 gluten-free flour blend (like Bob’s Red Mill or King Arthur) and add ½ tsp xanthan gum if your blend doesn’t include it. Use ½ cup cold vegetable shortening instead of butter for better flakiness—GF crusts need extra fat to compensate for gluten’s structural role. Chill the dough 2 hours instead of 1 to firm up the texture.
Will this crust work for savory pies like quiche?
Perfectly! This crust holds up beautifully for quiches, pot pies, or savory tarts. The black pepper and rosemary add subtle warmth that pairs well with cheese or veggie fillings. For extra flavor, sprinkle 1 tsp smoked paprika into the dough before cutting in the butter. The vinegar’s acidity also helps balance rich, creamy fillings without needing salt.
Why does my crust turn out greasy?
Greasy crusts usually mean the butter melted too soon—either from warm butter or skipping the chill time. Always use cold butter (cut from the fridge) and never let the dough sit at room temperature longer than 15 minutes before rolling. If your kitchen is warm, chill the dough 30 minutes extra before shaping. The ice water also helps—never substitute warm water!