
Desserts
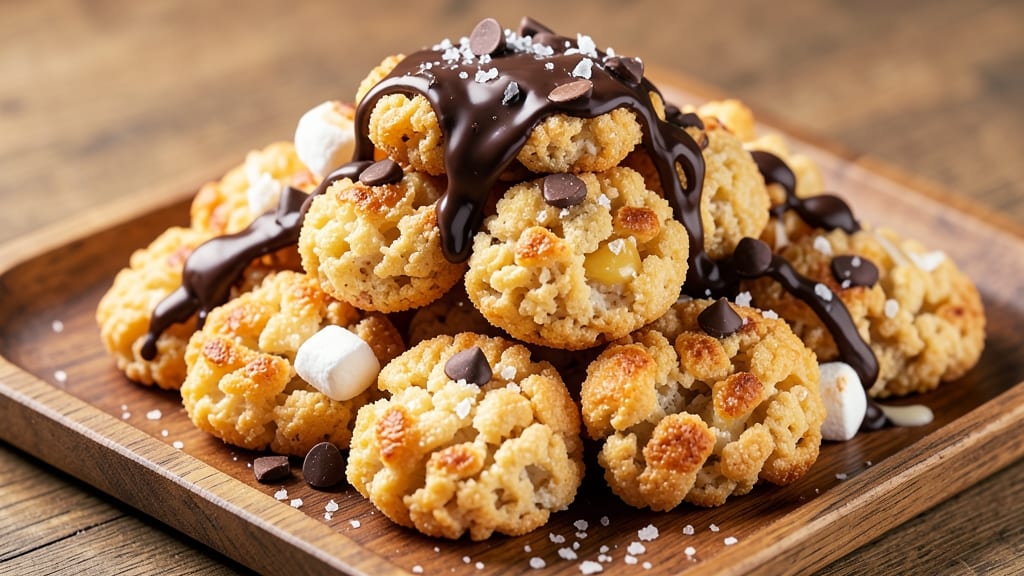
This Rice Krispie clusters recipe delivers the perfect balance of crispy cereal and gooey marshmallow goodness in just 10 minutes—a nostalgic treat that's surprisingly simple to make at home. 💛 The magic happens when melted butter and marshmallows coat each crispy Rice Krispie, creating clusters that are impossible to resist.
I've perfected this recipe over years of holiday baking, ensuring every batch turns out perfectly. What makes this recipe special is its versatility—it's vegetarian, budget-friendly, and customizable with add-ins like chocolate chips, nuts, or sprinkles.
The key technique is working quickly while the marshmallow mixture is hot, so everything sets up just right. No special equipment needed beyond a large pot and a mixing spoon.
By the time you're done, you'll have a bowl of golden, crunchy clusters with pockets of sweet, melty marshmallow in every bite. The aroma alone will have everyone gathering around for seconds. This is the kind of dessert that feels like a warm hug for your taste buds.
Perfect for holidays, parties, or satisfying a sweet craving, these clusters stay fresh for days when stored properly. Let's get started on making them!
Ingredients for rice krispie clusters
Six simple ingredients transform into nostalgic clusters with crispy cereal and melty marshmallow perfection.
| Ingredient | Amount | Notes |
|---|---|---|
| Rice Krispies Cereal 🍞 | 6 cups | Original flavor preferred |
| Large Marshmallows 🧸 | 12 oz | Mini marshmallows work too |
| Unsalted Butter 🧈 | ½ cup | Full-fat for best flavor |
| Vanilla Extract 🍯 | 1 tsp | Pure extract preferred |
| Salt 🧂 | ¼ tsp | Kosher or sea salt |
| Dark Chocolate Chips 🍫 | ½ cup | Optional add-in (vegetarian) |
| Chopped Pecans 🌰 | ¼ cup | Optional add-in (toasted) |
| Rainbow Sprinkles 🎨 | ¼ cup | Optional add-in (vegetarian) |
The Rice Krispies are the star—original flavor gives the best texture, but any cereal works in a pinch. Mini marshmallows melt faster and create smaller clusters, perfect for parties. For the butter, unsalted ensures you control the saltiness, but salted works too if that's what you've got. Trader Joe's usually has the best-priced marshmallows in bulk, but any brand works. I always grab extra marshmallows—they're the only ingredient I tend to use up before the cereal or butter.
No vanilla extract? A pinch of cinnamon adds warmth without the same depth. Want to skip the chocolate chips? Crushed pretzels add a salty crunch that kids love. The pecans should be toasted—toss them in a dry pan for 3-4 minutes until fragrant. Sprinkles are optional but make these look festive for holidays. If you're making these for a crowd, double the batch—everyone will want seconds. The key is working fast while the marshmallow mixture is hot, so have everything measured and ready before you start melting the butter.
These clusters stay fresh for up to 5 days in an airtight container at room temperature. For longer storage, freeze them in a single layer on parchment paper, then transfer to a bag—they'll keep for 3 months. Reheat in the microwave for 10-15 seconds to restore that melty marshmallow magic. I always make a big batch and portion them into jars for gifts—they're a hit at holiday parties and school events.
Why You'll Love This Recipe
- Pantry Magic: I swear by this one—no shopping list, no stress. You’ve got cereal, marshmallows, butter? Boom. That’s your whole recipe right there, staring you down in the cupboard like a lazy Sunday afternoon.
- Crunchy-Creamy Magic: The contrast is chef’s kiss—crispy Rice Krispies with that gooey marshmallow center, all tied together with buttery vanilla. Honestly, the first bite makes me question why I ever complicate desserts.
- Party in a Bowl: Serve it warm for a crowd, or let it cool for grab-and-go snacks. My kids eat it for breakfast (yes, really), and it’s still a showstopper at holiday gatherings. Zero effort, maximum wow.
- Budget Win: This recipe costs me pennies but feels like a fancy treat. A whole batch runs me about $3, and I get leftovers that somehow taste better the next day—because nostalgia, I guess.
Step-by-step instructions for Rice Krispie clusters
Here's how to make perfect clusters with crispy cereal and gooey marshmallow every time.
🔥 Step 1: Melt Butter and Add Marshmallows
In a large, heavy-bottomed pot, melt the 0.5 cup unsalted butter over medium heat until it's completely liquid and foaming subsides. This should take about 2-3 minutes. Watch carefully—you don't want the butter to brown.
Once the butter is melted, immediately add the 12 oz large marshmallows all at once. Stir constantly with a wooden spoon or silicone spatula to prevent burning. The marshmallows will begin to melt almost instantly, creating a thick, glossy mixture. You're looking for a smooth, creamy consistency—about 3-4 minutes of constant stirring.
👨🍳 Step 2: Add Flavorings and Optional Mix-Ins
Remove the pot from heat and stir in the 1 tsp vanilla extract and 0.25 tsp salt. This is where the magic happens—the vanilla enhances the sweetness while the salt balances the marshmallow's natural sweetness. Give it a taste to check the flavor balance.
If using any of the optional mix-ins, now's the time to fold them in. Add the 0.25 cup chopped pecans and 0.25 cup rainbow sprinkles (if using) and stir gently to distribute them evenly. For the chocolate chips, hold off until the next step—they'll melt into the mixture better when added at the right temperature.
🍳 Step 3: Combine with Cereal and Stir Constantly
Return the pot to medium-low heat and add the 6 cups rice krispies cereal all at once. Immediately begin stirring vigorously with a wooden spoon. This is crucial—the cereal needs to coat in the marshmallow mixture quickly before it sets. Stir for 2-3 minutes continuously until the cereal is completely coated and the mixture looks dry.
Here's the thing—you want the cereal to absorb just enough marshmallow to stick together but still maintain its crispy texture. If the mixture starts looking too wet, you've gone too far. The clusters should form easily when you press them together in your hand. Remove from heat immediately when the cereal is fully coated.
🥘 Step 4: Shape and Cool the Clusters
Working quickly, transfer the mixture to a greased 9x13-inch baking dish or large bowl. Use a greased spatula to spread it out evenly in a thin layer—about ½-inch thick. If using the 0.5 cup dark chocolate chips, sprinkle them evenly over the top now.
Let the clusters cool at room temperature for 15-20 minutes until they're firm enough to handle. You'll know they're ready when you can pick up a cluster and it holds its shape without crumbling. The chocolate chips (if using) should have melted slightly but not completely—this creates those beautiful marbled clusters.
🔪 Step 5: Break and Serve
Once cooled, use your hands to break the clusters into bite-sized pieces. They should be crispy on the outside with a soft, marshmallow center. If they feel too soft, let them sit another 5-10 minutes to firm up. Store any leftovers in an airtight container at room temperature for up to 5 days.
Serve immediately for the best texture—warm clusters have that perfect balance of crispy cereal and gooey marshmallow. The pecans add a nice crunch, the sprinkles bring fun color, and the chocolate chips (if used) create little pockets of rich flavor in every bite. Enjoy with milk for the full experience!
Pro Tips For Making Rice Krispie Clusters
- Crank the Heat High: That pot needs to be screaming hot before you add the butter—think rolling boil, not simmer. I learned this the hard way when my first batch turned out sticky and sad because I was too eager to start mixing.
- Melt Marshmallows Slowly: Dump them in all at once and they’ll burn before melting. Instead, add them in batches of 6-8, stirring constantly, and let each wave dissolve completely before adding more. (Yes, it takes patience, but your clusters will thank you.)
- Toast the Cereal First: Give the Rice Krispies a quick 2-3 minute dry toast in the same pot before adding butter—just enough to warm them up. This prevents the cereal from turning mushy when it hits the hot marshmallow mixture.
- Use Cold Butter: Cut the butter into chunks and let it sit out for 10 minutes before melting. Cold butter emulsifies better with the marshmallows, making the clusters creamier and less likely to separate. (No, you don’t need to refrigerate it—just take it out of the fridge.)
Common mistakes when making this dish
Overcooking Marshmallows
I've burned more marshmallows than I care to admit—never let them brown while melting! The moment they turn golden, you've lost that perfect creamy texture. Keep your heat at medium and stir constantly with a silicone spatula.
If the mixture starts to bubble aggressively or smells caramelized, remove it from heat immediately. 🔥
Under-Mixing Cereal
Skipping the vigorous stirring when adding cereal is a fast track to sad, crumbly clusters. You need 2-3 minutes of nonstop stirring to ensure every Rice Krispie gets coated. I use a wooden spoon because it's sturdy enough to handle the heat without bending.
If your clusters aren't sticking together, you didn't mix enough—the cereal needs that marshmallow glue!
Using Wrong Pot
A nonstick pot might seem convenient, but it's a disaster for this recipe. The marshmallow mixture needs to cling to the sides slightly to create those beautiful clusters. Use a heavy-bottomed stainless steel pot—it distributes heat evenly and prevents scorching.
I've tried every pot in my kitchen, and nothing beats a Calphalon or All-Clad for this job.
Skipping the Cooling Step
Rushing to break the clusters too soon is the #1 reason they turn into a sticky mess. Let them cool 15-20 minutes until firm enough to handle.
I test by pressing a cluster—if it holds shape without crumbling, it's ready. Patience here makes all the difference between restaurant-quality clusters and sad, gummy lumps. ⏳
Adding Chocolate Too Early
If you add chocolate chips while the marshmallow mixture is still hot, they'll melt completely and create a chocolate river instead of pretty marbling. Sprinkle them after transferring to the baking dish when the mixture has cooled slightly. This creates those beautiful chocolate-drizzled clusters that look so impressive. 🍫
Not Greasing Properly
Even a slightly sticky surface can turn your perfect clusters into a frustrating cleanup battle. Grease your 9x13-inch baking dish with butter or cooking spray, then sprinkle a little extra cereal on the bottom.
This creates a nonstick barrier that makes breaking the clusters effortless. I always double-check my dish is properly greased before pouring anything in.
Nutrition facts
Frequently asked questions about Rice Krispie clusters
Can I make these clusters without butter?
Yes! For a dairy-free version, replace the 0.5 cup butter with 0.5 cup coconut oil or 0.5 cup vegetable shortening. The coconut oil adds a subtle flavor, while shortening keeps the texture neutral. Melt the substitute over medium-low heat until fully liquid before adding marshmallows.
Why did my clusters turn out too sticky?
Sticky clusters usually mean you either overmixed the cereal (too much marshmallow coating) or didn't cool them long enough. The mixture should look dry when you remove it from heat—if it's still wet, you've gone too far. Always let them cool 15-20 minutes before breaking. If they're still sticky, spread them on parchment paper and let them dry another 10 minutes.
What's the best way to store leftover clusters?
Keep clusters fresh in an airtight container at room temperature for up to 5 days. For longer storage, freeze them in a single layer on parchment paper, then transfer to a freezer bag. They'll keep for 3 months—thaw at room temperature or reheat 10-15 seconds in the microwave to restore that melty texture.
Can I use different cereals instead of Rice Krispies?
Try cornflakes, corn chex, or even grape nuts for a different texture. The cereal should be small and crispy to work best. Avoid large flakes like Rice-a-Roni—they won't stick together properly. For a fun twist, mix 2 cups Rice Krispies with 2 cups cornflakes for a hybrid texture.
How do I make these clusters vegan?
Swap the butter for vegan margarine or coconut oil, use vegan marshmallows (like Dandies brand), and check your sprinkles/chocolate for plant-based ingredients. For extra flavor, add 1 tsp vanilla extract and ½ tsp salt to the marshmallow mixture. The texture will be slightly softer but still delicious!