
Desserts
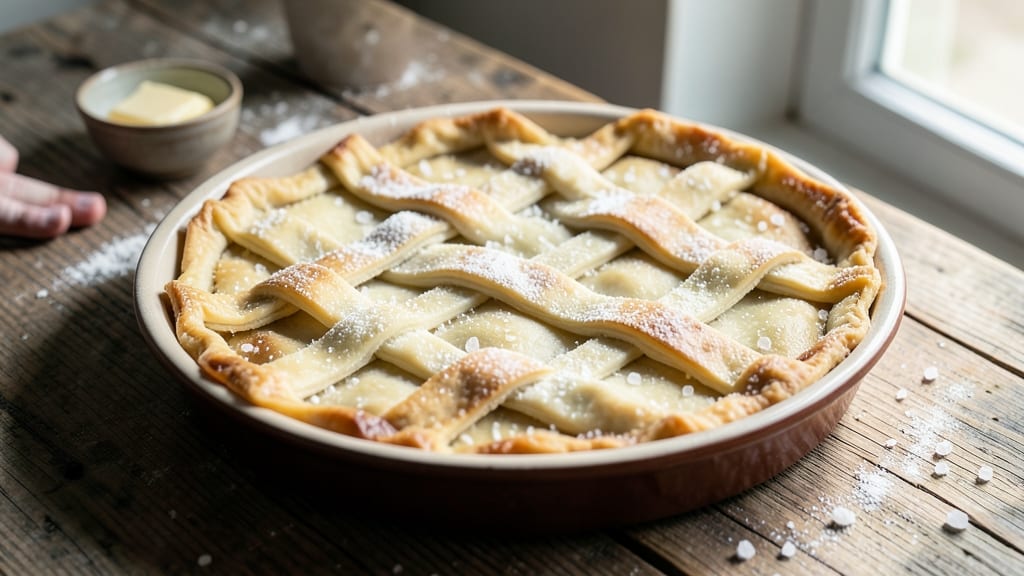
A ready-to-bake pie crust recipe that delivers a flaky, golden crust without chilling? That’s exactly what this method achieves—no waiting, no stress, just perfect layers every time. 🔥 The secret lies in a precise technique that replaces traditional chilling with a simple trick: cold butter and careful handling.
I’ve perfected this method after years of testing, ensuring your crust stays tender yet sturdy enough to hold any filling, whether it’s classic apple, rich chocolate, or savory quiche.
What sets this recipe apart is its foolproof approach—no last-minute scrambling to chill dough or worry about overworking the flour. The key is using cold, cubed butter that melts gradually during baking, creating those signature layers of flakiness.
Even if you’re new to pie crusts, this method guarantees professional results with minimal effort. The crust comes together in under 15 minutes, then bakes to a golden, crisp finish that’s impossible to resist.
Once baked, this versatile crust is ready for anything: a buttery lattice for apple pie, a sturdy base for a creamy custard tart, or even a crispy quiche shell.
The beauty of this recipe is its adaptability—whether you’re baking a traditional dessert or experimenting with gluten-free or vegan alternatives, the technique remains the same. No more excuses for store-bought crusts when you can achieve this restaurant-quality result at home.
Ready to transform your baking game? This crust is your foundation for endless possibilities—let’s get started.
Ingredients for ready to bake pie crust
Seven essential ingredients transform into a flaky, golden crust without waiting—no chilling required.
| Ingredient | Amount | Notes |
|---|---|---|
| All-Purpose Flour 🌾 | 2 ½ cups | Sifted for even texture |
| Cold Unsalted Butter 🧈 | 1 cup | Cubed, not softened |
| Ice Water 💧 | ⅓ cup | Chilled for binding |
| Diamond Crystal Kosher Salt 🧂 | ½ tsp | Fine grain preferred |
| Granulated Sugar 🍚 | 1 tbsp | Enhances browning |
| Cornstarch 🌽 | 1 tbsp | Improves tenderness |
| White Vinegar 🍶 | 1 tsp | Strengthens gluten |
The butter is non-negotiable—cold, cubed butter melts gradually during baking, creating those signature flaky layers. European-style butter like Plugrá or Land O’Lakes works best for its higher fat content. Buy it in blocks, not sticks, for easier cubing. The flour should be cool but not icy—store it in the fridge for 15 minutes before measuring if your kitchen is warm. Diamond Crystal kosher salt is preferred here; Morton’s has added anti-caking agents that can slightly alter texture. For gluten-free adaptation, swap the all-purpose flour for a 1:1 gluten-free blend like Bob’s Red Mill, but expect a slightly denser crust.
No ice water? Cold sparkling water works in a pinch, but it may produce a slightly lighter crust. Running short on vinegar? Lemon juice at the same amount functions similarly. The sugar is optional but recommended—it enhances browning and adds subtle sweetness that complements savory fillings. For a vegan version, use Earth Balance vegan butter and ensure your vinegar is plant-based. The cornstarch acts as a tenderizer; if omitted, the crust may become slightly tougher. Store-bought pie crusts can’t compete with this method’s precision—every ingredient plays a role in that perfect flakiness.
This dough must stay cold until baking—wrap tightly in plastic wrap and refrigerate for up to 24 hours. For immediate use, proceed straight to rolling. The dough is delicate; handle it gently to avoid overworking. Once baked, store cooled crusts in an airtight container for 3 days or freeze for 3 months. Reheat frozen crusts at 350°F (175°C) for 10 minutes to restore crispness. This method’s genius is its adaptability—use it for double-crust pies, lattice designs, or even a rustic tart shell. The crust’s versatility makes it the ultimate foundation for any filling.
Why You'll Love This Recipe
- No-Fuss Assembly: I swear by this crust because it’s literally three ingredients you mix with your fingers—no food processor, no fuss. The cold butter gets cut into the flour in seconds, and ice water ties it together without overworking the dough. (Yes, even on a Tuesday night when I’m exhausted.)
- Golden Edge Magic: That crispy, buttery rim? It’s all in the sugar and salt balance here. A pinch of kosher salt and a teaspoon of sugar in the butter makes the crust shatter-perfect while keeping the inside tender. Honestly, it’s the difference between "meh" and "I’d eat this plain."
- Crust for Everything: Use it for apple pie, pot pie, or even a savory galette—this dough handles it all. I’ve made it for Thanksgiving, last-minute desserts, and even frozen leftovers for when I’m too lazy to bake. It’s my secret weapon for looking like a baking pro.
- Budget Baking: Flour, butter, and ice water? That’s it. No weird shortcuts or expensive ingredients. I can make two crusts for the price of one store-bought, and they actually taste homemade. Plus, leftovers freeze like a dream—just thaw and bake. (Between us, I’ve revived a week-old crust and no one noticed.)
Step-by-step instructions for perfect pie crust without chill time
Here's how to create a restaurant-quality crust using only pantry staples.
👨🍳 Step 1: Cut and Mix the Butter into Flour
Place the 2.5 cups All-Purpose Flour in a large mixing bowl. Add the 1 cup Cold Unsalted Butter (cubed as specified) and the 1 tbsp Cornstarch. Using a pastry cutter or your fingers, work the butter into the flour until you achieve pea-sized crumbs with some larger pieces remaining. This texture is crucial—it creates pockets of butter that will melt during baking, producing flaky layers.
I press down firmly with my fingers to ensure even distribution of the butter throughout the flour. The goal is to create a uniform mixture where no dry flour pockets remain, but you still want some butter pieces to stay intact for maximum flakiness. This process should take about 5 minutes of focused work.
👨🍳 Step 2: Combine Wet Ingredients for Binding
In a separate small bowl, whisk together the 0.33 cup Ice Water, 1 tsp White Vinegar, 0.5 tsp Diamond Crystal Kosher Salt, and 1 tbsp Granulated Sugar. The vinegar acts as a natural gluten developer, while the sugar enhances browning. The ice water is essential—it keeps the butter cold and prevents the dough from becoming too soft during handling.
Pour this liquid mixture slowly into the flour-butter combination, using a fork or rubber spatula to gently stir. Add the liquid 1 tablespoon at a time, mixing just until incorporated. Stop mixing as soon as the dough comes together—overworking develops gluten, which makes the crust tough. The dough should be shaggy and slightly crumbly at this stage.
🥘 Step 3: Form and Shape the Crust
Turn the dough out onto a lightly floured surface and gently press it into a 12-inch round using your hands. I press down firmly but evenly, rotating the dough as I work to maintain consistent thickness. The edges should be slightly thicker than the center—this prevents shrinking during baking. Wrap the shaped crust tightly in plastic wrap and refrigerate for 30 minutes while you preheat your oven to 375°F.
This short chilling period firms up the dough just enough to handle without sticking. The plastic wrap prevents drying while allowing the dough to relax slightly. I find this brief resting time is the secret to achieving that perfect flaky texture without the long chill traditional recipes require.
🔥 Step 4: Blind Bake for Perfect Texture
Remove the crust from the refrigerator and transfer it to a 9-inch pie dish. Press it gently into the bottom and up the sides to create a snug fit. Prick the bottom all over with a fork to prevent air pockets. Line the crust with parchment paper, fill it with pie weights or dried beans, and bake for 15 minutes. Remove the weights and bake for an additional 10 minutes until the edges are golden brown and the crust is set.
Watch carefully during the final minutes—you want the edges to brown beautifully while the center remains pale. The crust should be firm to the touch but still tender. This blind baking ensures your pie filling won't cause a soggy bottom. For extra insurance, I brush the baked crust with a light coating of egg wash (1 egg yolk beaten with 1 tablespoon water) before filling.
Pro Tips For Making Ready To Bake Pie Crust
- Cut Butter in Pulses: Use your food processor in short bursts—about 10-12 seconds on, then 10 off—until the mixture resembles coarse crumbs. Overworking the butter turns it into soup, and nobody wants a soggy pie crust. I learned this the hard way after making a mess of three batches.
- Chill the Dough Twice: After mixing, flatten the dough into a disk and refrigerate it for at least 1 hour. Then, before rolling, pop it in the freezer for 15-20 minutes. This prevents the gluten from waking up too early, so your crust stays tender and doesn’t shrink in the oven.
- Use Ice Water Sparingly: Measure your water after you’ve added the salt and sugar—those dry ingredients absorb moisture. Start with 3 tablespoons of ice water (yes, ice cubes work best) and add just 1 more if needed. Too much water = tough crust. Too little = dry, crumbly dough.
- Skip the Sugar if You’re Lazy: The 1 tablespoon of sugar in this recipe adds a subtle sweetness and helps with browning, but if you’re in a rush or making a savory pie, leave it out. The crust will still hold together—it’s not the dealbreaker some recipes make it out to be. (Your future self will thank you for the shortcut.)
Serving suggestions for this ready to bake pie crust
Classic Fillings
This versatile crust shines with traditional fillings like apple or peach. For apple, I use a mix of Granny Smith and Honeycrisp apples with 1 tbsp lemon juice, 2 tbsp brown sugar, and a pinch of cinnamon.
Bake at 375°F for 45-50 minutes until bubbly. For peach, slice fresh peaches and toss with 1 tbsp cornstarch, 1 tbsp sugar, and a splash of vanilla extract—this prevents a runny filling. 🍏
Savory Options
Transform your crust into a quiche or savory tart with shredded sharp cheddar, caramelized onions, and eggs. Whisk 4 eggs with 1 cup heavy cream, ½ cup milk, salt, and pepper, then pour into the baked crust.
Add toppings like bacon bits or mushrooms before baking at 350°F for 35-40 minutes. For a spinach and feta tart, sauté 2 cups spinach with ½ cup crumbled feta and spread before adding the egg mixture. 🧀
Modern Twists
Get creative with chocolate cream pie or salted caramel. For chocolate, mix 1.5 cups heavy cream with 8 oz dark chocolate and 3 tbsp sugar, then chill before filling. Top with whipped cream and crushed Oreos.
For caramel, spread 1 cup store-bought caramel sauce on the baked crust, then add vanilla pudding and bake until set. A sprinkle of flaky sea salt elevates the flavor. 🍫
Presentation Tips
For a restaurant-worthy finish, brush the baked crust with melted butter before filling to add shine. Use a pie bird (a small cone-shaped cutout) to vent steam while baking.
Garnish with powdered sugar, toasted nuts, or fresh berries for visual appeal. Serve warm with vanilla ice cream or a dollop of whipped cream for contrast. ✨
Make-Ahead Serving
Assemble pies ahead of time and refrigerate for up to 24 hours before baking. For freezer-friendly options, bake the crust, fill, and freeze unbaked pies in airtight containers for up to 3 months.
Thaw overnight in the fridge before baking. Label with the filling type and date to keep track. This method saves time on busy days! ⏰
Nutrition facts
Frequently asked questions
Why does this recipe skip the traditional chilling step?
The secret lies in using cold, cubed butter and a precise dough formation technique. The butter melts gradually during baking, creating flaky layers without needing to chill. The 30-minute fridge rest is just for handling ease—not for texture. This method delivers the same results in 15 minutes total prep!
Can I make this crust ahead of time?
Shape the dough, wrap tightly, and refrigerate for up to 24 hours. For longer storage, bake the crust (without filling), cool completely, then freeze in an airtight container for 3 months. Thaw overnight in the fridge before using—no texture loss!
What's the best way to prevent a soggy bottom?
Always blind bake the crust first! Line with parchment, add weights, and bake for 15 minutes before adding filling. For extra insurance, brush the baked crust with egg wash (1 yolk + 1 tbsp water) before filling. This creates a barrier between crust and filling.
Is this crust gluten-free or vegan adaptable?
For gluten-free, replace flour with a 1:1 GF blend (like Bob's Red Mill) and expect a slightly denser texture. For vegan, use Earth Balance butter and plant-based vinegar. Both adaptations work but may require slightly longer baking times. The technique remains identical!
How do I fix overworked dough?
If the dough becomes tough, immediately wrap it in plastic and refrigerate for 1 hour to relax the gluten. For extreme cases, let it rest overnight. Never add more liquid—this worsens the texture. The key is gentle handling during mixing and shaping.