
Main Courses
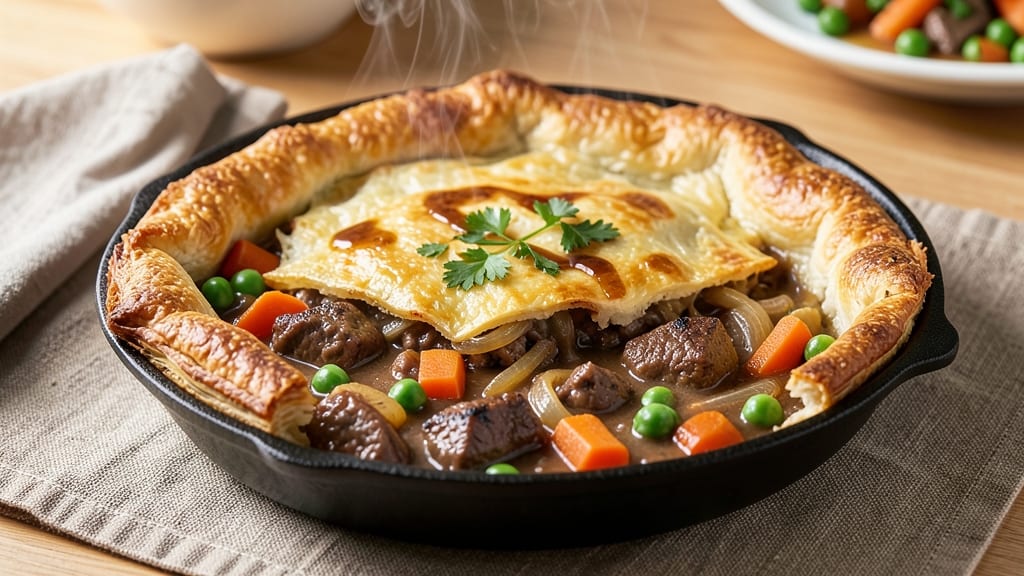
This quick beef pot pie delivers restaurant-quality comfort in under 60 minutes—no slow braising required. The secret lies in a simple browning technique that builds deep flavor fast, paired with a velvety gravy that coats every tender bite of beef and vegetable.
I developed this version after years of making traditional pot pies, cutting the time in half without sacrificing that golden, flaky crust or rich, savory filling.
The key to this quick beef pot pie is prepping ingredients efficiently—using pre-cut frozen vegetables and a store-bought crust saves time while keeping the dish fresh-tasting.
The beef gets a quick sear in the pan before simmering with onions and garlic, locking in flavor while the vegetables soften just enough to melt into the sauce. A simple cornstarch slurry thickens the gravy in minutes, creating that signature silky texture.
What you'll end up with is a pot pie that looks and tastes like it simmered all day: a crispy, golden crust encasing a velvety filling of tender beef, tender carrots, and bright peas.
The aroma alone will have everyone gathering at the table, and each bite delivers perfect balance—rich beef, sweet vegetables, and that buttery, flaky crust. Best of all, it's ready in time for dinner, not just dessert.
Serve with a simple green salad or crusty bread to soak up every last drop of that savory gravy. This is comfort food at its finest—quick enough for weeknights but impressive enough for company. Let's get started on making it!
Ingredients for quick beef pot pie
Fourteen simple ingredients transform into a restaurant-style pot pie in under an hour.
| Ingredient | Amount | Notes |
|---|---|---|
| Beef Chuck Roast 🥩 | 1 ½ lb | Pre-cut into 1-inch cubes |
| Yellow Onions 🧅 | 1 whole | Diced, about 1.5 cups |
| Garlic Cloves 🧄 | 4 cloves | Minced, about 1 tbsp |
| Carrots 🥕 | 1 lb | Pre-cut or peeled/chopped |
| Frozen Peas 🌱 | 1 cup | Thawed or frozen |
| Beef Broth 💧 | 2 cups | Low-sodium preferred |
| All-Purpose Flour 🌾 | 2 tbsp | For cornstarch slurry |
| Unsalted Butter 🧈 | ½ cup | Cold, cubed |
| Store-Bought Pie Crust 🥧 | 1 sheet | Thawed if frozen |
| Salt 🧂 | 1 ½ tsp | Kosher or sea salt |
| Ground Black Pepper 🌶️ | ½ tsp | Freshly ground |
| Dried Thyme 🌿 | 1 tsp | Or 1 tbsp fresh |
| Worcestershire Sauce 🍶 | 1 tbsp | Vegan if needed |
| Egg 🥚 | 1 whole | For egg wash |
| Milk 🥛 | 1 tbsp | For egg wash |
The beef is the star—chuck roast delivers that melt-in-your-mouth texture. Pre-cut cubes save time, but if you're starting with a whole roast, ask your butcher to trim off excess fat and cut into 1-inch pieces (smaller pieces cook faster). For the best flavor, grab low-sodium beef broth—it keeps the filling from getting too salty. I always stock Swanson or Pacific Foods brands for their rich flavor. The frozen vegetables are a game-changer here: no chopping, and they keep the dish bright and fresh-tasting. If using fresh carrots, peel and chop them into 1/4-inch slices for even cooking.
No pre-cut frozen veggies? Fresh carrots and peas work just fine—just peel and chop the carrots, and shell the peas. Running short on thyme? Dried oregano at half the amount works in a pinch, though fresh thyme gives that earthy depth. The Worcestershire sauce adds umami—if you're avoiding it, a splash of soy sauce works too. For the pie crust, Pillsbury or store-brand work perfectly, but if you're feeling fancy, a homemade crust adds that extra flaky touch. The egg wash is non-negotiable for that golden crust—beat the egg with a splash of milk for extra shine.
This pie reheats beautifully—350°F for 20-25 minutes until the crust is golden and the filling is bubbly. Store leftovers in an airtight container for up to 4 days in the fridge, or freeze for 3 months. The filling freezes well, so you can bake the crust fresh when serving. For make-ahead prep, assemble the pie (without baking) and refrigerate for up to 24 hours before baking. The aroma alone will have everyone anticipating dinner—trust me on that.
Why You'll Love This Recipe
- One-Pot Magic: I swear by this recipe—just toss everything into one pot, and the chuck roast practically melts into tender perfection while the onions caramelize. No fancy layers, no stress, and honestly? My kitchen stays cleaner than when I attempt anything with multiple pans.
- Tender Yet Bold: That chuck roast, slow-cooked until it shreds easily, paired with the deep sweetness of caramelized onions and a whisper of garlic? It’s the kind of flavor that makes you pause mid-bite. The peas add a bright pop, but the real star is how the beef soaks up all the savory juices.
- Leftovers That Beg: Between us, this recipe doubles as a meal-prep dream. The flavors only get better the next day—perfect for lunches or a lazy dinner when reheating feels like cheating. I’ve even frozen portions, and they thaw into something just as comforting.
- Budget-Friendly Powerhouse: A chuck roast stretches for days, and frozen peas? They’re my secret weapon for keeping costs low without sacrificing taste. This dish feeds four for under $15, and I’ve never once heard anyone complain about the value—or the seconds.
Step-by-step instructions for quick beef pot pie
Here's how to create a rich, velvety filling with a perfectly crispy top in under an hour.
Sear the Beef and Build the Filling Base
Preheat your oven to 375°F. In a large oven-safe skillet, melt 0.5 cup unsalted butter over medium-high heat. Add the 1.5 lb beef chuck roast cut into 1-inch cubes and sear for 4-5 minutes until browned on all sides. This step develops deep flavor through the Maillard reaction.
Remove the beef and set aside. In the same skillet, add the 1 whole yellow onion and cook for 5 minutes until softened. Add the 4 cloves minced garlic, 1 lb carrots cut into chunks, and cook for another 3 minutes until the vegetables begin to caramelize. This creates a flavorful foundation for your filling.
Create the Velvety Sauce
Sprinkle the 2 tbsp all-purpose flour evenly over the vegetables and stir vigorously for 1 minute to cook out the raw flour taste. Gradually pour in the 2 cups beef broth while stirring constantly to prevent lumps from forming. Add the seared beef back to the skillet along with the 1 cup frozen peas, 1 tbsp Worcestershire sauce, 1.5 tsp salt, 0.5 tsp ground black pepper, and 1 tsp dried thyme.
Bring the mixture to a gentle simmer and cook for 10 minutes until the sauce thickens slightly and the vegetables are tender. The filling should be rich and flavorful with a velvety consistency. If the sauce is too thick, add 1-2 tablespoons of water to reach your desired texture.
Assemble and Bake the Pot Pie
Roll out the 1 sheet store-bought pie crust according to package instructions and place it over the skillet, pressing gently to seal. Trim any excess dough from the edges. Cut 4 small slits in the top crust to allow steam to escape during baking. This prevents a soggy bottom while maintaining that beautiful golden-brown appearance.
In a small bowl, whisk together the 1 whole egg and 1 tbsp milk to create an egg wash. Brush this mixture evenly over the top crust. The egg wash will give your pie that beautiful golden color and crispy texture we're after.
Bake to Golden Perfection
Transfer the skillet to the preheated oven and bake for 30-35 minutes until the crust is deep golden brown and the filling is bubbling through the slits. The crust should be crispy to the touch, with no soft spots when pressed gently with a wooden spoon.
Remove the pot pie from the oven and let it rest for 5-10 minutes before serving. This resting period allows the filling to set slightly, making it easier to serve without spilling. The contrast between the crispy top and velvety filling will make every bite worth the wait.
Pro Tips For Making Quick Beef Pot Pie
- SEAR THE CHUCK FIRST: That beef won’t tenderize properly if it’s just simmered raw—get your pan screaming hot and sear the chuck in 2-3 batches until it’s deep brown. I used to skip this and ended up with tough, gray meat that fell apart when sliced. The crust of flavor from the Maillard reaction carries through the whole dish.
- CHOP ONIONS UNEVENLY: Tiny dice? No. Big chunks? Not quite. Aim for ¼-inch slices with a few rough edges—this keeps them from turning to mush while still cooking fast enough to stay crisp in the final pie. My grandmother swore by this, and she was right: even cooking matters more than you think with frozen peas in the mix.
- DON’T DRAIN THE PEAS: Those little frozen peas release starch when thawed, and that starch thickens your sauce naturally. Draining them turns your filling into a watery mess. Just toss them straight from the freezer into the pot—they’ll soften perfectly while everything else cooks.
- BAKE UNTIL GOLDEN: The crust won’t set properly if you pull it at 375°F just because the filling smells done. Crank the oven to 425°F for the last 10 minutes—watch the edges turn golden brown, not just pale. This isn’t the prettiest method, but it’s the tastiest: a crisp top seals in all that beefy flavor.
Storing and reheating this dish
Refrigerator Storage
Let your pot pie cool completely before storing in an airtight container—I use glass Pyrex with snap-on lids to maintain freshness. Store at 40°F or below for up to 4 days, but I find the filling tastes best within 2-3 days.
The crust stays crispy if you reheat it properly, so don’t skip that step! 🌡️
Freezer Prep Tips
For long-term storage, freeze the entire assembled pie (unbaked) in a freezer-safe dish with plastic wrap pressed directly on the crust. Label with the date—it keeps for 3 months.
When ready to bake, thaw overnight in the fridge, then bake as directed (add 5-10 extra minutes to the baking time).
Reheating for Crispy Crust
For the best results, reheat in a 350°F oven for 20-25 minutes until the crust is golden and the filling bubbles. Cover loosely with foil if the top browns too quickly.
Microwave reheating works in a pinch: 60% power for 2-3 minutes, then stir and continue in 30-second intervals until warmed through. 🔥
Make-Ahead Assembly
Save time by assembling the pie (without baking) up to 24 hours ahead. Wrap tightly in plastic and refrigerate. When ready to bake, add 5-10 minutes to the baking time—this ensures the crust crisps perfectly. The aroma alone will have your kitchen smelling like a cozy restaurant! ✨
Leftovers Strategy
Portion leftovers into individual oven-safe ramekins for easy reheating. Cover with foil and bake at 375°F for 10-12 minutes—this keeps the crust crispy while warming the filling. Store in the freezer for up to 3 months if you won’t use them within a week. 💫
Nutrition facts
Frequently asked questions
Can I use ground beef instead of beef chuck roast?
Yes, but the texture will be different. Ground beef will create a more tender filling but lose that melt-in-your-mouth quality. Use 1 lb ground beef (80/20 fat ratio) and brown it thoroughly for best flavor. For a quicker version, combine 1 lb ground beef with 0.5 lb beef chuck cubes to balance texture and richness.
How do I prevent a soggy bottom crust?
Prevent sogginess by ensuring your filling isn't too wet before adding the crust. Simmer the filling uncovered for the last 2-3 minutes to reduce excess liquid, and always cut small slits in the top crust to release steam. For extra insurance, sprinkle 1 tbsp crushed cornflakes between the crust and filling before baking.
What's the best way to make this vegetarian?
Swap the beef for 1.5 lbs mushrooms (cremini or portobello) and 1 cup lentils (cooked). Use vegetable broth instead of beef broth and add 1 tsp smoked paprika for depth. The filling will still be hearty and flavorful! The crust assembly and baking steps remain exactly the same.
Can I make this in a slow cooker?
Brown the beef and sauté the vegetables as directed, then transfer everything to a 6-quart slow cooker. Add the broth, Worcestershire, and seasonings, then cook on Low for 6-8 hours or High for 3-4 hours. For the crust, press store-bought dough over the top, cut slits, and bake at 375°F for 20-25 minutes until golden.
Why did my crust turn out pale?
Pale crusts usually happen from insufficient egg wash or underbaking. Always use 1 tbsp milk with the egg wash for shine, and brush it generously. Bake until the crust reaches 190°F internally (use an instant-read thermometer) and the edges are golden. For extra color, broil for 1-2 minutes at the end of baking.