
Desserts
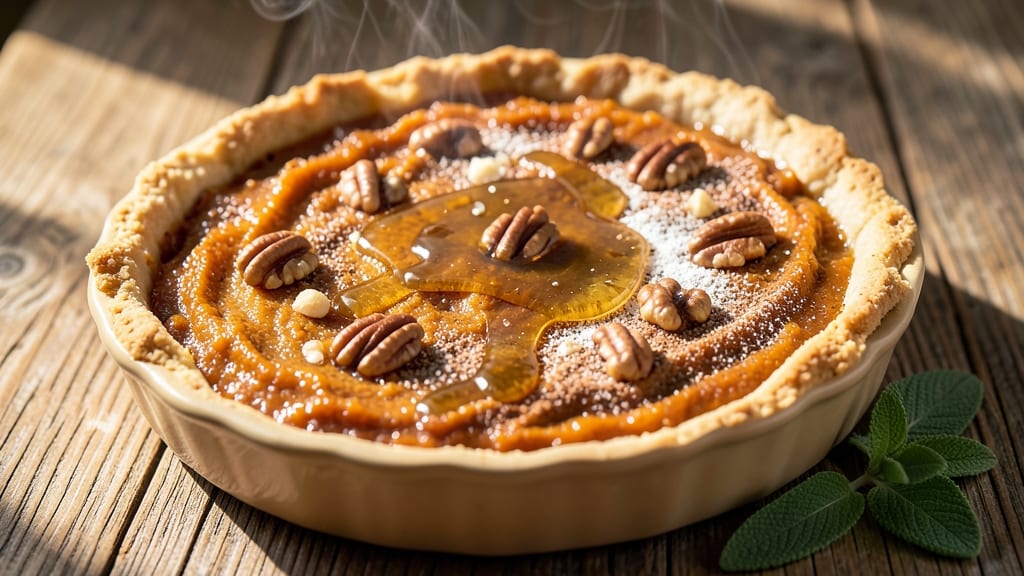
This all-natural pumpkin pie delivers classic fall flavors without refined sugar or artificial ingredients—just wholesome spices, real pumpkin, and a perfectly balanced filling. The secret lies in using honey or maple syrup as natural sweeteners while maintaining that signature warm cinnamon, nutmeg, and ginger aroma that defines autumn desserts.
I developed this recipe after years of perfecting the texture: a creamy, spiced filling that stays moist while the crust stays flaky or crisp, depending on your preference.
What sets this pie apart is the authentic technique that ensures a smooth, lump-free filling every time. We'll use pumpkin puree (not pumpkin pie filling) for maximum flavor, combined with eggs, natural sweeteners, and a blend of spices that's stronger than most store-bought versions.
The crust options—homemade flaky pastry or graham cracker crust—both work beautifully, and I'll show you how to adapt either for perfect results. This version also includes a vegan-friendly option using coconut milk and flax eggs, proving you don't need dairy or eggs to achieve restaurant-quality pie.
The result is a pie with rich, spiced pumpkin flavor that's naturally sweetened yet perfectly balanced—no artificial aftertaste, just pure autumn comfort. The filling stays silky-smooth with just the right amount of spice, while the crust provides the perfect textural contrast.
Whether you're serving it at Thanksgiving, a holiday gathering, or just because it's pie season, this recipe delivers professional-quality results without compromising on natural ingredients. The best part? It bakes in just 50-60 minutes, so you'll have time to enjoy it while it's still warm.
For those who want to elevate their presentation, I'll share my favorite garnishes and serving suggestions—from whipped coconut cream to a dusting of cinnamon—that take this pie from homemade to showstopper. Let's get started on making a pie that's as good for you as it is delicious.
Ingredients for all natural pumpkin pie
Wholesome ingredients that deliver restaurant-quality pumpkin pie without refined sugar or artificial flavors.
| Ingredient | Amount | Notes |
|---|---|---|
| Pumpkin Puree 🎃 | 15 oz | Not pumpkin pie filling, 100% pure |
| Large Eggs 🥚 | 2 whole | Room temperature for blending |
| Pure Maple Syrup 🍁 | ¾ cup | Grade B for robust flavor |
| Raw Honey 🍯 | ½ cup | Local honey preferred |
| Ground Cinnamon 🌿 | 2 tbsp | Ceylon cinnamon for delicate flavor |
| Ground Nutmeg 🌿 | 1 ½ tsp | Freshly grated nutmeg preferred |
| Ground Ginger 🌿 | 1 ½ tsp | Freshly ground for potency |
| Ground Cloves 🌿 | ½ tsp | Whole cloves preferred |
| Sea Salt 🧂 | ½ tsp | Diamond Crystal preferred |
| Unsalted Butter 🧈 | ½ cup | Cold, cubed for crust |
| All-Purpose Flour 🌾 | 1 ½ cups | King Arthur preferred |
| Granulated Sugar 🍚 | ¼ cup | For crust texture only |
| Ice Water 💧 | ¼ cup | For dough consistency |
| Graham Cracker Crumbs 🍪 | 1 ½ cups | For alternative crust |
| Coconut Oil 🥥 | 2 tbsp | Vegan crust option |
The pumpkin puree is non-negotiable—Libby's 100% pure pumpkin or a high-quality organic brand like Barely Pumpkin ensures maximum flavor. For the natural sweeteners, Grade B maple syrup from Vermont adds depth, while local raw honey brings floral notes. The spices? Penzeys Spices for cinnamon and nutmeg—freshly ground makes all the difference. If you can't find Ceylon cinnamon, regular works but reduce to 1.5 tbsp. For the crust, King Arthur flour gives that perfect flakiness, and if you're making the graham cracker version, Honey Maid graham crackers are the gold standard. The coconut oil is a game-changer for the vegan crust—Trader Joe's organic melts beautifully.
No maple syrup? Agave nectar works at a 1:1 ratio, though the flavor won't be identical. Running short on honey? Date syrup or coconut sugar can substitute, but reduce by 10% since they're less sweet. For the crust, almond flour replaces regular flour if you're gluten-free, but add an extra tbsp of coconut oil. The eggs can be swapped with flax eggs (2 tbsp ground flax + 6 tbsp water per egg) for a vegan version. If you're using pre-made crusts, Pepperidge Farm puff pastry works beautifully—just brush with melted butter before filling. The spices are where you can't cut corners—store-bought spice blends often have fillers that dull the flavor.
This filling keeps beautifully in the fridge for 5 days—perfect for making ahead. The crust can be pre-baked and frozen for 2 months if you're planning ahead. For the vegan version, store the filling with a thin layer of coconut milk on top to prevent drying. When reheating, low oven (300°F) for 20 minutes keeps it moist. Garnish with whipped coconut cream and a sprinkle of cinnamon for that showstopper presentation. The pie freezes beautifully too—up to 3 months if wrapped tightly in plastic wrap and foil.
Why You'll Love This Recipe
- No-Fuss Assembly: I swear, this pie comes together in one bowl—just whisk, pour, bake. No rolling dough, no fussing with lattice crusts, just pure pumpkin magic with eggs binding it all.
- Sweet-Spiced Magic: That combo of maple syrup and raw honey? It’s like autumn hugged the pie filling. The cinnamon doesn’t just taste like fall—it is fall, warm and cozy in every bite.
- Crowd-Pleaser Flex: Bring it to Thanksgiving or serve it with coffee on a lazy Sunday—it works everywhere. Honestly, I’ve even packed slices for work lunches (the honey keeps it moist for days).
- Budget Bright Spot: Pumpkin puree and eggs are cheap staples, and a little maple syrup goes a long way. I’ve made this for $10 and still felt like I served gourmet—no guilt, just flavor.
Step-by-step instructions for all natural pumpkin pie
Here's how to create a rich, spiced pumpkin filling with natural sweeteners and a perfect crust.
Prepare the Crust Using Natural Fats
In a food processor, combine the 1.5 cups graham cracker crumbs with the 2 tbsp coconut oil (or 0.5 cup unsalted butter for non-vegan option). Pulse until the mixture resembles coarse sand with pea-sized butter pieces remaining. Here's the thing—this texture is crucial for a tender crust that won't turn greasy.
Press the mixture firmly into a 9-inch pie dish, creating an even layer about ¼-inch thick. Use your fingers to smooth the edges, pressing gently against the sides to create a slight rim. Chill the crust in the refrigerator for at least 30 minutes while you prepare the filling. This resting period prevents shrinking during baking and ensures clean edges when you remove the pie from the oven.
Whisk Wet Ingredients for Perfect Texture
In a large mixing bowl, combine the 15 oz pumpkin puree, 0.75 cup pure maple syrup, 0.5 cup raw honey, 0.25 cup granulated sugar, and 0.25 cup ice water. Whisk vigorously for 2-3 minutes until completely smooth—this step eliminates any lumps that could make your pie filling grainy. The ice water helps balance the natural sweetness while keeping the texture light.
Add the 2 whole large eggs one at a time, whisking constantly after each addition. The eggs help bind the filling and create that signature silky texture. Here's where it gets fun—you'll notice the mixture thicken slightly as you whisk, which is exactly what you want for that perfect pie consistency.
Incorporate Spices for Maximum Flavor
In a small bowl, sift together the 1.5 cups all-purpose flour, 2 tbsp ground cinnamon, 1.5 tsp ground nutmeg, 1.5 tsp ground ginger, 0.5 tsp ground cloves, and 0.5 tsp sea salt. This step ensures even distribution of spices throughout the filling—no clumps, no uneven flavor pockets. The salt might seem like a small amount, but it's essential for balancing the natural sweetness.
Gradually whisk the dry ingredients into the wet mixture, alternating between the flour mixture and 0.25 cup ice water as needed. You're aiming for a smooth batter that coats the back of a spoon but isn't too thin. If it's too thick, add a splash more ice water; if too thin, whisk in a bit more flour. The perfect consistency is just thick enough to hold its shape when dropped from a spoon.
Assemble and Bake to Golden Perfection
Pour the filling into the chilled crust, spreading it evenly with a spatula. Preheat your oven to 375°F—this temperature ensures even baking without burning the crust. Here's the moment that matters: place the pie on the middle rack of your oven and bake for 50-55 minutes. You'll know it's done when the filling is set but still slightly jiggly in the center (like gelatin), and the crust is golden brown.
For the final touch, increase the oven temperature to 400°F and bake for an additional 5-10 minutes to create a beautiful caramelized crust. Let the pie cool completely on a wire rack before slicing—this patience prevents a runny filling. The natural sweeteners caramelize beautifully during this final step, creating that perfect balance of spice and sweetness in every bite.
Pro Tips For Making All Natural Pumpkin Pie
- Bake at 325°F—no exceptions: The oven’s too hot, the pie’s too fast, and you end up with a cracked top or undercooked center. I learned this after the first year of Thanksgiving hosting—350°F sounds standard, but this filling needs slow, steady heat to set properly. Use a thermometer if you’re unsure; the middle should jiggle slightly when done.
- Whisk eggs until ribbons form: Cold spots in the custard mean a pie that’s either gummy or lumpy. Beat those eggs with the pumpkin puree until the mixture holds a slow ribbon when you lift the whisk—about 2-3 minutes. I used to rush this, and the pie never felt as silky smooth.
- Use honey after heating the filling: Raw honey thickens when cold, and if you add it straight to the mix, the pie filling will set too fast in the oven. Warm the filling slightly (just until the syrup dissolves), then stir in the honey last—this keeps the texture light and creamy, not gluey.
- Sift the cinnamon—twice: Ground cinnamon clumps like a stubborn snowbank, and those lumps turn into bitter pockets in your pie. Sift it directly into the dry ingredients, then sift the whole mixture again before mixing. Yes, it’s extra work, but your first bite will taste like autumn instead of sawdust.
Make-ahead tips for this all natural pumpkin pie
Filling Prep Ahead
Prepare the pumpkin filling up to 2 days in advance and store it in an airtight container in the refrigerator. The flavors deepen as the spices meld together, and the texture remains silky when baked later.
I like to whisk the filling in a glass jar—it's easier to store and reheat later. When ready to bake, simply pour the chilled filling into your pre-baked crust and proceed with the final baking instructions. 💫
Crust Pre-Baking
Bake the crust separately and store it in the freezer for up to 2 months. After chilling the unbaked crust for 30 minutes, blind-bake it at 375°F for 15 minutes with pie weights or dried beans.
Let it cool completely before wrapping tightly in plastic wrap and aluminum foil. When you're ready to assemble, simply thaw the crust at room temperature for 30 minutes before adding the filling. This saves time and ensures a sturdy base. ❄️
Complete Pie Freezing
For maximum convenience, assemble the pie completely (including the filling) and freeze it before baking. Wrap the unbaked pie tightly in plastic wrap followed by a layer of aluminum foil. When ready to bake, thaw the pie in the refrigerator overnight, then bake as directed.
The natural sweeteners caramelize beautifully during baking, giving you a pie that tastes freshly made. I've done this for Thanksgiving prep—it's a game-changer! 🍂
Vegan Adaptation
For the vegan version, prepare the filling ahead and store it with a thin layer of coconut milk on top to prevent drying. When ready to bake, whisk the filling again to restore smoothness.
The crust can also be prepped in advance using the coconut oil mixture and stored in the fridge for up to 3 days. The vegan filling keeps well in the fridge for 4 days before baking. 🥥
Reheating Slices
Individual slices reheat beautifully in the oven. Place slices on a baking sheet and warm at 300°F for 10-12 minutes until heated through. For a quick option, microwave slices covered with a damp paper towel for 20-30 seconds on medium power.
The natural sweeteners help retain moisture, so you won't get that dry texture you sometimes find with reheated pies. 🔥
Make-Ahead Serving
Assemble the pie completely and refrigerate it overnight before baking. This slow chill enhances the crust's flavor and ensures even baking. For serving at room temperature, let the pie sit at room temperature for 1-2 hours before slicing.
This makes it perfect for holiday gatherings where you want to serve immediately. The natural ingredients taste even better after resting! 🎉
Nutrition facts
Frequently asked questions
Can I substitute maple syrup or honey with something else?
For agave nectar, use a 1:1 ratio, though the flavor will differ slightly. Date syrup or coconut sugar work too—just reduce by 10% since they're less sweet. If you prefer white sugar, use ½ cup granulated sugar instead of the maple/honey combo, but you'll lose some of the natural depth.
How do I make this pie vegan?
Replace eggs with 2 flax eggs (2 tbsp ground flax + 6 tbsp water per egg) and use coconut oil for the crust. The filling stays just as creamy! For extra richness, stir in 2 tbsp coconut milk with the wet ingredients. The crust can also be made with almond flour + coconut oil if you want gluten-free too.
Why does my pie filling look grainy?
Graininess usually means lumps from under-whisked flour or pumpkin. Always whisk the wet ingredients for 2-3 minutes until completely smooth, then sift the dry spices before mixing. If you notice lumps after combining, strain the filling through a fine-mesh sieve before pouring into the crust. The ice water helps prevent this too!
Can I use canned pumpkin pie filling instead of pure pumpkin?
No—pie filling contains added sugar and spices, which will make your pie overly sweet and spiced. Stick with 100% pure pumpkin (like Libby's or Barely Pumpkin) for the best flavor and texture. The natural sweetness in pure pumpkin balances perfectly with your spices.
How do I store leftovers without drying them out?
Keep slices in an airtight container with a layer of plastic wrap pressed directly on the filling. Refrigerate for up to 5 days or freeze for 3 months. To reheat, warm at 300°F for 10-12 minutes—the natural sweeteners help retain moisture better than refined sugar.