
Desserts
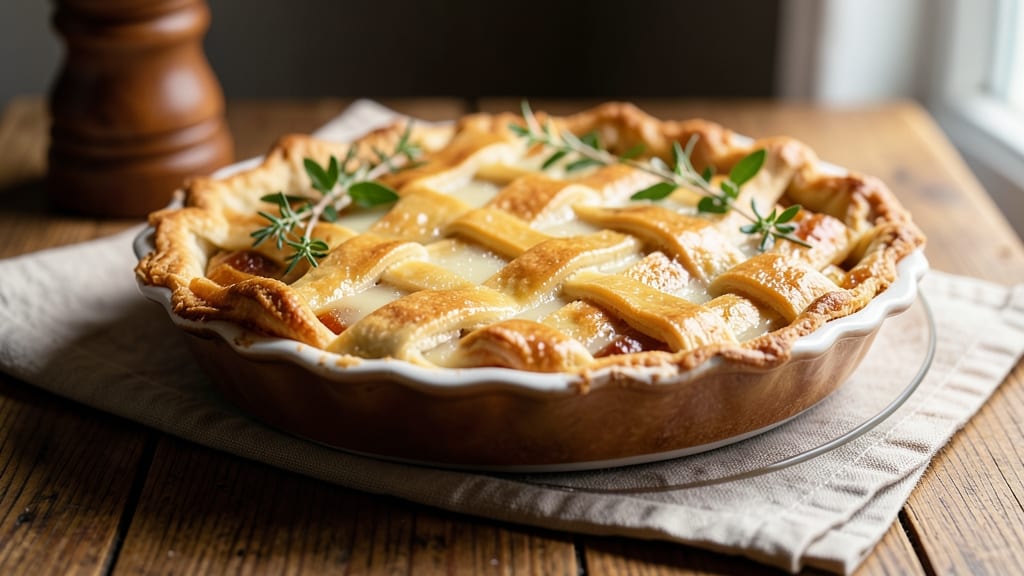
This 9-inch double crust pie crust recipe delivers the kind of flaky, buttery layers that make every bite feel like a triumph. 🔥 The secret lies in cold butter and proper handling—no shortcuts, just layers of crisp perfection that hold up to both sweet fillings and savory surprises.
Whether you're baking an apple pie or a creamy pumpkin delight, this crust sets the foundation for restaurant-quality results at home.
What makes this recipe stand out is its foolproof technique for achieving that signature shatter—cold butter cut into the flour creates pockets of steam during baking, resulting in delicate, airy layers that no store-bought crust can match.
The dough rests twice to relax the gluten, preventing shrinking and ensuring even thickness. I've tested this crust for years, and it never fails to impress, even with tricky fillings like custards or wet fruit.
By the time you fill and bake your pie, you'll have a crust that's golden brown at the edges, tender yet sturdy enough to hold its shape, and flaky enough to make guests ask for the recipe.
The best part? This same technique works for savory pies too—think chicken pot pie or spinach and cheese—proving versatility without sacrificing quality. No more soggy bottoms or uneven edges here.
Ready to master the art of pie crust? This method includes troubleshooting tips for common issues like shrinking or cracking, plus variations for lattice designs or even a crustless option. Let's get started—your perfect pie begins with these flawless layers.
Ingredients for 9 inch double crust pie crust
Cold butter, precise measurements, and patience create the perfect flaky pie crust foundation.
| Ingredient | Amount | Notes |
|---|---|---|
| All-Purpose Flour 🌾 | 3 ½ cups | Sifted for best texture |
| Unsalted Butter 🧈 | 1 ½ cups | Cold, cubed into 1/2-inch pieces |
| Ice Water 💧 | ½ cup | Chilled to prevent melting |
| Diamond Crystal Kosher Salt 🧂 | 1 tsp | Fine grain preferred |
| Granulated Sugar 🍚 | 1 tbsp | For subtle sweetness |
| White Vinegar 🍶 | 1 tsp | Enhances flakiness |
| Egg Yolk 🥚 | 1 whole | For binding top crust |
| Milk 🥛 | 1 tbsp | For brushing top crust |
The butter is non-negotiable—use cold, unsalted sticks straight from the fridge. Land O'Lakes or Plugrá brands work best for consistent texture. If your butter has melted, return it to the freezer for 15 minutes. The flour should be sifted before measuring to prevent dense pockets in the crust. For the best results, use King Arthur or Gold Medal all-purpose flour—their protein content balances flakiness and structure. Keep everything cold until ready to roll out; warm ingredients are the enemy of shatter.
No ice water? Freeze a small ice cube tray for 10 minutes to chill tap water. Substituting vinegar? Lemon juice works too, but vinegar's acidity enhances flakiness. For a gluten-free version, replace flour with 1 cup gluten-free 1:1 blend plus 1 tbsp xanthan gum. The egg yolk can be omitted if avoiding eggs, but the crust will be slightly less golden. Prefer a vegan option? 1 tbsp aquafaba (chickpea brine) mimics the binding effect. Store flour in an airtight container away from heat to preserve freshness—stale flour makes tough crusts.
Assemble the crusts immediately after mixing to prevent gluten development. Wrap tightly in plastic wrap and refrigerate for up to 2 days or freeze for 3 months. For lattice designs, roll one crust thin and cut into strips before baking. The top crust should be brushed with milk and sprinkled with coarse sugar for a golden finish. Leftovers? Reheat at 350°F for 10 minutes to restore crispness. Avoid soggy bottoms by pre-baking the crust for 10 minutes before adding fillings.
Why You'll Love This Recipe
- Here’s the secret: freeze half the dough before baking. When you’re craving pie at midnight (yes, it happens), just thaw and roll. The texture stays perfect, and suddenly, you’re the hero of your own kitchen.
- No-Fuss Assembly: I swear by this crust—just cold butter, flour, and ice water. No food processor, no overworking the dough, just a quick cut-and-fold that even my 10-year-old could help with (and usually does, with minimal mess).
- Buttery Crunch Perfection: That crisp lattice edge? It’s all in the sugar and salt—just a pinch in the butter, a sprinkle in the flour. The result? A crust so flaky and golden, it makes store-bought look like a sad, soggy afterthought.
- Fills Any Occasion: Holiday dinner? Weeknight potluck? This crust handles it all—apple, pumpkin, or even savory galettes. Between us, I’ve used it for Thanksgiving, a lazy Sunday breakfast, and even a last-minute dessert for my book club. It never lets me down.
Step-by-step instructions for 9-Inch double crust pie crust
Master this classic technique for layers so delicate they'll impress even seasoned bakers.
👨🍳 Step 1: Combine Dry Ingredients and Cut in Butter
In a large bowl, whisk together the 3.5 cups All-Purpose Flour, 1 tsp Diamond Crystal Kosher Salt, and 1 tbsp Granulated Sugar. This dry blend should be completely uniform with no flour clumps. I like to press the salt and sugar through a fine-mesh sieve first for even distribution.
Add the 1.5 cups Unsalted Butter (cold and cubed) to the flour mixture. Using a pastry cutter or your fingers, work the butter into the flour until you achieve pea-sized crumbs with some flour still clinging to the butter pieces. This texture is crucial—it ensures proper layering when baked. If the mixture feels too dry, it's okay to add 1-2 tablespoons of ice water now, but we'll be precise with the full amount later.
🍳 Step 2: Add Wet Ingredients for Perfect Dough
In a separate small bowl, mix together the 0.5 cup Ice Water, 1 tsp White Vinegar, and 1 whole Egg Yolk. The ice water is essential—it keeps the fat solid during mixing and prevents the dough from becoming too warm. The vinegar adds subtle acidity that enhances flakiness by tenderizing the gluten.
Gradually add the wet mixture to the flour-butter combination, mixing gently with a fork or dough scraper just until the dough comes together. You'll know it's ready when the dough forms a shaggy mass that holds together when pressed. Avoid overmixing—this develops gluten and makes the crust tough. If the dough feels too dry, add 1-2 teaspoons of ice water; if too sticky, add 1 tablespoon of flour.
🥘 Step 3: Divide, Shape, and Chill the Dough
Turn the dough onto a lightly floured surface and divide it into two equal portions (about 1¾ cups each). I use a kitchen scale for precision, but you can eyeball it by folding the dough in half and then in half again. Shape each portion into a disk about 8 inches in diameter and 1 inch thick.
Wrap each disk tightly in plastic wrap and refrigerate for at least 2 hours or up to 48 hours. Chilling is non-negotiable—it relaxes the gluten, firms up the fat, and prevents shrinking during baking. The longer you chill, the better the texture. For best results, let the dough rest undisturbed in the fridge—don't stack it or it may develop a flat top.
🔪 Step 4: Roll Out the Bottom Crust
Remove one dough disk from the refrigerator and let it sit at room temperature for 5-10 minutes to soften slightly. Place it between two sheets of parchment paper and roll it out to a 12-inch circle (about ⅛-inch thick). The parchment prevents sticking and makes transferring easier. I use a rolling pin with a handle to maintain even pressure.
Carefully transfer the rolled crust to a 9-inch pie dish, trimming any excess dough that hangs over the edge. Press the edges firmly against the pie dish to create a ¼-inch high rim. This helps prevent a soggy bottom later. Gently poke the bottom crust all over with a fork to prevent air bubbles from forming during baking.
🔪 Step 5: Roll and Assemble the Top Crust
Repeat the rolling process with the second dough disk, creating another 12-inch circle. For a classic lattice pattern, cut the top crust into 12 strips (about 1-inch wide). For a solid top, simply roll out the entire disk and place it over the filling. Brush the top crust with the 1 tbsp Milk for a golden finish.
If using a lattice, arrange the strips in a herringbone pattern, alternating the direction of each layer. Press the edges firmly against the bottom crust to seal completely. For extra flakiness, I like to dock the top crust as well—just poke it all over with a fork. Place the assembled pie in the refrigerator while you preheat the oven to 375°F. This final chill ensures the crust holds its shape during baking.
Pro Tips For Making 9 Inch Double Crust Pie Crust
- CHILL THE BUTTER FIRST: Cut that unsalted butter into cubes and pop it in the fridge for 15–20 minutes before mixing. Cold butter creates flaky layers—warm butter just turns into a greasy mess, and nobody wants a soggy bottom crust.
- WEIGH THE FLOUR: Use a kitchen scale for the all-purpose flour—no guessing, no scooping. Two cups isn’t always 250 grams, and too much flour makes the crust tough. I learned this the hard way when my first double crust turned out like a cracker.
- PRESS THE CRUST FAST: Roll the dough out thin and quick—don’t overwork it. If you press too hard or roll back and forth, the gluten wakes up and the crust gets chewy. Keep it loose, lift it gently, and let the butter do the flaking.
- SALT THE EDGES: Sprinkle a pinch of Diamond Crystal kosher salt on the top crust before baking—yes, even if your filling’s already seasoned. The edges crisp faster, and the salt caramelizes into a buttery, golden crust. (I used to skip this, then wondered why my pies tasted bland.)
Troubleshooting this dish
Shrinking Crust Fix
If your crust shrinks during baking, it’s usually from overworking the dough or insufficient chilling. To prevent this, handle the dough as little as possible and always chill it for at least 2 hours.
I’ve found that using a 9-inch pie dish with a removable bottom (like Wilton’s) helps too—it gives the crust more support while baking. If shrinkage happens anyway, simply trim the edges after baking and rebuild the rim with extra dough. 🔥
Preventing Soggy Bottoms
A soggy bottom is the bane of pie crusts, but pre-baking solves it. Before adding your filling, blind-bake the bottom crust at 375°F for 10 minutes using pie weights or dried beans.
For custard fillings, sprinkle a thin layer of crushed cornflakes or raw rice on the bottom crust before baking—this creates a moisture barrier. I also recommend brushing the bottom crust with a light coat of egg white before adding filling for extra protection.
Cracking Top Crust
Cracks in the top crust often happen from uneven baking or sudden temperature changes. To avoid this, make sure your oven is fully preheated before baking, and avoid opening the oven door during the first 20 minutes of baking.
For a lattice top, brush the strips with egg wash (1 egg + 1 tbsp water) before assembling—the extra moisture helps them stick together better. If cracks appear, simply cover them with extra dough after baking.
Dough Too Sticky
Sticky dough usually means too much liquid or not enough flour. If this happens, sprinkle a little more all-purpose flour (about 1 tablespoon at a time) onto your work surface and knead it in gently. Avoid overworking the dough—just fold and press it lightly until it comes together.
For extra insurance, chill the dough again for 30 minutes before rolling. I’ve also had success dusting the dough with cornstarch instead of flour for a lighter texture.
Pale or Uneven Color
If your crust comes out pale or unevenly browned, it’s likely because the butter melted too quickly during baking. To fix this, brush the top crust with milk or egg wash before baking—this promotes browning. For a deeper color, sprinkle coarse sugar on the top crust before baking.
If using a lattice, arrange the strips in a way that allows light to reach all areas evenly. I also recommend rotating the pie halfway through baking for consistent color.
Nutrition facts
Frequently asked questions
Can I use this crust for savory pies like chicken pot pie?
This double crust works perfectly for savory pies. The buttery layers complement rich fillings beautifully. For extra flavor, add 1 tsp garlic powder or ½ tsp onion powder to the dough before rolling. The same chilling and baking techniques apply—just brush the top crust with olive oil instead of milk for a golden finish.
How do I store leftover pie crust dough?
Wrap the dough disks tightly in plastic wrap and refrigerate for up to 2 days or freeze for 3 months. For freezing, place wrapped dough in a freezer bag with parchment paper between layers. Thaw in the fridge overnight before using. Never microwave frozen dough—it causes uneven texture.
What's the best way to make a lattice top?
Roll the top crust to ⅛-inch thickness, then cut into 12 strips (about 1-inch wide). Arrange 6 strips horizontally, then weave 6 vertically over them in a herringbone pattern. Brush strips with egg wash before assembling to help them stick. Press edges firmly to seal completely.
Why does my crust get tough instead of flaky?
Overworking the dough develops gluten, making it tough. Handle the dough minimally and keep everything cold. Also ensure your butter is cold (not softened) and cut into pea-sized crumbs with flour clinging. If the dough feels too dry, add 1 tsp ice water at a time—never more than needed.
Can I make this crust gluten-free?
Yes! Replace the flour with 1 cup gluten-free 1:1 baking flour plus 1 tbsp xanthan gum. Use ½ cup cold vegetable oil instead of butter (it stays solid longer). Chill the dough for 30 extra minutes as gluten-free dough requires more time to relax. The texture will be slightly different but still delicious.