
Desserts
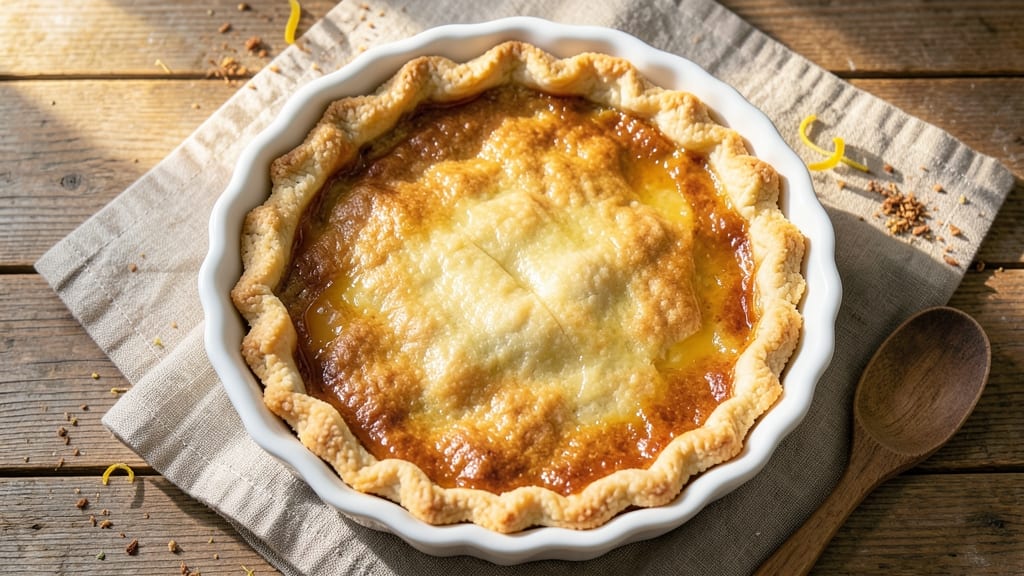
This 9-inch apple pie crust recipe delivers the perfect foundation for golden, flaky slices every time—no more soggy bottoms or tough edges. The secret lies in cold butter and precise rolling technique, which I’ve perfected after years of baking pies for family gatherings. A lattice design adds elegance while keeping the filling visible, making it ideal for showcasing seasonal apples.
The crust starts with a simple mix of all-purpose flour, cold butter cut into small pieces, and a touch of sugar for subtle sweetness. Chilling the dough thoroughly prevents shrinking, while a single blind bake ensures the crust stays crisp even under a juicy filling.
This method guarantees a flaky texture with layers that melt in your mouth—no shortcuts, just proven results.
Once baked, the lattice pattern creates beautiful diamond shapes while allowing steam to escape, preventing a soggy crust. The edges turn golden brown, creating that irresistible contrast with the tender filling. This recipe is designed for both beginners and seasoned bakers, with clear steps that ensure success every time.
Whether you’re making a classic apple pie or experimenting with other fillings, this crust delivers restaurant-quality results at home. The lattice design isn’t just decorative—it’s functional, ensuring your pie stays crisp and delicious from the first to the last slice.
Ingredients for 9 inch apple pie crust
Cold butter and precise measurements create the perfect foundation for golden, flaky lattice pie crust.
| Ingredient | Amount | Notes |
|---|---|---|
| All-Purpose Flour 🌾 | 2 ½ cups | Sifted for even texture |
| Unsalted Butter 🧈 | 1 cup | Cold, cubed into small pieces |
| Granulated Sugar 🍚 | ¼ cup | For subtle sweetness |
| Ice Water 💧 | ⅓ cup | Chilled for dough binding |
| Kosher Salt 🧂 | ½ tsp | Diamond Crystal preferred |
| Large Egg Yolk 🥚 | 1 whole | For dough cohesion |
| Vanilla Extract 🍯 | ½ tsp | Pure extract preferred |
The butter makes or breaks this crust. European-style unsalted butter (like Plugrá) has more fat content, which gives you those signature flaky layers. If you only have regular butter, chill it for at least 30 minutes before cutting into cubes—this prevents melting during mixing. The flour should be sifted to avoid lumps, and I always grab the King Arthur brand for its consistent quality. Sugar isn't just for sweetness—it helps tenderize the crust slightly, and white granulated works best here. For the ice water, use a glass measuring cup so you can see the water level clearly.
No egg yolk? 1 tbsp milk or water can replace it, though the crust won't be quite as sturdy. Running short on vanilla? Almond extract at half the amount adds depth without overpowering. The kosher salt matters—Diamond Crystal dissolves more slowly, giving you better flavor control. If you're using table salt, reduce to 1/4 tsp. For a gluten-free version, swap the all-purpose flour for a 1:1 gluten-free baking flour blend. The dough should come together just as it starts to crumble—don't overwork it, or you'll lose that flaky texture. If the dough feels too dry, add 1 tsp ice water at a time until it holds together.
Wrap the dough tightly in plastic and refrigerate for at least 2 hours—overnight is even better. The longer it chills, the more pronounced those flaky layers become. When you're ready to roll, use parchment paper between the dough and your rolling pin to prevent sticking. For the lattice, cut strips about 1/2-inch wide—they'll shrink slightly as they bake. Blind bake the crust for 15 minutes before adding filling to prevent a soggy bottom. Store leftover dough in the fridge for up to 3 days or freeze for 3 months by wrapping tightly in plastic and foil.
Why You'll Love This Recipe
- No-Fuss Assembly: The butter stays cold, the water’s ice-cold—this dough comes together in three minutes of cutting and folding. No food processor, no waiting for butter to soften. Just a bowl, a knife, and the kind of effortless that makes you question why you ever overcomplicated pie crust.
- Buttery Crisp Magic: That sugar in the butter? It’s not just decoration—it caramelizes into a golden, shatteringly crisp edge while keeping the center tender. Honestly, the first time I bit into one, I nearly dropped the whole pie. (Worth it.)
- Half-Pie, Double Use: A 9-inch crust is the perfect size for a single-serving dessert or a picnic lunch—think apple slices with almond butter, or even a savory galette. My college-aged kid took a whole one to work for snacks all week. No waste, just flexibility.
- Pantry Staple Power: Flour, butter, sugar, salt—these are ingredients you already have. Between us, I’ve made this crust at least 12 times this year, and I’ve never had to buy anything extra. The ice water trick keeps it from getting gummy, so it’s foolproof even when I’m distracted.
Step-by-step instructions for 9-Inch apple pie crust
Master this classic technique for a buttery, flaky lattice crust that holds its shape perfectly.
Combine Dry Ingredients and Cut in Cold Butter
In a large mixing bowl, whisk together the 2.5 cups all-purpose flour, 0.25 cup granulated sugar, and 0.5 teaspoon kosher salt until evenly distributed. This ensures uniform flavor and texture throughout the crust.
Next, add the 1 cup cold, cubed unsalted butter to the dry mixture. Using a pastry cutter or your fingers, work the butter into the flour until you achieve pea-sized crumbs with minimal flour streaks. The butter should remain cold—this is critical for achieving flaky layers. If the mixture feels too dry, chill for 10 minutes before proceeding.
Add Wet Ingredients and Form the Dough
Create a well in the center of the bowl and add the 1 whole large egg yolk, 0.5 teaspoon vanilla extract, and 0.33 cup ice water. Using a fork, gently mix the wet ingredients into the dry mixture until the dough just begins to come together. Avoid overmixing—just combine until the dough forms a shaggy mass.
Turn the dough out onto a lightly floured surface and knead it 3-4 times until it holds together. The dough should be slightly tacky but not sticky. If it crumbles, add 1 teaspoon ice water at a time until cohesive. Wrap the dough in plastic wrap and refrigerate for at least 1 hour (or up to 24 hours). This resting period relaxes the gluten and makes rolling easier.
Roll and Transfer the Crust to the Pan
On a lightly floured surface, roll the chilled dough into a 12-inch circle (about ⅛-inch thick). If the dough resists rolling, let it rest for 10 minutes at room temperature. Gently transfer the rolled dough to a 9-inch pie dish, trimming any excess dough that hangs over the edges.
Press the dough gently into the pie dish, ensuring it adheres evenly to the bottom and sides. Use your fingers to create a slight rim around the edges—this will help the lattice design stay in place later. Chill the crust in the refrigerator for another 20 minutes while you prepare the lattice strips.
Create the Lattice Design
Using a sharp knife or pizza cutter, cut the remaining dough into 6 strips (about 1½ inches wide). Arrange 3 strips horizontally across the pie crust, spacing them evenly with ½-inch gaps between each strip. Then, cut 3 additional strips and arrange them vertically, overlapping the horizontal strips by ½ inch at each intersection. Press the strips gently to ensure they adhere to the base crust.
For extra flakiness, brush the lattice with a light coating of egg wash (1 egg yolk beaten with 1 teaspoon water). This adds shine and helps the crust brown beautifully in the oven. Bake the crust (unfilled) at 375°F for 15-18 minutes until golden brown and fully set. The lattice should hold its shape without sagging.
Blind-Bake for a Sturdy Foundation
For a perfect filling later, blind-bake the crust. Line the baked crust with parchment paper, fill it with dried beans or pie weights, and bake at 375°F for 10 minutes. Remove the weights and parchment, then bake for another 5-7 minutes until the crust is deep golden brown and crisp. Cool completely before adding your apple filling—this prevents a soggy bottom.
The result is a flaky, sturdy lattice crust with crisp edges and a tender interior, ready to hold your apple filling without losing its shape. The key to success lies in keeping the butter cold, handling the dough gently, and ensuring proper chilling at each stage.
Pro Tips For Making 9 Inch Apple Pie Crust
- Chill the Butter First: Take that cold block of unsalted butter out of the fridge and let it sit for 10-15 minutes before cutting it into cubes—just enough to soften slightly but not melt. I learned this the hard way after my crust turned into a greasy mess because the butter pools melted into a puddle during mixing.
- Cut Butter No Smaller: Use ½-inch cubes of butter, not tiny pea-sized pieces. Larger cubes create flaky layers that melt slowly during baking, while small bits disappear too fast. Yes, it’s more work to cut them evenly, but your crust will thank you with that perfect shatter.
- Skip the Overmixing: Once the dough comes together, stop mixing the second the flour disappears—no need to knead or work it further. Overhandling develops gluten, which makes the crust tough instead of tender. Just press it into the pan and chill.
- Use Ice Water, Not Cold: Grab ice cubes straight from the freezer and toss them into your measuring cup—don’t use cold tap water. The shock of freezing temps keeps the butter from softening too fast during mixing, and the dough stays cooler longer. (Your future self will thank you when the crust doesn’t turn out greasy.)
Pro cooking tips for this recipe
Butter Temperature Matters
Cold butter is non-negotiable for flaky layers—I mean it. Cut your 1 cup unsalted butter into ½-inch cubes and refrigerate for at least 30 minutes before mixing. If your kitchen feels warm, pop the butter in the freezer for 10 minutes to keep it firm.
Warm butter creates dense, tough crusts instead of those dreamy, feather-light layers. 🧈
Dough Resting is Key
Never skip the 1-hour minimum chill—this relaxes the gluten and prevents shrinking. I often rest my dough overnight, and the difference is night-and-day. Wrap it tightly in plastic wrap and place it on the middle rack of your fridge.
If you're short on time, a 30-minute freeze works in a pinch, but overnight is ideal for maximum flakiness.
Rolling Technique Secrets
Use a rolling pin with a smooth surface (I love my OXO Good Grips model) and roll from the center outward in even strokes. Keep the dough moving to prevent sticking—if it resists, let it rest for 5 minutes at room temperature.
For lattice strips, roll them ⅛-inch thick and cut with a sharp knife or pizza cutter for clean edges. A dull blade crushes the dough, making strips uneven.
Blind-Baking Perfection
Line your 9-inch pie dish with parchment paper before adding dried beans or pie weights. Bake at 375°F for 15 minutes to pre-cook the starches—this prevents a soggy bottom. Remove the weights, prick the bottom with a fork, then bake 5 more minutes until golden.
Pro tip: Use a wire cooling rack to cool the crust completely before filling.
Lattice Weaving Tips
Cut your strips 1½ inches wide—they'll shrink slightly during baking. Arrange them in a 3-over-3 pattern (3 horizontal, 3 vertical) with ½-inch gaps for that classic diamond look.
Press the strips firmly into the base crust to prevent gaps. For extra flair, brush with egg wash before baking—it adds shine and helps the crust brown evenly. 🌟
Storage Hacks
Leftover dough? Wrap it tightly in plastic and store in the fridge for up to 3 days or freeze for 3 months. To reheat frozen dough, thaw in the fridge overnight, then let it sit at room temperature for 15 minutes before rolling.
For pre-baked crusts, store at room temperature in an airtight container for 2 days or freeze for up to 2 months. Reheat frozen crusts at 300°F for 10 minutes to refresh crispness.
Nutrition facts
Frequently asked questions
Why does my crust turn out tough instead of flaky?
The most common cause is warm butter—always use cold, cubed butter straight from the fridge. Overworking the dough or skipping the 1-hour chill also creates tough crusts. Handle the dough gently and keep everything cold until it goes into the oven.
Can I make this crust without a food processor?
Use your fingers or a pastry cutter to work the cold butter into the flour until you get pea-sized crumbs. The key is keeping the butter cold—if it starts melting, chill the mixture for 10 minutes before continuing. This method works just as well for flaky layers.
How do I fix a cracked lattice design?
Gently press the cracked strips back into place with your fingers or a small rolling pin. For extra hold, brush the cracks with a bit of egg wash before baking. If the cracks are wide, you can also add small dough triangles to reinforce the lattice—just press them into the gaps.
What's the best way to store leftover crust dough?
Wrap the dough tightly in plastic wrap and refrigerate for up to 3 days. For longer storage, freeze it for 3 months by wrapping it in plastic and foil. Thaw overnight in the fridge before using. Never refreeze thawed dough—it loses texture quality.
Can I substitute shortening for butter in this recipe?
Shortening will make your crust flakier but less flavorful. If you must substitute, use ¾ cup shortening instead of butter and reduce the sugar to ¼ cup. The crust will be more stable but lacks the rich taste of butter. For best results, stick with cold butter for that authentic flavor.