
Desserts
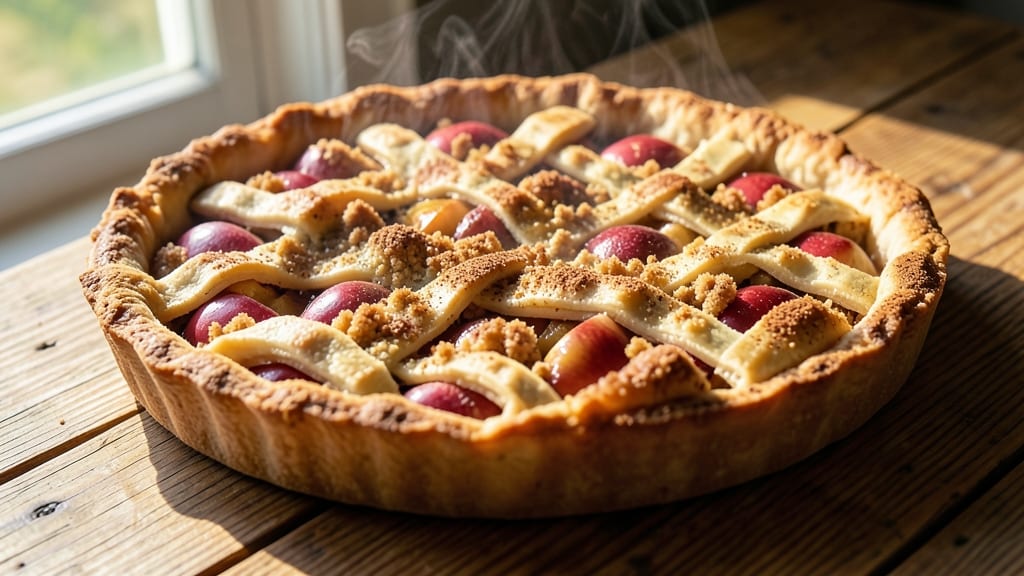
This Amish apple crumb pie recipe captures the heart of autumn with its tender spiced apples and buttery crumb topping—just like Grandma used to make. 🍂 The secret lies in balancing sweetness with warm cinnamon and nutmeg, creating layers of flavor that make every bite feel like comfort.
I've perfected this recipe over years of baking, ensuring the apples stay juicy while the crumb topping achieves that ideal crispy texture.
The beauty of this pie is its simplicity, a hallmark of Amish cooking. You'll start with a classic double-crust pastry, filled with a blend of apples—both tart and sweet—that caramelize beautifully during baking.
The crumb topping, made with just butter, flour, and brown sugar, adds a satisfying crunch that contrasts perfectly with the soft filling. It's the kind of dessert that brings people together, whether for a family gathering or a quiet evening at home.
What you'll end up with is a pie that's golden brown on top, with a filling so flavorful it practically melts in your mouth. The aroma alone will fill your kitchen with warmth, while the combination of spiced apples and buttery crumbs creates a texture that's impossible to resist.
This pie is best served warm with a scoop of vanilla ice cream or a dollop of whipped cream, but it's so good you might just eat it straight from the oven.
Perfect for harvest season or holiday celebrations, this recipe scales beautifully for any occasion. Once you try it, you'll understand why this pie has become a staple in kitchens across the country. Let's get baking!
Ingredients for amish apple crumb pie
Six apples, two crusts, and one buttery crumb topping—this is all you need for Grandma's classic pie.
| Ingredient | Amount | Notes |
|---|---|---|
| Apples (Mixed Varieties) 🍎 | 6 medium | Tart and sweet varieties like Granny Smith and Honeycrisp |
| All-Purpose Flour 🌾 | 3 cups | For pie crust and crumb topping |
| Unsalted Butter 🧈 | 1 ½ cups | Cold and cubed for crumb topping |
| Light Brown Sugar 🍚 | 1 ½ cups | Packed for crumb topping |
| Granulated Sugar 🍚 | 1 cup | For apple filling sweetness |
| Ground Cinnamon 🌿 | 2 tbsp | Freshly ground for warmth |
| Ground Nutmeg 🌿 | ½ tsp | Freshly grated preferred |
| Salt 🧂 | ½ tsp | Kosher or sea salt |
| Lemon Juice 🍋 | 2 tbsp | Freshly squeezed |
| All-Purpose Flour (for dusting) 🌾 | ¼ cup | Extra for rolling crust |
| Granulated Sugar (for sprinkling) 🍚 | 1 tbsp | Optional for extra crunch |
| Vanilla Extract 🥛 | 1 tsp | Pure vanilla for depth |
| Heavy Cream 🥛 | ½ cup | Optional for extra richness |
The apples are the heart of this pie, so don't skimp on quality. Local orchards or farmers markets often have the best mix of tart and sweet varieties—Granny Smith adds tang, while Honeycrisp or Braeburn brings natural sweetness. If you're buying pre-sliced, avoid those treated with anti-browning sprays. For the crumb topping, European-style butter (like Plugrá) gives the most flavor, but any good-quality unsalted butter works. The brown sugar should be packed—don't scoop it. And if your local store doesn't carry light brown sugar, dark brown sugar works too, just reduce by a teaspoon or two.
No Granny Smith apples? McIntosh or Fuji work well for tartness, though you might want to add an extra tablespoon of lemon juice. Running short on butter? Coconut oil is a 1:1 substitute, though it'll add a slight coconut flavor. The vanilla extract is non-negotiable—imitation vanilla won't give you that deep, warm aroma. For the crumb topping, if you're feeling fancy, toast the brown sugar and flour together for 2-3 minutes before mixing with cold butter. It develops a nutty flavor that's worth the extra minute. And if you're making this ahead, prep the crumb topping first—it keeps perfectly in the fridge for up to 3 days.
The apples can be peeled or left whole—peeling takes 10 minutes but gives a cleaner bite. Store any prepped apples in a bowl of cold water in the fridge for up to 24 hours. The crumb topping mixture should be kept cold until baking—form it into a disk and chill for 30 minutes before adding to the pie. This pie reheats beautifully—350°F for 15-20 minutes with foil over the top revives that fresh-baked taste. And if you're planning ahead, the unbaked pie freezes wonderfully—assemble completely, wrap tightly, and bake straight from frozen (add 15-20 minutes to baking time).
Why You'll Love This Recipe
- Here’s what sold me: the crumb topping. Cold butter cut into the flour and brown sugar until it’s just barely holding together—those little pockets melt into pure, gooey satisfaction. And the apples? They soften just enough to release that caramelized sweetness, but still hold their shape. Honestly, the first time I made this, I ate a slice straight from the oven and didn’t even care about the mess.
- Foolproof Assembly: I swear by this recipe—no lattice fuss, no tricky crusts. Just toss your mixed apples (I use Honeycrisp and Granny Smith) into a bowl, sprinkle with cinnamon and a pinch of salt, then dump it all into a pie dish. The crumb topping? Mix cold butter into flour and sugar until it’s crumbly, then pat it on top. That’s it. No rolling, no stress.
- Butter-Sugar Magic: Here’s what sold me: the crumb topping. Cold butter cut into the flour and brown sugar until it’s just barely holding together—those little pockets melt into pure, gooey satisfaction. And the apples? They soften just enough to release that caramelized sweetness, but still hold their shape. Honestly, the first time I made this, I ate a slice straight from the oven and didn’t even care about the mess.
- Weeknight Crowd-Pleaser: This pie is my go-to for game days, potlucks, or when I need something hearty but not heavy. The crumb topping stays crisp even when sliced the next day, and the apples? They’re forgiving—use whatever’s on sale. I’ve made it with store-bought apples and it still turns out solid. Plus, it’s the kind of dessert that disappears fast, so you won’t end up with a sad, half-eaten pie sitting around.
Step-by-step instructions for Amish apple crumb pie
Here's how to create that perfect balance of tender apples and buttery crumb topping.
🍎 Step 1: Prepare the Apple Filling
Peel, core, and slice the 6 medium apples into ¼-inch thick pieces. I like to use a mix of tart and sweet varieties—Granny Smith for tang and Honeycrisp for natural sweetness. Toss the apple slices in a large bowl with the 1 cup granulated sugar, 2 tablespoons ground cinnamon, ½ teaspoon ground nutmeg, ½ teaspoon salt, 2 tablespoons lemon juice, and 1 teaspoon vanilla extract.
Mix gently but thoroughly so every apple slice gets coated with the spice blend. The lemon juice helps prevent browning while adding brightness. I let the mixture sit for 10 minutes at room temperature—this gives the spices time to infuse the apples and makes the filling even more flavorful when baked.
👨🍳 Step 2: Make the Crumb Topping
In a separate large bowl, combine the 1.5 cups light brown sugar, 1.5 cups unsalted butter (cold and cubed), and 2 tablespoons ground cinnamon. I use my fingers to work the butter into the sugar until it resembles coarse crumbs with some pea-sized butter pieces remaining—this creates that perfect texture of crispy bits with tender pockets.
Next, add the 3 cups all-purpose flour and mix with a wooden spoon or your fingers until everything is evenly distributed. The mixture should hold together when pressed but still have visible crumbly texture. If it seems too dry, add 1-2 tablespoons cold water to help bind it. This topping is what makes Amish apple crumb pie special—it's crispy on top but still tender enough to melt slightly when warm.
🥘 Step 3: Assemble the Pie
Preheat your oven to 375°F. Grease a 9-inch deep-dish pie dish and sprinkle the bottom with ¼ cup all-purpose flour (for dusting). This prevents sticking and helps create a nice barrier between the filling and crust. Transfer the prepared apple mixture to the pie dish and spread it out evenly in a single layer.
Sprinkle the optional 1 tablespoon granulated sugar (for sprinkling) over the top of the apples for extra caramelization. Then carefully spoon the crumb topping over the apples, pressing down gently with your fingers to create an even layer. The crumbs should cover the apples completely but still leave some visible apple peeking through. If using the ½ cup heavy cream, drizzle it over the crumb topping for extra richness before baking.
🔥 Step 4: Bake to Golden Perfection
Place the pie on the middle rack of your oven and bake for 45-50 minutes. The first 20 minutes should be at 375°F, then reduce the heat to 350°F for the remaining 25-30 minutes. This two-stage baking prevents the topping from burning while ensuring the apples cook through and develop that beautiful caramelized color.
You'll know it's done when the crumb topping is deep golden brown and the apples are tender enough that a knife slides in easily. The filling should bubble slightly at the edges, and you should smell that wonderful combination of cinnamon and caramelized apples. Let the pie cool for at least 2 hours before slicing—this resting time allows the juices to set and the crumb topping to firm up slightly for easier serving.
⏰ Step 5: Serve Warm with Vanilla Ice Cream
Slice the pie into 8 equal wedges (about 1-inch thick each) and serve warm. The contrast between the warm spiced apples and the cool, creamy ice cream is what makes this pie truly special. I like to serve it with a dollop of whipped cream on top of each slice for extra indulgence.
This pie tastes best when served within 24 hours of baking, but you can store leftovers covered at room temperature for up to 3 days. The flavors actually deepen as it sits, making each bite even more delicious. The secret to this classic Amish apple crumb pie is in the balance—tender apples, perfectly spiced filling, and that irresistible buttery crumb topping that melts just enough to coat every bite.
Pro Tips For Making Amish Apple Crumb Pie
- Preheat That Oven Hot: I learned this the hard way—cold pans and a lukewarm oven mean a soggy bottom. Crank your oven to 375°F (190°C) and let it scream hot for 15 minutes before baking. That extra heat shock sets the crust faster and keeps the apples from turning to mush.
- Slice Apples Thin and Toss: Thick apple slices? They’ll stew into a sad, watery puddle. Cut them ¼-inch thick, then immediately toss with 1 tablespoon lemon juice and a pinch of salt. This keeps them bright and prevents the filling from turning into apple soup.
- Skip the Overmixing: I used to knead the crumb topping like I was making pie dough—big mistake. The second you mix the flour, butter, and sugars with your fingers until it’s "even," you’ll end up with a dense, dry mess. Cut the cold butter into the dry ingredients with a pastry cutter or your fingers until it’s just combined with pea-sized crumbs. Done.
- Use Two Butters: This isn’t the prettiest method, but it works: mix ½ the butter into the crumb topping as usual, then save the other half for the apples. Dot 1-2 tablespoons of softened butter over the hot filling before adding the crumb topping. It’ll melt into the apples, making them juicier and richer—no extra effort, just next-level flavor.
Essential equipment for amish apple crumb pie
Pie Dish Essentials
The heart of any great pie starts with the right dish. I recommend a 9-inch deep-dish pie pan—it provides enough space for the filling to spread while keeping the proportions perfect.
Look for ceramic or glass pans (like Wilton or Pyrex) as they distribute heat evenly and prevent burning. Avoid dark-colored metal pans—they can over-brown the crust too quickly. If you're baking multiple pies, consider a pie stand to protect your countertops from spills and make transferring easier. 🍂
Crust Tools
A rolling pin is a must-have for creating that classic Amish-style pie crust, but not just any pin will do. I prefer a wide, heavy-duty rolling pin (like OXO Good Grips) with a smooth surface—it glides effortlessly and gives you even thickness.
For dusting, keep a small bowl of all-purpose flour nearby to prevent sticking. A pie crust shield (a metal ring) can also help create a crisp, decorative edge if you're feeling fancy. Don’t forget a sharp chef’s knife for trimming excess dough neatly.
Mixing and Measuring
For the crumb topping, a large mixing bowl (at least 8-quart capacity) is essential to handle the butter and sugar mixture without spills. I use a wooden spoon or my fingers to work the cold butter into the sugar—this creates those perfect crispy crumb bits.
A digital kitchen scale (like Escali Primo) ensures precise measurements for the flour and sugar, which is critical for the right texture. For the apple filling, a sharp peeler and mandoline slicer (like OXO Good Grips) make quick work of prepping the apples evenly.
A fine-mesh strainer also comes in handy if you want to drain excess juice from the apples before baking.
Baking Gear
An oven thermometer (like Thermoworks) is a game-changer—it ensures your oven is actually at 375°F (or 350°F for the second stage of baking). Uneven heat distribution can lead to a burnt topping or undercooked apples.
A pie cooling rack helps the pie crisp up faster after baking, and a pie server makes slicing clean, even wedges. For extra insurance, keep a small bowl of ice water nearby—dipping the pie server between slices keeps the filling from sticking.
And if you’re making this ahead, a vacuum-sealing bag or airtight container (like Rubbermaid) preserves freshness for up to 3 days at room temperature.
Optional Upgrades
For the ultimate pie experience, consider a pie weights set to prevent a soggy bottom crust during pre-baking. A pastry brush (like Silpat) helps brush egg wash evenly for a golden finish.
If you love the smell of baking, a stovetop pie warmer keeps your pie warm and gooey for hours. And for serving, a pie dish stand elevates the presentation while keeping fingers clean.
Trust me, these little upgrades make all the difference in turning a good pie into a showstopper. ✨
Nutrition facts
Frequently asked questions
Can I use frozen apples instead of fresh for this recipe?
Yes, but you'll need to thaw and drain them first. Use 6 cups frozen apple slices (about 2 pounds) and thaw overnight in the fridge. After draining, pat them dry thoroughly with paper towels to prevent a soggy pie. You may need to add 1 extra tablespoon of flour to the filling to help absorb any excess moisture.
How do I make this pie ahead of time?
This pie actually tastes better the next day! Assemble it completely (including the crumb topping) and refrigerate for up to 24 hours before baking. For make-ahead serving, bake it 1 day ahead and store at room temperature in an airtight container. Reheat slices in a 350°F oven for 10 minutes to restore that warm, gooey texture.
What's the secret to getting the crumb topping just right?
The key is keeping everything cold until baking. Use cold butter cubes and work them into the sugar mixture quickly with your fingers to create coarse crumbs. The topping should hold together when pressed but still look crumbly. For extra flavor, toast the brown sugar and flour together for 2-3 minutes before mixing with butter.
Can I substitute the double crust for a single crust? A single crust works perfectly and reduces prep time. Just
Why did my crumb topping turn out greasy?
Greasy crumb topping usually means the butter melted too much before baking. Keep everything cold by chilling the mixture for 30 minutes before adding to the pie, and use cold butter straight from the fridge. If the topping seems too wet, add 1-2 tablespoons extra flour and mix gently.