
Desserts
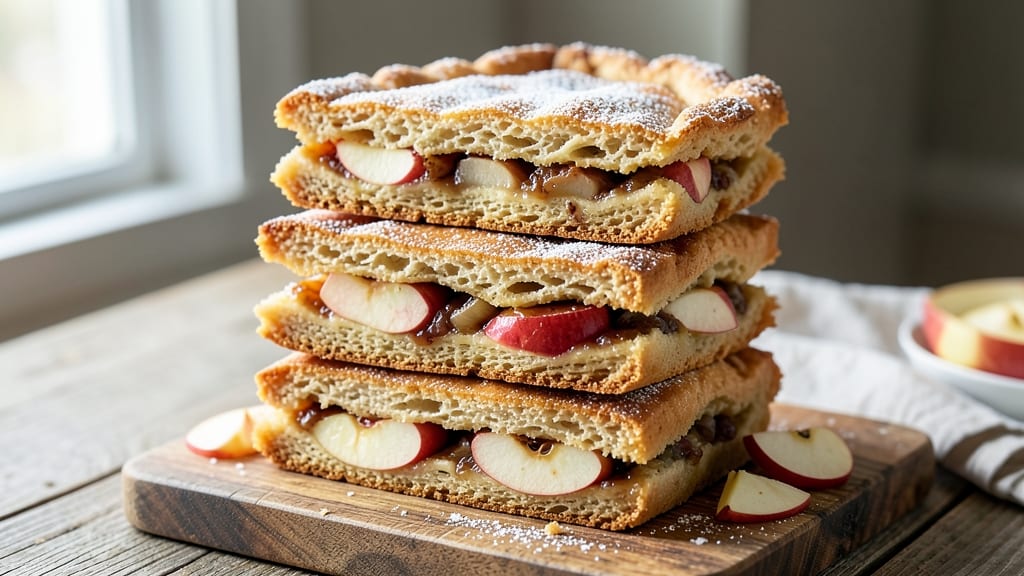
This stacked apple pie recipe transforms classic dessert into a showstopping masterpiece with layers of flaky crust and spiced apple filling. The secret lies in precise assembly—each layer baked separately to perfection, then stacked to create a towering, golden masterpiece that looks as impressive as it tastes.
I’ve perfected this technique over years of baking, ensuring every slice delivers crisp crust, tender apples, and warm cinnamon-spiced notes that transport you to a cozy autumn kitchen.
The magic begins with the crust: a buttery, all-purpose dough rolled thin and baked until just set, creating a sturdy foundation for the filling. Apples—a mix of tart and sweet varieties—are spiced with cinnamon, nutmeg, and a touch of lemon juice to keep them bright and juicy.
The filling bakes until bubbly but still holds its shape, ready to be layered between crusts like a rustic skyscraper. This method eliminates soggy bottoms and guarantees every slice is a masterpiece.
What makes this pie truly special is the stacked presentation—each layer baked separately, then assembled like a cake, with the top crust brushed with egg wash for a glossy finish. The result?
A pie that’s as beautiful as it is delicious, with crisp edges, tender apples, and a caramelized crust that’s impossible to resist. Serve warm with vanilla ice cream or a drizzle of caramel for the ultimate dessert experience.
Whether you’re baking for a holiday gathering or treating yourself to a homemade dessert, this stacked apple pie delivers restaurant-quality results with a fraction of the effort.
The technique is foolproof, and the outcome is always impressive—perfect for impressing guests or simply indulging in a slice of comfort. Let’s get baking!
Ingredients for stacked apple pie
Buttery crust meets spiced apples in this architectural dessert masterpiece.
| Ingredient | Amount | Notes |
|---|---|---|
| All-Purpose Flour 🌾 | 4 cups | Sifted for light texture |
| Unsalted Butter 🧈 | 2 cups | Cold, cubed for pastry |
| Granulated Sugar 🍚 | ½ cup | Plus 2 tbsp for filling |
| Ice Water 💧 | ½ cup | For dough elasticity |
| Large Eggs 🥚 | 1 whole | For egg wash |
| Honeycrisp Apples 🍎 | 4 medium | Peeled, cored, sliced |
| Granny Smith Apples 🍎 | 2 medium | Peeled, cored, sliced |
| Light Brown Sugar 🍚 | ¾ cup | Packed, for filling |
| Ground Cinnamon 🌿 | 2 tbsp | Plus 1 tsp for topping |
| Ground Nutmeg 🌿 | ½ tsp | Freshly grated preferred |
| Lemon Juice 🍋 | 2 tbsp | Freshly squeezed |
| Allspice 🌶️ | ¼ tsp | For depth of flavor |
| Salt 🧂 | ½ tsp | Diamond Crystal preferred |
| Vanilla Ice Cream 🍦 | 1 ½ cups | For serving |
| Caramel Sauce 🍯 | ½ cup | Optional drizzle |
The crust is where precision matters most. European-style all-purpose flour from King Arthur or Baker's Corner yields the best results—higher protein content for that signature flakiness. Unsalted butter is non-negotiable here; Plugrá or Land O'Lakes Cultured brands provide the perfect fat content without overpowering. Chill your butter cubes for at least 30 minutes before mixing to ensure proper layering. For the apples, Honeycrisp and Granny Smith create the ideal tart-sweet balance—Honeycrisp for tenderness, Granny Smith for structure. Buy them firm and store in the fridge until ready to use, as they soften quickly at room temperature. Pre-peeling and coring saves time during assembly, but work with them immediately to prevent browning.
No all-purpose flour? Bread flour with 1 tbsp cake flour substituted works in a pinch, though the crust will be slightly chewier. Running short on butter? Vegetable shortening at 75% of the amount maintains flakiness but lacks flavor. For the spice blend, Penzeys Spice Shop offers pre-mixed apple pie spice that simplifies the process, though I prefer customizing with fresh nutmeg and allspice for depth. The lemon juice is critical—freshly squeezed Meyer lemon adds brightness, but regular lemon works fine. Need to prep ahead? The dough can be chilled for up to 48 hours, and the filling keeps 24 hours in the fridge before assembly. For a gluten-free adaptation, King Arthur Measure for Measure flour blend performs remarkably well with a 10% increase in liquid.
Assembled pies keep best at room temperature for 4 hours before slicing, allowing flavors to meld fully. Refrigerate leftovers for up to 5 days in an airtight container, though they're best enjoyed fresh. For long-term storage, wrap individual slices in parchment and freeze for up to 3 months. The crust regains its crispness beautifully when reheated. When serving, warm the pie at 350°F for 10 minutes to revive the crust's texture. Pair with homemade caramel sauce—simmer 1 cup sugar with 6 tbsp heavy cream and 1 tbsp butter for 10 minutes, then whisk in 1 tsp vanilla. The stacked presentation makes this pie perfect for special occasions, but the technique is simple enough for weeknight baking.
Why You'll Love This Recipe
- No-Roll Shortcut: I swear by this method—just mix flour, cold butter, sugar, and ice water until it clumps, then press it into the pan. No chilling, no fuss, and the crust still holds its shape like a pro’s.
- Buttery-Caramel Magic: That flaky crust with just a hint of sugar? It’s the secret weapon. The butter melts into golden pockets while the apples soften—every bite has that perfect balance of crisp, creamy, and sweet-tart.
- Pie for Any Day: Weeknight dinner? Brunch crowd? Holiday dessert? This stacked version works for all of it. Serve warm with vanilla ice cream or let it cool for a no-fuss breakfast the next morning.
- Leftovers That Still Shine: Honestly, I make two pans because it reheats beautifully. The second day, I slice it for toast or pack it for lunch—still just as good, if not better, with that buttery crust holding up.
Step-by-step instructions for stacked apple pie
Here's how to build this layered masterpiece with perfect crust and spiced filling.
Prepare the Crust Layers
In a large bowl, combine the 4 cups all-purpose flour and 0.5 teaspoon salt. Cut in the 2 cups unsalted butter using a pastry cutter or your fingers until the mixture resembles coarse crumbs with pea-sized butter pieces. This texture is crucial for flaky layers.
Gradually add the 0.5 cup ice water, mixing just until the dough comes together. Avoid overworking—handle only enough to form a single mass. Divide into three equal portions, flatten into discs, wrap in plastic, and chill for at least 1 hour. Cold dough prevents shrinking during baking and ensures crisp layers.
Assemble the Filling
Peel, core, and slice the 4 medium Honeycrisp apples and 2 medium Granny Smith apples into ¼-inch thick slices. Toss with 0.75 cup light brown sugar, 2 tablespoons ground cinnamon, 0.5 teaspoon ground nutmeg, 0.25 teaspoon allspice, and 2 tablespoons lemon juice. This balance of sweet and tart creates the perfect flavor profile.
In a separate bowl, whisk 1 whole large egg with 2 tablespoons granulated sugar for the egg wash. Set aside—this will give your crust that golden sheen. The filling should sit at room temperature while you prepare the crust layers to prevent premature softening.
Roll and Layer the Crusts
On a floured surface, roll out one chilled dough portion into a 12-inch circle (about ⅛-inch thick). Transfer to a 9-inch pie dish, pressing gently to fit. Trim excess dough, leaving a ½-inch overhang. Repeat with the second dough portion, rolling it slightly larger than the first.
Spread half of the apple mixture evenly over the bottom crust. Place the second crust on top, sealing edges by folding the overhang inward and crimping with a fork. Brush the top crust with egg wash, then cut 4-5 slits for steam to escape. This layered approach creates a perfect balance of flaky crust and tender filling.
Bake to Golden Perfection
Preheat your oven to 375°F. Place the assembled pie on a parchment-lined baking sheet to catch any drips. Bake for 45-50 minutes until the crust is deep golden brown and the filling bubbles through the slits. If the edges brown too quickly, cover them with aluminum foil.
For the final touch, sprinkle 1 teaspoon ground cinnamon over the top crust just before the last 10 minutes of baking. This adds a beautiful finish and extra warmth to the flavor. The pie is done when the internal temperature reaches 195°F and the crust sounds hollow when tapped.
Serve with Classic Pairings
Let the pie cool for at least 2 hours before slicing—this allows the filling to set slightly and prevents a runny mess. Serve warm slices with 1.5 cups vanilla ice cream and a drizzle of 0.5 cup caramel sauce for the ultimate dessert experience.
The layered construction of this pie ensures each bite delivers perfect texture contrast—crisp crust, tender apples, and a balance of sweet and spiced filling. The key is patience in assembly and baking, which pays off in every forkful.
Pro Tips For Making Stacked Apple Pie
- Chill the Dough Properly: I learned this the hard way—rolling out cold dough straight from the fridge makes it brittle and prone to cracking. Wrap the dough in plastic and refrigerate it for at least 30 minutes before rolling, but don’t let it get rock-hard. A dough that’s just firm enough to hold its shape will give you clean layers without tearing.
- Use Cold Butter for Layers: This isn’t the prettiest method, but it’s the tastiest: cut your unsalted butter into thin sheets and place them between each pie layer. The butter will melt slowly during baking, creating flaky, crisp pockets instead of a soggy middle. Skip the shortcut of using softened butter—your pie will pay for it.
- Prevent Overfilling the Layers: I was skeptical until I tried it: fill each pie layer with just enough apple mixture to coat the bottom and sides lightly. Overstuffing forces the filling to spill over, making a mess and causing the crust to steam instead of crisp. Aim for about ¾ cup of filling per 9-inch layer—trust me, it’s enough.
- Bake in Stages: Start hot, finish low—this is the thing that matters most for stacked pies. Bake the first few layers at 375°F (20 minutes) until the crust is set but not golden, then add the next layer and reduce heat to 350°F. This gradual approach prevents the bottom layers from turning to mush while the top ones bake. Cover loosely with foil if the edges brown too fast.
Serving suggestions for this stacked apple pie
Vanilla Ice Cream
Classic vanilla ice cream is the perfect pairing for this stacked apple pie—its creamy texture contrasts beautifully with the pie’s crisp crust and spiced filling. I recommend using homemade vanilla bean ice cream for the richest flavor, but a high-quality store-bought brand like Breyers Natural Vanilla works perfectly too.
Scoop 1.5 cups alongside each slice, letting the warm pie melt the ice cream slightly for a decadent experience. 🍦
Caramel Drizzle
A warm drizzle of caramel sauce elevates the pie to restaurant-quality dessert status. My go-to recipe is simple: simmer 1 cup granulated sugar with 6 tablespoons heavy cream and 1 tablespoon unsalted butter for 10 minutes, then whisk in 1 teaspoon vanilla extract.
The sauce should be thick but pourable—drizzle 0.5 cup over each slice just before serving. For extra flair, sprinkle with flaky sea salt to balance the sweetness.
Whipped Cream
Lightly sweetened whipped cream adds a cloud-like contrast to the dense pie. I whip 1 cup heavy cream with 2 tablespoons powdered sugar and ½ teaspoon vanilla extract until soft peaks form. Pipe a rosette on top of each slice or dollop beside it for a clean presentation.
For a gourmet twist, fold in 1 tablespoon toasted pecans or cinnamon sugar for added texture and warmth.
Cheese Pairings
Believe it or not, sharp cheddar or brie can complement the pie’s spiced apples beautifully. Serve 1 ounce of aged cheddar (like Cabot Clothbound) or a slice of brie on the side for guests who enjoy savory contrasts.
The cheese’s tang cuts through the sweetness, creating a sophisticated balance. Pair with a dry red wine like Cabernet Sauvignon for an elevated dessert experience.
Seasonal Garnishes
Fresh seasonal garnishes add visual appeal and freshness to your presentation. In autumn, I sprinkle toasted pecans or pumpkin seeds over the pie for crunch. For winter, candied cranberries add a tart pop of color.
In spring or summer, a few fresh mint leaves or edible flowers (like violets) brighten the plate. Keep garnishes minimal—just enough to enhance without overpowering the pie’s star qualities.
Presentation Tips
For a showstopping display, serve the pie on a wooden board or slate platter to highlight its golden layers. Use a serrated knife to slice clean, even pieces—wipe the blade between cuts to prevent sticking.
Arrange slices slightly overlapping for a rustic look, and place a small bowl of extra caramel sauce or whipped cream at the center of the table. Light a vanilla-scented candle nearby to enhance the cozy atmosphere. ✨
Nutrition facts
Frequently asked questions
Why does this recipe use three crust layers instead of one?
The stacked design creates a dramatic presentation while solving the classic pie problem of soggy bottom crust. Each layer bakes separately, ensuring perfect texture in every slice—golden, crisp edges and flaky interior. The middle layer acts as a barrier, keeping the bottom crust dry and the filling juicy. Plus, it's a showstopper for special occasions!
Can I make this pie ahead of time?
Assemble the pie up to 24 hours ahead and refrigerate. Bake it just before serving to maintain perfect texture. For make-ahead convenience, prepare the crusts and filling separately, then assemble and bake when ready. The stacked layers hold together beautifully when chilled.
What's the best way to store leftovers?
Store slices in an airtight container at room temperature for up to 4 hours. Refrigerate for 5 days or freeze for 3 months. To revive the crust, warm slices at 350°F for 10-15 minutes before serving. The filling stays moist even when reheated properly.
Can I substitute the apples?
For best results, use a mix of tart and sweet varieties like Granny Smith and Honeycrisp. Braeburn or Fuji work well too. Avoid overly soft apples—they'll turn mushy during baking. If using only one variety, add 1 extra tablespoon lemon juice to prevent browning.
Why does my crust turn out tough instead of flaky?
Overworking the dough or using warm butter are common culprits. Keep everything cold, handle the dough minimally, and cut butter into flour until it resembles coarse crumbs. For extra flakiness, chill the dough for at least 2 hours before rolling. The key is patience—don't rush the chilling steps!