
Desserts
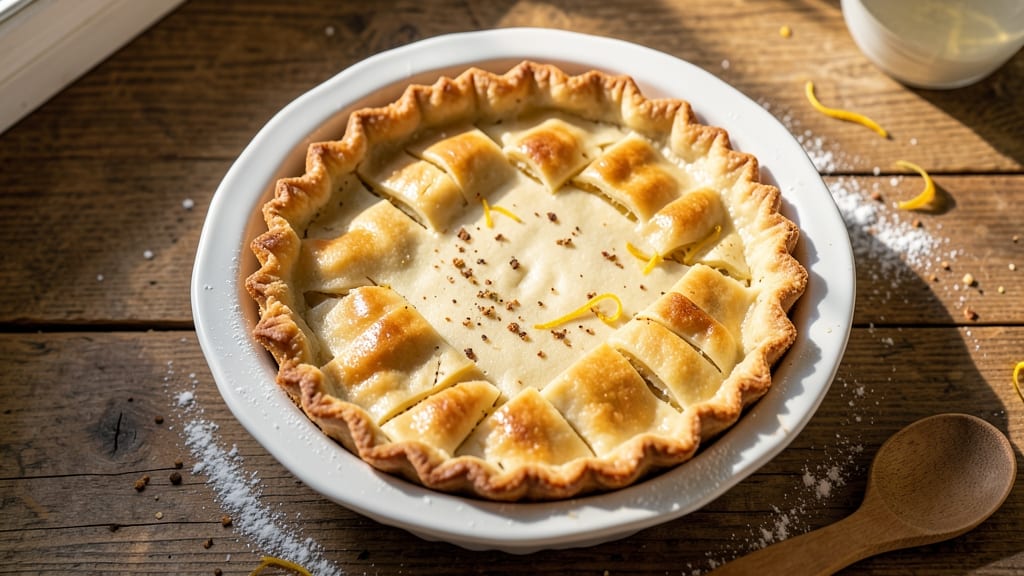
A 9-inch butter pie crust recipe starts with cold butter and precision—this is the foundation that makes all the difference between a good pie and an extraordinary one.
The secret lies in keeping everything chilled, cutting the butter into tiny pea-sized pieces, and working quickly to maintain that perfect flaky texture. I've perfected this technique over years of baking, and it delivers layers so delicate they practically melt in your mouth with every bite.
What makes this crust special is its versatility—it works equally well for sweet fruit pies, rich custard fillings, or even savory options like chicken pot pie. The key steps include blending cold butter into flour until it resembles coarse crumbs, then adding ice water just until the dough comes together.
Rolling it out carefully and fitting it into a 9-inch pie dish without tearing ensures a smooth, even base.
When baked, this crust emerges golden and crisp, with layers that shatter effortlessly. The butter creates pockets of air that transform into flaky, buttery goodness, while the edges develop a perfect golden-brown crust. Whether you're a beginner or an experienced baker, this foolproof method guarantees professional-quality results every time.
Use this crust as the base for your favorite pie filling or experiment with savory variations. The possibilities are endless, but the foundation—this perfect 9-inch butter pie crust—is what makes it all possible. Let's get started on creating something truly remarkable.
Ingredients for 9 inch butter pie crust
Cold butter, precise measurements, and patience—this is your flaky crust foundation.
| Ingredient | Amount | Notes |
|---|---|---|
| All-Purpose Flour 🌾 | 2 ½ cups | Unbleached preferred for flakiness |
| Unsalted Butter 🧈 | 1 cup | Cold, cubed into pea-sized pieces |
| Ice Water 💧 | ½ cup | Chilled, added gradually |
| Diamond Crystal Kosher Salt 🧂 | ½ tsp | Fine grain preferred |
| Granulated Sugar 🍚 | 1 tbsp | For edge crispness |
The butter makes or breaks this crust. European-style unsalted butter like Plugrá or Miyoko's delivers the best flavor and texture, but any good-quality brand works. Keep it cold—freeze it 15 minutes first if your kitchen runs warm. The flour? King Arthur or Bob's Red Mill are my go-tos—they bake consistently. For the salt, Diamond Crystal dissolves more gently than Morton, so use it for a cleaner flavor. Pro tip: Weigh your butter for precision—1 cup equals 2 sticks (8 oz), but scales take the guesswork out.
No ice water? Cold water from the fridge works in a pinch, but the ice helps control the dough's temperature. Running short on butter? Lard or shortening can substitute, but you'll lose that signature flavor. The sugar isn't just for sweetness—it caramelizes during baking, giving those edges their golden crispness. For a nutty depth, swap 1 tbsp of flour for almond flour. And if you're making a savory pie, skip the sugar entirely—just boost the salt to 1 tsp. The dough should come together when you press it, but not stick to your fingers.
This dough keeps for 3 days wrapped tightly in plastic in the fridge, or 3 months frozen between parchment paper. For freezing, roll it out, wrap it around a 9-inch pie dish, and freeze solid before transferring. Let it thaw in the fridge overnight before baking. Once baked, store cooled crusts stacked with parchment between layers—keeps them crisp for 5 days. Reheat in a 350°F oven for 5 minutes to restore crispness before adding fillings.
Why You'll Love This Recipe
- This crust works for anything: sweet pies, savory hand pies, or even a buttery tart base. I’ve used it for apple pies, chicken pot pies, and even a cheesy galette. It’s my go-to for when I need a blank canvas.
- No Fuss, All Flavor: I swear by this crust—just cold butter, flour, and ice water. No food processor, no waiting for dough to rest. Honestly, I’ve made it in my pajamas while watching TV.
- Crispy-Creamy Magic: That buttery, flaky top with a tender center? It’s the kind of texture that makes you pause mid-bite. The sugar in the dough caramelizes just enough to add a subtle sweetness—no extra work, just pure reward.
- Pie Pan Swiss Army: This crust works for anything: sweet pies, savory hand pies, or even a buttery tart base. I’ve used it for apple pies, chicken pot pies, and even a cheesy galette. It’s my go-to for when I need a blank canvas.
Step-by-step instructions for a perfectly flaky butter pie crust
This method delivers restaurant-quality flakiness with layers that truly shatter—no shortcuts, just science-backed technique.
Cut the Cold Butter into the Flour
Place the 2.5 cups all-purpose flour in a large mixing bowl. Add the ½ teaspoon Diamond Crystal kosher salt and 1 tablespoon granulated sugar, then whisk to combine. The sugar will help create those beautiful golden edges while the salt enhances flavor.
Using a pastry cutter or your fingers, cut the 1 cup cold, cubed unsalted butter into the flour mixture until you achieve pea-sized pieces. I press down firmly with my fingers—this ensures even distribution and prevents large butter clumps that can lead to tough spots. Work quickly but deliberately; warm hands will soften the butter too fast.
You're aiming for a texture that resembles coarse cornmeal with butter pebbles throughout. If the mixture feels too dry, it's perfect—this ensures maximum flakiness when baked. Don't overwork the dough at this stage; just until the butter is evenly distributed.
Add Ice Water Gradually Until Just Combined
Add the ½ cup ice water, 1 tablespoon at a time, using a small measuring cup. I like to use ice water because it keeps the butter cold longer, which is crucial for maintaining those delicate fat layers. Sprinkle the water over the flour mixture while gently stirring with a fork or wooden spoon.
Stop adding water as soon as the dough begins to clump together. You want it to come together just enough to hold when pressed, but it shouldn't be sticky. If it feels too dry, add a teaspoon more water; if too wet, sprinkle in a teaspoon of flour. The dough should be cool to the touch—this is your signal that it's ready for the next step.
Real talk: This is the moment that matters. Too much water creates a tough crust; too little results in dry, crumbly dough. Aim for a texture that's just shy of cohesive—it should hold when you press it gently but still feel slightly crumbly.
Form and Chill the Dough for Maximum Flakiness
Turn the dough out onto a lightly floured surface and gently shape it into a disk about 1-inch thick. I press down lightly with my hands, using just enough pressure to bring it together without compacting it. The goal is to create a uniform shape that will roll out evenly.
Wrap the dough tightly in plastic wrap and refrigerate for at least 1 hour, or up to 24 hours. This chilling step is non-negotiable—it allows the gluten to relax and the butter to firm up, which is what creates those signature flaky layers. Don't skip this, even if you're eager to bake. Patience here ensures a perfect crust.
I like to place the dough on a plate and cover it completely with wrap to prevent any drying. If you're short on time, you can chill it for 30 minutes in the freezer, but the longer it chills, the better the result. The dough should feel firm and cold when you're ready to roll it out.
Roll Out the Dough for a 9-Inch Crust
On a lightly floured surface, roll the chilled dough into a 9-inch circle, about ⅛-inch thick. I use a 9-inch pie dish as a guide to ensure the perfect size. Keep the dough moving as you roll to prevent it from sticking—this also helps maintain an even thickness.
If the dough starts to resist or tear, let it rest for 5-10 minutes in the fridge to firm up again. The key here is to keep everything cold. Warm dough will shrink when it hits the oven, and the butter will melt too quickly, resulting in a dense crust instead of flaky layers.
Gently transfer the rolled-out dough to your 9-inch pie dish, letting it drape over the edges slightly. This extra dough will create a beautiful, decorative edge when baked. Trim any excess dough with kitchen shears, leaving about ½-inch overhang for the classic pie crust finish.
Pro Tips For Making 9 Inch Butter Pie Crust
- CHILL THE BUTTER FIRST: Take that unsalted butter straight from the fridge—cold, firm cubes work best. I learned this the hard way when my crust turned greasy and fell apart after blind-baking. If it’s too soft, pop it in the freezer for 10-15 minutes before cutting into the flour.
- WEIGH THE FLOUR—DON’T SCOOP: That flour scoop in your measuring cup? It packs too much. Use a kitchen scale for precision—this crust relies on the right ratio. I was skeptical until I tried it; the texture is noticeably more tender when you skip the over-scooping.
- PRESS THE CRUST EVENLY: Don’t just dump the dough and pat it down—press it firmly into the pie dish, especially the edges. Use your fingers to smooth the bottom and sides, then chill it uncovered. This prevents shrinking later, and yes, even if you’re impatient like me, resist the urge to skip this step.
- USE ICE WATER SPARINGLY: This recipe calls for ice water, but too much makes the dough tough. Start with 3-4 tablespoons, then add more gradually—just enough to hold the dough together when pressed. I used to drown it, and the crust ended up dense and bland. Less is more here.
Perfect pairings for these flavors
Sweet Fillings
This crust shines with classic fruit pies like apple or peach, where its flaky layers contrast beautifully against tender fruit. For a rich custard pie, try a pumpkin or pecan filling—the buttery crust adds depth to the spiced flavors.
I love using chilled berries (like blueberry or raspberry) for a no-bake option; the cold fruit prevents the crust from getting soggy. 🍓
Savory Applications
Don’t limit this crust to sweets! It’s perfect for chicken pot pie or spinach and cheese quiche. The buttery richness complements savory fillings without overpowering them.
For a breakfast twist, use it as the base for a sausage and egg pie—the flaky texture holds up beautifully to runny yolks. Pre-bake the crust for 10 minutes at 375°F before adding fillings to prevent sogginess.
Wine Pairings
A dry Riesling or Chardonnay enhances the buttery richness of sweet pies, while a Pinot Noir complements savory versions like pot pie. For a dessert wine, try Moscato d’Asti—its sweetness matches fruit pies without clashing.
I often serve iced tea with lemon for a refreshing contrast to the richness. 🍷
Cheese Pairings
For cheese-topped pies, sprinkle sharp cheddar or Gouda over the filling before baking—it melts into a golden blanket. A brie or camembert pairing works beautifully with apple or pear fillings.
For a nutty twist, add pecans or walnuts to the crust’s edges before baking. The contrast of creamy cheese and crisp crust is pure magic.
Seasonal Twists
In fall, try a maple-glazed crust by brushing the edges with 1 tablespoon maple syrup before baking. For summer, swap butter for olive oil (reduce by 2 tablespoons) and add 1 teaspoon lemon zest to the dough.
In winter, add cinnamon or nutmeg to the crust for warmth. Each season brings a fresh take on this classic! ❄️
Nutrition facts
Frequently asked questions
Can I make this crust without a food processor?
Use your fingers or a pastry cutter to cut the cold butter into the flour until you get pea-sized pieces. Work quickly and keep everything chilled—this method works just as well and gives you better control over the butter distribution. The key is to keep the butter cold and work efficiently to avoid melting.
How do I prevent the crust from shrinking in the oven?
Chill the dough thoroughly before rolling, and keep it cold while transferring to the pie dish. Use a 9-inch pie dish as a guide when rolling, and avoid overworking the dough. Pre-bake the crust for 10-12 minutes at 375°F before adding fillings to set its shape. This prevents shrinking and ensures a perfect fit.
What if my dough feels too dry or crumbly?
Add ice water 1 tablespoon at a time** until the dough just holds together when pressed. Too much water makes the crust tough, so stop as soon as it comes together. If the dough still feels dry, sprinkle a little more water and knead gently. The texture should be cool, slightly crumbly, and hold its shape when pressed.
Can I use this crust for a double-crust pie?
Yes! Make a second identical crust and use it as the top. Brush the bottom crust edges with beaten egg or milk before adding the top crust for a golden seal. Cut a few slits in the top crust to allow steam to escape and prevent puffing. Weigh down the top crust with pie weights or dried beans to keep it flat while baking.
Why does my crust turn out tough instead of flaky?
Overworking the dough or using warm butter are the most common causes. Keep everything cold, work quickly, and avoid pressing the dough too much when rolling. The butter should remain in pea-sized pieces—if it melts into the flour, the crust will lose its flakiness. Chill the dough thoroughly before and after rolling for best results.